Aller au contenu principal

Logitech G Cloud Case Replacement

Ce dont vous avez besoin

  1. Logitech G Cloud Case Replacement, Case: étape 1, image 1 de 2 Logitech G Cloud Case Replacement, Case: étape 1, image 2 de 2
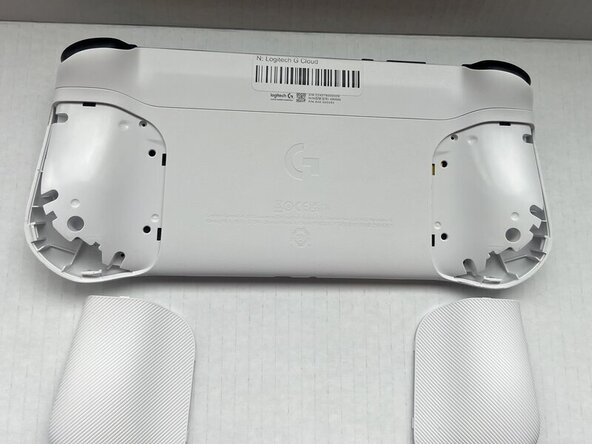
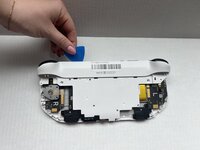
    • Power the device off and turn it over so the screen is face down.

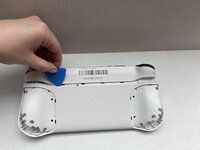
    • Insert an opening pick into the seam between the back plate and left handguard.

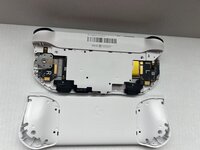
    • Pry around the entire perimeter until the handguard fully releases.

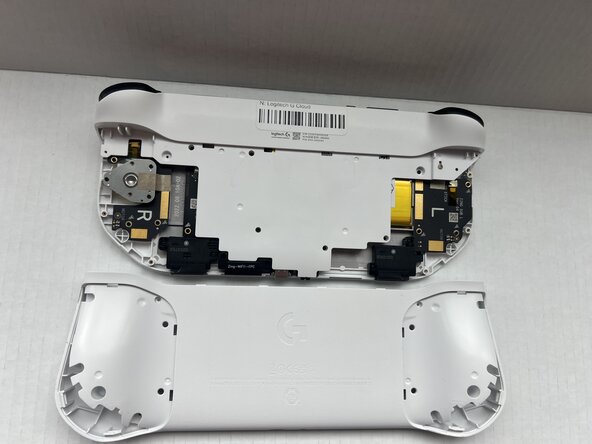
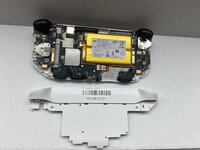
    • Remove the handguard.

    • Repeat the previous three bullets on the right handguard.

  2. Logitech G Cloud Case Replacement: étape 2, image 1 de 1
    • Use a Phillips #00 screwdriver to remove all eight 10 mm screws from the rear case located under where the handguards were.

  3. Logitech G Cloud Case Replacement: étape 3, image 1 de 2 Logitech G Cloud Case Replacement: étape 3, image 2 de 2
    • Insert an opening pick into the seam between the midframe and rear case.

    • Gently pry the rear case upwards to separate it from the midframe.

  4. Logitech G Cloud Case Replacement: étape 4, image 1 de 1
    • Use a Phillips #00 screwdriver to remove all seven 10 mm screws that secure the midframe.

  5. Logitech G Cloud Case Replacement: étape 5, image 1 de 2 Logitech G Cloud Case Replacement: étape 5, image 2 de 2
    • Insert an opening pick into the seam between the midframe and front case at the top of the device to separate the interior plating.

    • Gently pry out the midframe by lifting an opening pick.

    • You may hear loud popping noises when you remove the interior plating. That's the sound of the retaining clips disengaging.

Conclusion

To reassemble your device, follow these instructions in reverse order.

Spencer Davis

Membre depuis le 01/23/25

517 Réputation

6 tutoriels rédigés

Équipe

0 commentaires de tutoriel

Ajouter un commentaire

Nombre de vues :

Dernières 24 heures : 0

7 derniers jours : 3

30 derniers jours : 11

Total : 147