Aller au contenu principal
Logitech G402 Left and Right Mouse Buttons Replacement

Logitech G402 Left and Right Mouse Buttons Replacement

Aaron C.

Aaron C. et un autre contributeur

Dernière mise à jour le September 1, 2024

25 - 30 minutes
Difficile
Tutoriel étudiant vedette

This guide is for the purpose of replacing the left and right mouse buttons on the Logitech G402 gaming mouse. The process of replacing a faulty mouse button may be daunting. However, this guide aims to streamline this process, making it as simple as possible.

Ce dont vous avez besoin

Outils

Afficher plus…

  1. Logitech G402 Left and Right Mouse Buttons Replacement, Left and Right Mouse Buttons: étape 1, image 1 de 1
    • Remove the adhesive mouse skates from the bottom casing.

  2. Logitech G402 Left and Right Mouse Buttons Replacement: étape 2, image 1 de 3 Logitech G402 Left and Right Mouse Buttons Replacement: étape 2, image 2 de 3 Logitech G402 Left and Right Mouse Buttons Replacement: étape 2, image 3 de 3
    • Remove the five 1.2 mm screws using a Phillips #00 screwdriver from the bottom of the mouse.

    • Separate the top casing from the bottom.

  3. Logitech G402 Left and Right Mouse Buttons Replacement: étape 3, image 1 de 2 Logitech G402 Left and Right Mouse Buttons Replacement: étape 3, image 2 de 2
    • Remove the two case screws using a Phillips #00 screwdriver.

    • Remove the single 1.2 mm screw from the middle of the circuit board using a Phillips #00 screwdriver.

  4. Logitech G402 Left and Right Mouse Buttons Replacement: étape 4, image 1 de 3 Logitech G402 Left and Right Mouse Buttons Replacement: étape 4, image 2 de 3 Logitech G402 Left and Right Mouse Buttons Replacement: étape 4, image 3 de 3
    • Remove the perpendicular circuit board containing the side buttons.

    • Remove the remaining 1.2 mm screws under the removed board and next to the mouse buttons using a Phillips #00 screwdriver.

  5. Logitech G402 Left and Right Mouse Buttons Replacement: étape 5, image 1 de 3 Logitech G402 Left and Right Mouse Buttons Replacement: étape 5, image 2 de 3 Logitech G402 Left and Right Mouse Buttons Replacement: étape 5, image 3 de 3
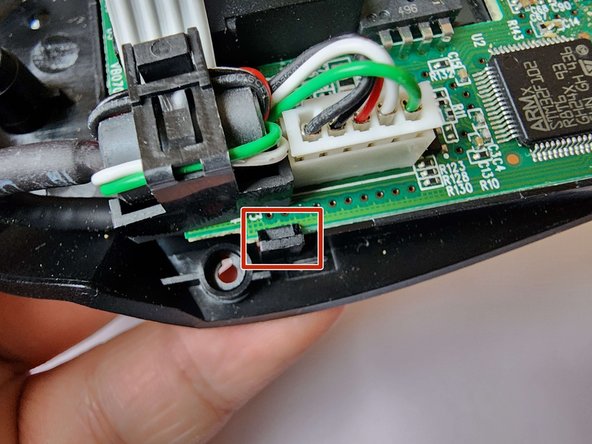
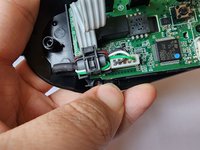
    • Pull back the plastic clip and lift the circuit board out of the bottom casing.

  6. Logitech G402 Left and Right Mouse Buttons Replacement: étape 6, image 1 de 2 Logitech G402 Left and Right Mouse Buttons Replacement: étape 6, image 2 de 2
    • Separate the wire from the bottom casing by pulling the wire out.

  7. Logitech G402 Left and Right Mouse Buttons Replacement: étape 7, image 1 de 3 Logitech G402 Left and Right Mouse Buttons Replacement: étape 7, image 2 de 3 Logitech G402 Left and Right Mouse Buttons Replacement: étape 7, image 3 de 3
    • You can access the iFixit guide to soldering and desoldering here.

    • Please be cautious when using a soldering iron. Soldering irons can reach several hundreds of degrees in temperature and improper use may result in a burn.

    • Please perform soldering and desoldering in a very well ventilated space. Solder containing lead can potentially be toxic and be an irritant. Solder and desolder outside or in the presence of a fume hood or fume extractor.

    • The solder connections for the left and right buttons are labeled in the second picture.

    • The solder connections circled in red are for the left mouse button.

    • The solder connections circled in orange are for the left mouse button.

  8. Logitech G402 Left and Right Mouse Buttons Replacement: étape 8, image 1 de 2 Logitech G402 Left and Right Mouse Buttons Replacement: étape 8, image 2 de 2
    • Solder the replacement button onto the circuit board.

    • Make sure the metal contacts are not bent and are touching the soldering contacts before soldering.

Conclusion

To reassemble your device, follow these instructions in reverse order. When reassembly is complete, apply the replacement mouse skates.

Aaron C.

Membre depuis le 01/11/24

157 Réputation

1 tutoriel rédigé

Équipe

York University, Team O-10, O'Regan Winter 2024 Membre de l'équipe York University, Team O-10, O'Regan Winter 2024

YORK-O'REGAN-W24SOG10

1 membre

2 tutoriels rédigés

0 commentaires de tutoriel

Ajouter un commentaire

Nombre de vues :

Dernières 24 heures : 4

7 derniers jours : 32

30 derniers jours : 125

Total : 1,705