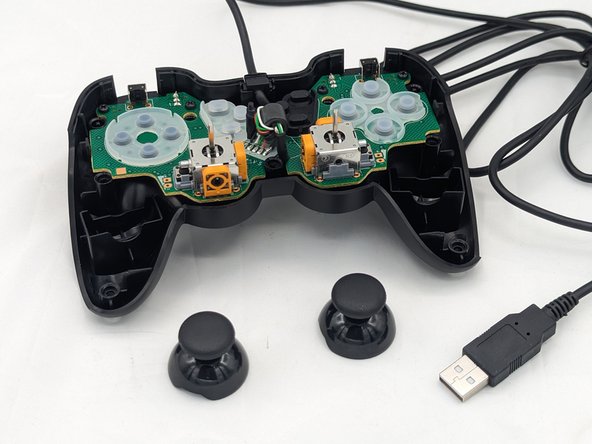
Aller au contenu principal

Logitech Gamepad F310 Joystick Cover Replacement

Ce dont vous avez besoin

  1. Logitech Gamepad F310 Joystick Cover Replacement, Case: étape 1, image 1 de 2 Logitech Gamepad F310 Joystick Cover Replacement, Case: étape 1, image 2 de 2
    • Use a Phillips #1 screwdriver to remove all seven 3 mm screws that secure the rear case.

  2. Logitech Gamepad F310 Joystick Cover Replacement: étape 2, image 1 de 2 Logitech Gamepad F310 Joystick Cover Replacement: étape 2, image 2 de 2
    • Press along the seams of the controller and gently pull the front and rear case apart.

    • If necessary, use an opening tool to help pry the front and rear case apart.

    • Make sure to open the controller with the front facing down so that the buttons do not fall out.

  3. Logitech Gamepad F310 Joystick Cover Replacement: étape 3, image 1 de 1
    • Separate the front and rear case.

    • There are two side panels on the controller that come apart as well. When putting them back together, they slot into place on the sides of the controller.

  4. Logitech Gamepad F310 Joystick Cover Replacement, Joystick Cover: étape 4, image 1 de 2 Logitech Gamepad F310 Joystick Cover Replacement, Joystick Cover: étape 4, image 2 de 2
    • Pull the joystick covers straight up and off the modules.

Conclusion

You're finished! To reassemble your device, follow these instructions in reverse order.

Graydon

Membre depuis le 02/05/24

145 Réputation

2 tutoriels rédigés

Équipe

0 commentaires

Ajouter un commentaire

Nombre de vues :

Dernières 24 heures : 3

7 derniers jours : 21

30 derniers jours : 94

Total : 176