Ce dont vous avez besoin
-
-
Turn the device over. The D-ring will be on the left face of the speaker when viewing the device from this orientation.
-
-
-
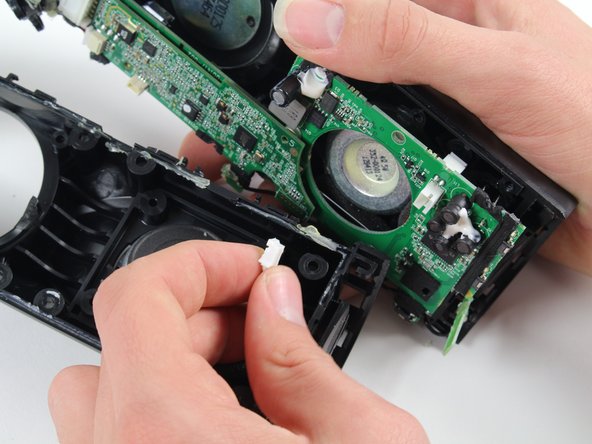
Holding the speaker upright, wedge the metal spudger in between the casing and the speaker. Gently pry open the tabs as they are easily broken.
This part is not easy. The main risk is to broke the plastics clips.
Use a heat gun (or hair dryer on high) first around the edges before attempting to pry it open. There are six tabs: one directly in line with the charging port; one approx 3/4 inch to the left and right of that tab; one centered against the back of the volume control "panel", and one approx 3/4 inch to either side of that one. So when prying, try to insert your spudger in between those spacings in order to not push on the tabs directly.
-
-
-
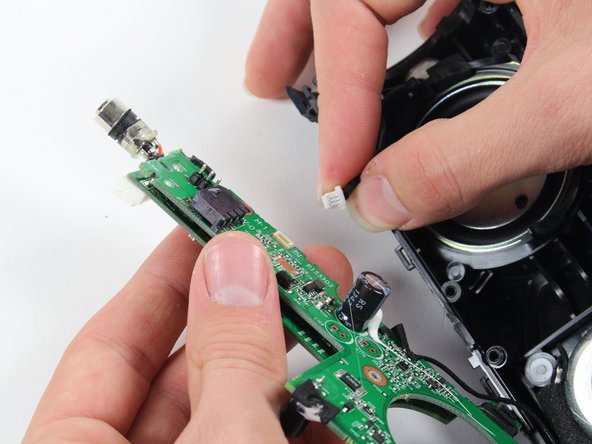
Using a soldering iron, de-solder the two ends of the switch plate.
Great instructions here guys - just one comment from myself - underneath the plate there is glue holding it down as well as the solder joints. Be sure to heat it up slightly prior to lifting out otherwise the capacitors and other components get stuck in the glue.
bei mir sieht der blootooth-adapter anders aus. da muss ich nix löten, er ist klein und liegt nur in einer passenden mulde, aus der er herausgehoben und in die er wieder abgelegt werden kann. meine typbezeichnung ist S-00122.
Definitely start with the middle one, has 2 solder hinge points that took me a couple minutes to heat up, wiggle and finally lift up. One that side lifted, was much easier to go back to the edge hinge, heat up and just gently pull off.
It is importante to note that there are two large solder hinge points and for the midle to pin point. Easy to desoldering but not easy to soldering after battery replacement.
-
-
-
-
With a metal spudger, pry open the tabs on the speaker sleeve along the length of the speaker.
-
-
-
Use a plastic opening tool to pry the sleeve off from the bottom of the speaker.
Zuerst auf der Gegenseite zuerst den Deckel, dann die Hülle lösen. Erst am Ende die Seite mit dem Power Button.
Translation: First loosen the cover on the opposite side, then the cover. Only at the end the page with the power button.
Dan -
A tips that could be help lot of us. i consider it what not easy to pry the sleeve off. But in fact there are many hole around the side that could be used to push through the holes, the plastic ring retainer.
-
-
-
Remove the speaker by pulling it from the terminal as marked in the picture.
-


To reassemble your device, follow these instructions in reverse order.
To reassemble your device, follow these instructions in reverse order.
Annulation : je n'ai pas terminé ce tutoriel.
7 autres ont terminé cette réparation.
Équipe

Cal Poly, Team 4-1, Maness Fall 2015 Membre de l'équipe Cal Poly, Team 4-1, Maness Fall 2015
CPSU-MANESS-F15S4G1
4 membres
22 tutoriels rédigés
2 commentaires
Is there anywhere I can buy the motherboard to replace my UE Boom board fried by lightning?