Aller au contenu principal
Pour réparer ensemble - Je crée un compte

Lomo LC-A: fixing the exposure / picture counter

    1. Lomo LC-A: fixing the exposure / picture counter, Remove batteries: étape 1, image 1 de 2 Lomo LC-A: fixing the exposure / picture counter, Remove batteries: étape 1, image 2 de 2
      • Remove the three LR44 batteries.

      Demander à FixBot

      Ajouter un commentaire

    2. Lomo LC-A: fixing the exposure / picture counter, Removing the front panel: étape 2, image 1 de 3 Lomo LC-A: fixing the exposure / picture counter, Removing the front panel: étape 2, image 2 de 3 Lomo LC-A: fixing the exposure / picture counter, Removing the front panel: étape 2, image 3 de 3
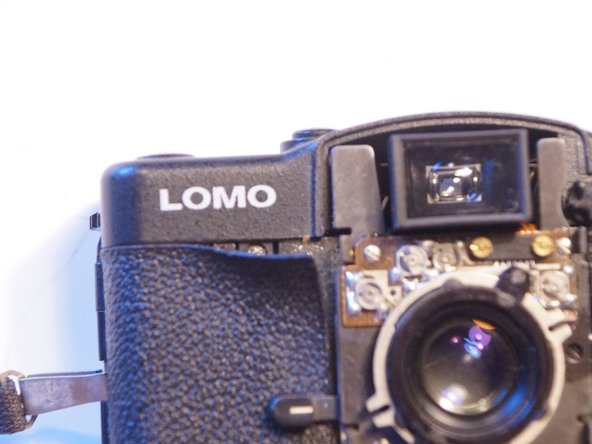
      • Remove the 4 screws (Phillips, 2.7mm) on the left and right side of the front cover. Lift the cover straight up. Sometimes it fits very tight. Just apply careful lifting force.

      • When assembling, pay attention to the alignment of the pins and slots. It works best if everything is aligned “centrally” on both the camera and cover sides.

      Demander à FixBot

      Ajouter un commentaire

    3. Lomo LC-A: fixing the exposure / picture counter, Remove the leather cover: étape 3, image 1 de 3 Lomo LC-A: fixing the exposure / picture counter, Remove the leather cover: étape 3, image 2 de 3 Lomo LC-A: fixing the exposure / picture counter, Remove the leather cover: étape 3, image 3 de 3
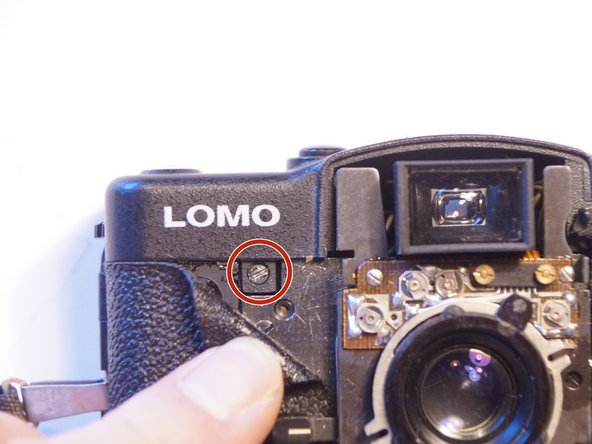
      • Using a scalpel or a sharp knife to remove the glue and loosen the leather in the grip area. Underneath the leather are hidden screws.

      • The one shown in picture #3 needs to be removed in the next step.

      Demander à FixBot

      Ajouter un commentaire

    4. Lomo LC-A: fixing the exposure / picture counter, Top Cover removal: étape 4, image 1 de 3 Lomo LC-A: fixing the exposure / picture counter, Top Cover removal: étape 4, image 2 de 3 Lomo LC-A: fixing the exposure / picture counter, Top Cover removal: étape 4, image 3 de 3
      • Remove the screw shown in the last step from the front (black, slotted screw, 4 mm).

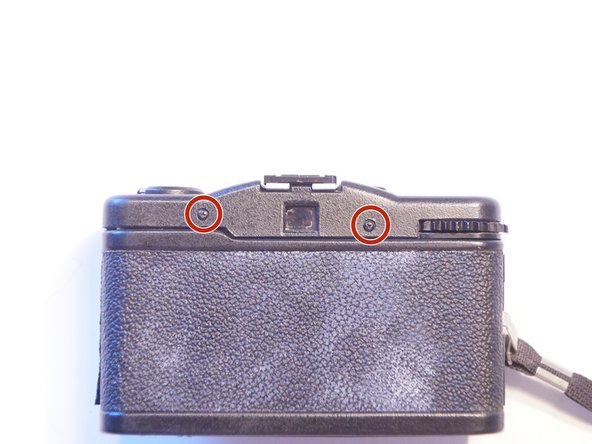
      • Remove the two black Phillips screws (3.8 mm) from the back.

      • Two more screws (silver, slotted screw, 3.5 mm) are hidden under the rewind crank. The next step shows how to get to them.

      Demander à FixBot

      Ajouter un commentaire

    5. Lomo LC-A: fixing the exposure / picture counter, Remove the rewind crank.: étape 5, image 1 de 3 Lomo LC-A: fixing the exposure / picture counter, Remove the rewind crank.: étape 5, image 2 de 3 Lomo LC-A: fixing the exposure / picture counter, Remove the rewind crank.: étape 5, image 3 de 3
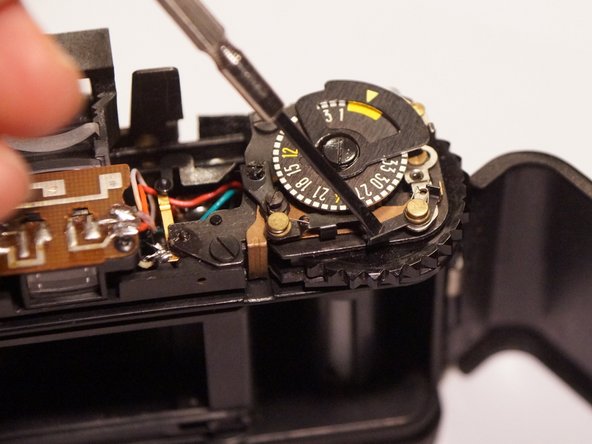
      • If you block the shaft with a screwdriver as shown, you can completely remove the crank by turning it counterclockwise.

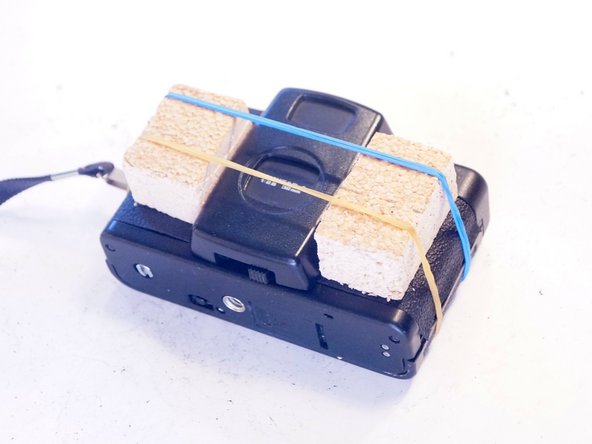
      • To prevent the back cover from snapping shut and becoming impossible to reopen, I recommend reattaching the crank afterward.

      • Alternatively, you can open the back cover by using a screwdriver to pry up the metal bracket as shown.

      Demander à FixBot

      Ajouter un commentaire

    6. Lomo LC-A: fixing the exposure / picture counter, Remove the top cover.: étape 6, image 1 de 3 Lomo LC-A: fixing the exposure / picture counter, Remove the top cover.: étape 6, image 2 de 3 Lomo LC-A: fixing the exposure / picture counter, Remove the top cover.: étape 6, image 3 de 3
      • Turn the camera upside down and carefully remove the cover. This keeps the release button in place.

      • Remove the release button. It consists of two interlocked parts. When reassembling, please ensure the parts are correctly oriented and put back together.

      Demander à FixBot

      Ajouter un commentaire

    7. Lomo LC-A: fixing the exposure / picture counter, Automatic counter: étape 7, image 1 de 2 Lomo LC-A: fixing the exposure / picture counter, Automatic counter: étape 7, image 2 de 2
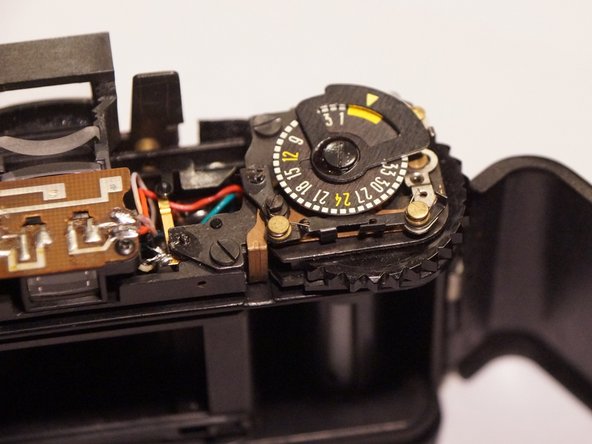
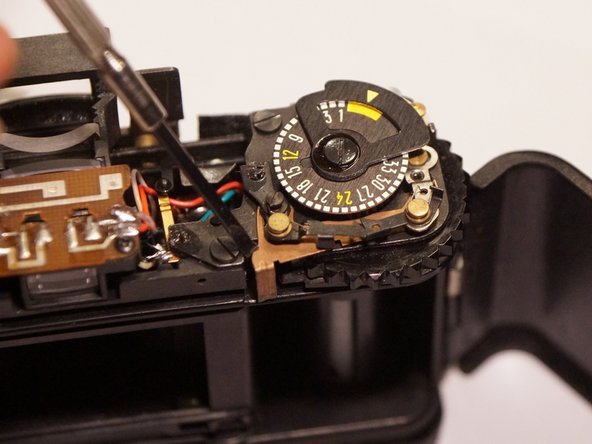
      • In case the counter does not count at all: check the two black little levers.

      • Pull the trigger a few times and release it by pressing the trigger mechanism (see red arrow in Fig. 1, also works without battery) to see how and whether the counter is working.

      • Move the levers back and forth with a screwdriver; sometimes they are not properly engaged or are in the wrong position.

      Demander à FixBot

      Ajouter un commentaire

    8. Lomo LC-A: fixing the exposure / picture counter: étape 8, image 1 de 3 Lomo LC-A: fixing the exposure / picture counter: étape 8, image 2 de 3 Lomo LC-A: fixing the exposure / picture counter: étape 8, image 3 de 3
      • In case the counter does not reset to "zero" when opening the back cover:

      • The copper-colored lever is released when the back cover is opened (see the little nose on the cover): this will reset the counter.

      • Move the lever with a screwdriver to check if the counter resets correctly.

      • Check for a smooth gliding mechanics. If the lever does not release by itself, a drop of quality sewing machine oil (no WD 40 or similar!) might help.

      Demander à FixBot

      Ajouter un commentaire

    9. Lomo LC-A: fixing the exposure / picture counter, Checking the spring mechanism: étape 9, image 1 de 2 Lomo LC-A: fixing the exposure / picture counter, Checking the spring mechanism: étape 9, image 2 de 2
      • In this case, the cause was a broken spring. This spring provides sufficient tension to release the lever and reset the counter when the back cover is opened.

      • Figure 2 shows an intact spring from another Lomo.

      Demander à FixBot

      Ajouter un commentaire

    10. Lomo LC-A: fixing the exposure / picture counter, Install an extra spring: étape 10, image 1 de 3 Lomo LC-A: fixing the exposure / picture counter, Install an extra spring: étape 10, image 2 de 3 Lomo LC-A: fixing the exposure / picture counter, Install an extra spring: étape 10, image 3 de 3
      • Shorten the spring from a ballpoint pen to about 4mm.

      • Mount this spring behind the copper lever. This compensates for the lack of tension of the original copper spring.

      Demander à FixBot

      Ajouter un commentaire

    11. Lomo LC-A: fixing the exposure / picture counter, Conclusion: étape 11, image 1 de 3 Lomo LC-A: fixing the exposure / picture counter, Conclusion: étape 11, image 2 de 3 Lomo LC-A: fixing the exposure / picture counter, Conclusion: étape 11, image 3 de 3
      • Assemble everything back together in reverse order.

      • I used thin double-sided tape to reattach the leather to the case.

      • When putting on the front cover, it is best to align the locking lever and the front panel “medial”. Position the front panel, and gently move the slide back and forth until the slide catches the locks. From then on, the lever will also open and close the locks again.

      • you can look forward to beautiful new photos from your Lomo!

      Demander à FixBot

      Ajouter un commentaire

Conclusion

Re-assemble everything back in reverse order.

Annulation : je n'ai pas terminé ce tutoriel.

Merci à ces traducteurs :

de en

100%

Ces traducteurs nous aident réparer le monde ! Vous voulez contribuer ?
Commencez à traduire ›

JackInTheBox

Membre depuis le 07/30/13

1 107 Réputation

4 tutoriels rédigés

1 commentaire de tutoriel

really nice good!!!

19 K - Réponse Partager

Ajouter un commentaire

Nombre de vues :

Dernières 24 heures : 4

7 derniers jours : 29

30 derniers jours : 78

Total : 1,537