Aller au contenu principal

Lorex LW2742 Back Panel Replacement

Conditions préalables uniquement
Ce tutoriel est uniquement destiné à être utilisé comme prérequis d'autres tutoriels. Il ne se suffit pas à lui-même.

Ce dont vous avez besoin

  1. Lorex LW2742 Back Panel Replacement, Back Panel: étape 1, image 1 de 3 Lorex LW2742 Back Panel Replacement, Back Panel: étape 1, image 2 de 3 Lorex LW2742 Back Panel Replacement, Back Panel: étape 1, image 3 de 3
    • Remove the battery cover on the back of the LCD monitor by unscrewing one 5mm Phillips #1 screw.

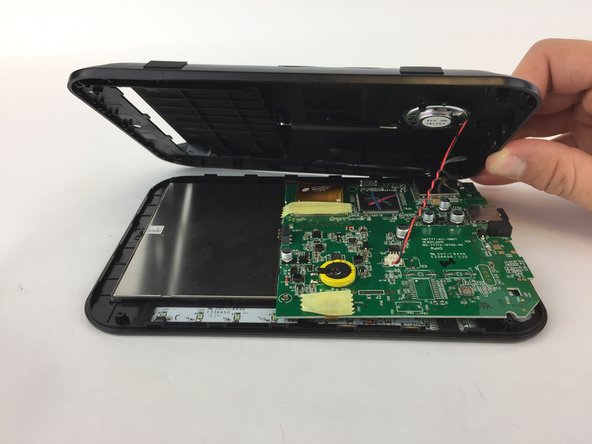
    • Slide the battery out of the housing. Lightly tap the opposite end of the monitor if the battery does not come right out.

  2. Lorex LW2742 Back Panel Replacement: étape 2, image 1 de 1
    • Remove the four 6mm Phillips #1 screws on the back of the LCD monitor.

  3. Lorex LW2742 Back Panel Replacement: étape 3, image 1 de 2 Lorex LW2742 Back Panel Replacement: étape 3, image 2 de 2
    • Using a plastic opening tool, gently separate the back panel from the front panel, working the tool around the panel to disconnect it.

    • Carefully remove the back panel

    • The speaker wire is connected to the motherboard so DO NOT rip back panel away from the monitor.

Conclusion

To reassemble your device, follow these instructions in reverse order.

Alex Kusmierz

Membre depuis le 09/26/16

601 Réputation

5 tutoriels rédigés

Équipe

USF Tampa, Team 16-1, Eyestone Fall 2016 Membre de l'équipe USF Tampa, Team 16-1, Eyestone Fall 2016

USFT-EYESTONE-F16S16G1

4 membres

12 tutoriels rédigés

0 commentaires

Ajouter un commentaire

Nombre de vues :

Dernières 24 heures : 0

7 derniers jours : 3

30 derniers jours : 4

Total : 54