Aller au contenu principal

Mac Cube G4 205W Power Supply Disassembly

Ce dont vous avez besoin

  1. Mac Cube G4 205W Power Supply Disassembly, Mac Cube G4 205W Power Supply Disassembly: étape 1, image 1 de 1
    • First things first : you'll need a reasonably dead Mac Cube power supply

  2. Mac Cube G4 205W Power Supply Disassembly: étape 2, image 1 de 3 Mac Cube G4 205W Power Supply Disassembly: étape 2, image 2 de 3 Mac Cube G4 205W Power Supply Disassembly: étape 2, image 3 de 3
    • The first step is to separate these two end-caps

    • Each of them has 2 very strong (and equally brittle) clips holding it in place

  3. Mac Cube G4 205W Power Supply Disassembly: étape 3, image 1 de 1
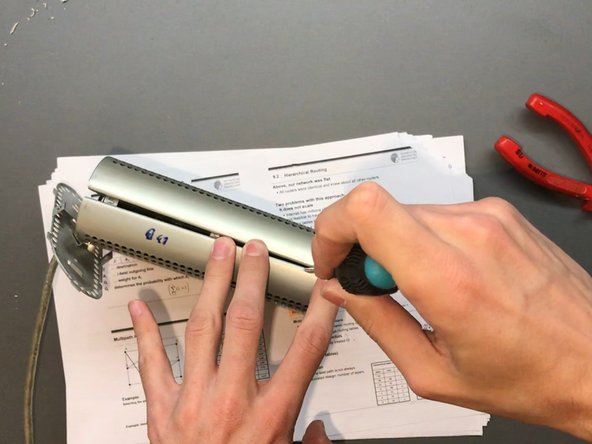
    • The only way to access these clips is through the ventilation holes, .. how convenient !

    • It's enough to unhook 1 clip per side, and one of the clips cannot be unhooked, as it's blocked by some black paper plastic rubber thingy

    • It is highly recommended you go in through the marked holes (those are the largest open areas inside the PSU anyway)

    • In case you have something thin and strong enough to do this without enlarging the holes: please leave a comment down below !

    • I drilled through the existing holes to make them large enough for a fittingly stiff screw driver

    • BEWARE : this plastic is incredibly brittle and will crack very easily; using a stepped drill bit for the plastic, then a regular bit for the metal worked best

  4. Mac Cube G4 205W Power Supply Disassembly: étape 4, image 1 de 2 Mac Cube G4 205W Power Supply Disassembly: étape 4, image 2 de 2
    • Once you've enlarged your holes, it's just a matter of carefully prising these clips free

    • Again, be careful, they're very brittle

    • Since peeping through a 3mm hole doesn't give one the best visibility, here's also a photo of the power supply board, so you know what to look out for ;)

  5. Mac Cube G4 205W Power Supply Disassembly: étape 5, image 1 de 1
    • Correctly assuming you've gotten rid of all the plastic surrounding the metal chassis, it's high time to open a bottle of something !

    • Unclip metallic end-caps with a relatively skinny flat-head screw driver

  6. Mac Cube G4 205W Power Supply Disassembly: étape 6, image 1 de 1
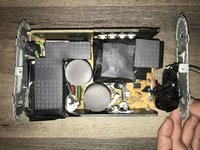
    • Now, the last step is to unhook the two halves of the metal chassis from each other - with the correct motion, this happens very easily

    • Firmly press on the top half (the bottom has the PCB laying right against it) whilst prising with a flat-head screw driver at the seam: there's 3 metal clips to unhook on each side

    • And you're done !

    • Feel free to share what problem yours had and how you've fixed it down in the comments :)

Conclusion

Congrats !

2 autres ont terminé cette réparation.

Darie H

Membre depuis le 11/20/12

4 550 Réputation

5 tutoriels rédigés

2 commentaires

Excellent walk-through of the steps, with very kind and generous warnings. I found this VERY helpful, as I own two working G4 Cubes, with no power supplies. I’m looking for broken “bricks” to repair and finally re-use my Cubes.

Scott Peaker - Réponse

Thanks mate ! This will help to get my Cube alive again : -)

Pumpkin Eater - Réponse

Ajouter un commentaire

Nombre de vues :

Dernières 24 heures : 0

7 derniers jours : 9

30 derniers jours : 37

Total : 1,726