Introduction
Únase a nosotros mientras echamos un vistazo al interior de la revisión más reciente de Apple del Mac Mini, ¡ahora con un puerto HDMI!
Comprueba el enlace externo YouTube video slideshow of the teardown as well!
Ce dont vous avez besoin
-
-
Bueno, después de mucho clamor, parece que los ingenieros de Apple finalmente han incluido un puerto HDMI en un producto actual Apple.
-
Especificaceiones ténicas:
-
Procesador Intel Core 2 Duo 2.4 or 2.66 GHz
-
2 GB de RAM (ampliables hasta 8 GB)
-
Procesador gráfico NVIDIA GeForce 320M con 256 MB de SDRAM DDR3 compartida (igual que la MacBook más reciente)
-
Puerto HDMI compatible con una resolución de hasta 1920 por 1200
-
Red inalámbrica Wi-Fi AirPort Extreme 802.11n
-
Ranura tarjetas SD
-
-
-
Alejándose de generaciones anteriores, la carcasa superior unibody del Mini está mecanizada a partir de un solo bloque de aluminio.
-
Mide 1.4 x 7.7 x 7.7 pulgadas y pesa solo 3 libras, es realmente como uno mas de los libros.
-
El logotipo negro y otros detalles combinan muy bien con el estilo del iPad de Apple y los iMacs recientes. ¡Felicidades, Mini, ya no eres la oveja negra de la familia!
-
El número de modelo de esta nueva unidad es A1347.
-
-
-
El nuevo diseño de puertos del Mini es realmente sorprendente:
-
Conector de alimentación AC
-
Ethernet 10/100 / 1000BASE-T incorporada
-
Firewire 800
-
HDMI
-
Mini DisplayPort
-
Cuatro puertos USB 2.0 ports, uno menos que el Mac Mini anterior.
-
Ranura par tarjetas SD. Bajo estas encontramos conector de audio de auriculares y micrófono.
-
-
-
En comparación con el modelo Mac Mini A1176, el Mid 2010 es más delgado y ancho.
-
Hay una clara diferencia de altura entre el Mid 2010 y las versiones anteriores.
There isn't much difference in volume. The new model is just a few cubic inches smaller, and it contains the power supply now.
The old model can comfortably be laying on its side, saving desk space. I wonder how it would work with the new thinner case? I like the looks of the new design though.
-
-
-
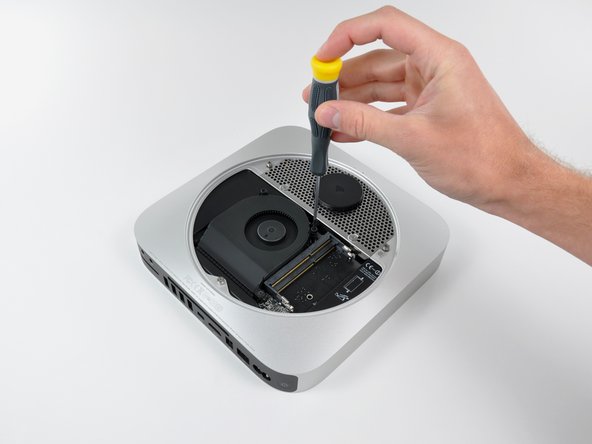
Con un simple giro en sentido antihorario, la placa de acceso negra se puede quitar para facilitar el acceso a la RAM y al ventilador.
Apple's new motto is "If you machine it out of a solid block of aluminum, they will come."
I want the Apple shaped hole. With the bite!
rab777hp -
-
-
-
Después de quitar dos tornillos, el ventilador se puede levantar para acceder a su conector de alimentación.
-
Los conectores dentro de esta máquina parecen bastante consistentes , se encuentran en la línea de productos actual de Apple. Nada demasiado nuevo aquí.
-
Los tres tornillos del ventilador están aislados con amortiguadores de goma; una característica que no se ve en las máquinas Apple más antiguas. El bajo nivel de ruido y la vibración son grandes puntos de venta para Apple en estos días, y la emisión inactiva del nuevo Mini de 14 dB es un testimonio de esos objetivos de diseño.
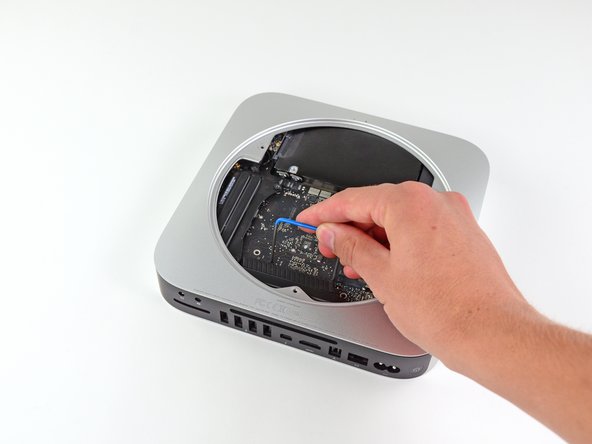
Since not everybody has seen the Mac Mini connectors before, they are removed most easily by lifting up on the wire-end of the connector. Use care as it is very easy to break the plastic that retains the pins in the connectors. Using something soft and thin, like the end of a plastic wire tie to lift the connector is safest. Do not pry against the motherboard. Not much lifting force is required to remove the connectors, but done incorrectly, the connectors can be damaged fairly easily.
The fan connector is a Vertical Insertion (JST)
• Important: These connectors are extremely fragile. Use extreme care. Major repairs may be needed if damaged.
• Use a black stick under the cable, next to the connector, with a finger over the top for support, or grasp cables with tweezers, and lift straight up to remove.
• Keep connector level to board when disconnecting and reconnecting.
• When connecting, verify that the grooves in the connector face down.
• Press evenly when reconnecting or connector can be tipped up and not fully seated.
-
-
-
-
La placa de la antena Wi-Fi se mantiene en su lugar con cuatro tornillos.
-
Después de moverla bien, la placa de la antena se puede deslizar por debajo del borde de la carcasa exterior.
-
-
-
Quitar la cubierta da acceso a varios conectores en la placa lógica:
-
Cable flexible de disco duro
-
Cable flexible de la unidad óptica (en el modelo de servidor, aquí es donde está el cable flexible del segundo disco duro)
-
Cables de sensores térmicos
-
Cable de placa de infrarrojos
If you are planning on removing the 'logic board' - disconnect all the indicated (colored square) connectors on the logic board. Note: The hard drive and DVD drive do not slide out with 'logic board' assembly. You will break a connector like I did if you do not disconnect all the connectors.
Second, the optical drive connector ripped right off the PCB, no fixing that...
As stated in the intro, "Teardowns provide a look inside a device and should not be used as disassembly instructions." Repair guides for this device can be found here.
-
-
-
¡Mira, la herramienta especializada de extracción de placa lógica Mac Mini Mid 2010 de iFixit!
-
Hay dos orificios ciegos en la carcasa del Mini que están destinados a los extremos de la herramienta de extracción de placa lógica en forma de U de Apple.
-
Siendo los mecánicos ahorradores que somos, decidimos eludir la herramienta especial de Apple en favor de algo que funciona bien mientras mantiene los dólares adicionales fuera de los bolsillos del Sr. Jobs.
There is a black torque screw to the left of the left side blind hole. It is removed in the photo but no reference to this in the guide. This has to be removed or the board won't slide forward.
As stated in the introduction, "Teardowns provide a look inside a device and should not be used as disassembly instructions." Keep an eye out for a full set of repair guides that will be released shortly.
-
-
-
La parte superior e inferior de la placa lógica y el conjunto del marco de I/O.
-
Al usar la construcción unibody, Apple tuvo que ser creativo con la ubicación de las antenas. Dos antenas auxiliares son los componentes cuadrados de acero que se ven en ambos extremos del marco de I/O.
-
-
-
Junto a donde estaba ubicado el altavoz, encontramos la tarjeta AirPort Extreme.
-
El Mac Mini Mid 2010 tiene red inalámbrica Wi-Fi 802.11n, así como Bluetooth 2.1 con tecnología Enhanced Data Rate.
-
Después de desconectar los dos conectores de antena restantes y su cable de datos, la tarjeta AirPort se puede quitar fácilmente de la placa lógica.
Great teardown - thanks for the info!
Has anyone had any success in upgrading the airport card?
In search of better Bluetooth range I'm considering retrofitting the Bluetooth 4.0 card that's in the late 2012 Mac mini, but the connectors for the FFC cable look to be in a different place.
Are the two cards interchangeable and would I need a new cable?
Thanks
-
-
-
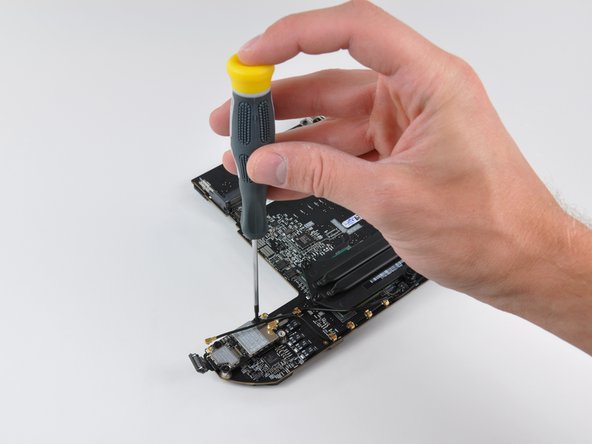
Un par de tornillos Torx T8 con resorte aseguran el disipador de calor de forma extraña a los procesadores.
-
De acuerdo con su diseño que ahorra espacio, las aletas que dirigen el aire hacia el orificio de ventilación están inclinadas para permitir una mejor ubicación del ventilador.
-
-
-
El marco de I/O se sujeta a la placa lógica mediante unos tornillos Torx T6.
-
Las dos antenas de bisel de I/O son más visibles en esta imagen. Los cables largos de la antena se conectan a tierra periódicamente a lo largo de su longitud, presumiblemente para una mejor transmisión de la señal a la parte importante: las propias antenas.
-
-
-
La placa lógica desnuda.
-
Los cerebros de la unidad cuentan con:
-
Procesador Intel P8600 2.4 GHz Core 2 Duo
-
Procesador gráfico NVIDIA GeForce 320M con 256MB compartidos de DDR3 SDRAM
-
Otros chips notables incluidos:
-
Controlador de lector de tarjetas de memoria y Ethernet gigabit integrado Broadcom BCM57765
-
Controlador de audio Cirrus 4206ACNZ
-
Filtro LAN discreto Delta LFE9249-R
Hi, David!
Congratulations, very Nice Tear Down!
I wish to hear something about the "Light Peak". So, let's wait for the new release of the Mac PRO. I hope we could see some "new" hardware.
Apple is just refreshing the "old decade" style CPU + GPU.
I was wondering for Intel Core i5 and NVidia GTX 480M.
May be in the new refresh of the iMac 27". But without the Light Peak, no chance! I will keep waiting for next years long!!!
Any way, thanks for your great collaboration!
I could learn that the new "Mac mini" is more for a MacBook than ever!!! It could follow the steps of the MacBook Pro as well, if Apple give some more minimal "space"
Is the CPU soldered onto the logic board? It looks like it may be glued based on the Macminicolo teardown. Is it upgradable? If so what socket does it use?
The processor is soldered to the logic board and is non-upgradable.
-
-
-
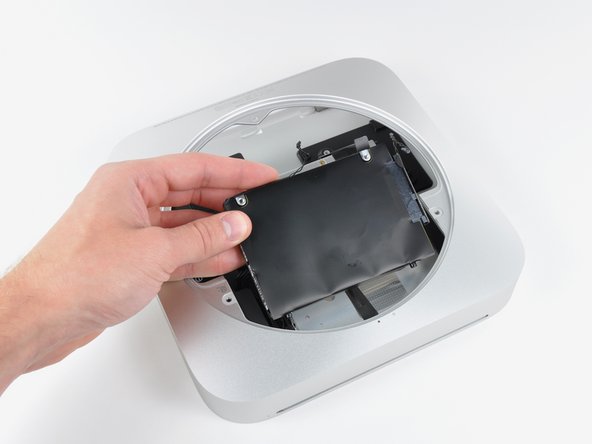
El Mac Mini viene con un disco duro SATA de 320 GB o 500 GB.
-
Lamentablemente, solo hay un disco duro en nuestro modelo sin servidor.
-
¿Necesitas más espacio de almacenamiento? Solo el tiempo dirá si este Mac Mini se modifica tan fácilmente como su predecesor. Por ahora, recomendamos obtener la edición de servidor.
The main ribbon cable coming from the hard drive connector is the SATA to logic board cable. The other two small cables are thermal sensors. There is one thermal sensor attached to the hard drive cable and the other is attached to the other end of the hard drive.
What drive height room is there? Wondering if it will take 1TB 12.5mm drives like the current MacBook Pro does.
-
-
-
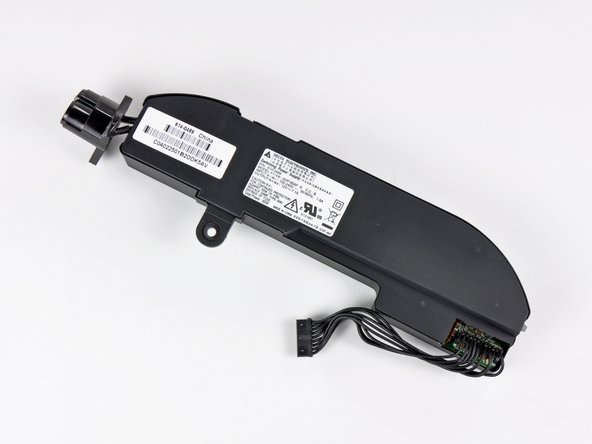
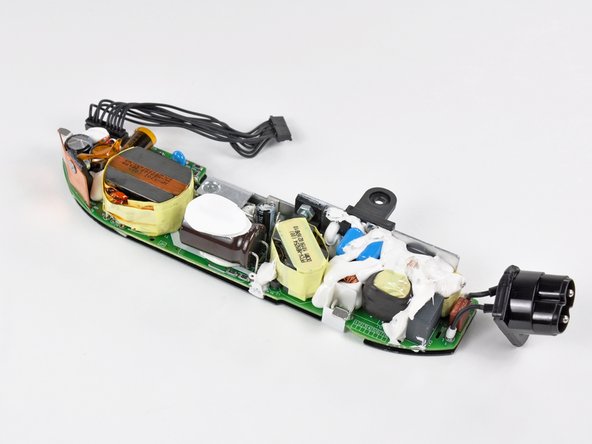
La fuente de alimentación del nuevo Mini produce unos minúsculos 7 amperios a 12 V. Compare eso con los 25.8 amperios a 12 V del iMac Intel 27 ".
-
Al igual que su primo iMac, el Mac Mini finalmente se despide de los adaptadores de CA externos.
That keeps the components from moving around and weakening the solder joints.
-
-
-
La la bahía de la unidad óptica simplemente se desliza fuera de la carcasa unibody de aluminio.
-
Bueno, ¿qué tenemos aquí? ¿Es esta una nueva unidad óptica? ¡Por qué sí lo es!
-
Regrabadora de DVD súper múltiple con almacenamiento de datos Hitachi-LG (HLDS) modelo GA32N
-
La unidad óptica tiene un grosor de 12.5 mm, lo que da a todos un rayo de esperanza para una instalación de Blu Ray agradable ...
-


Merci à ces traducteurs :
100%


Ces traducteurs nous aident réparer le monde ! Vous voulez contribuer ?
Commencez à traduire ›

5 commentaires
It seems the advantage of going with the server edition is the higher storage space and faster CPU. however you miss out on the DVD player. How easily do you anticipate it would be to upgrade the CPU on the non-server edition?
About Step 7, did you notice if the screw to the left of the RAM module has factory damage ?
There is a guy that claims that on different models he found stripped screws and that such stripped screw could eventually invalidate the warranty.
I didn't notice anything unusual when we were taking it apart - the screws seemed fine to me. The only time I've seen damaged screws is when we've disassembled a few random certified Apple Refurbished devices.
Do you need a CDs drive ?
The CD drive is not necessary. You can replace it with a HDD / SSD with an adapter.