Introduction
Use this guide to replace a broken display.
Ce dont vous avez besoin
-
Outil utilisé dans cette étape :P5 Pentalobe Screwdriver Retina MacBook Pro and Air$5.99
-
Use a P5 Pentalobe driver to remove ten screws securing the lower case, of the following lengths:
-
Two 9 mm screws
-
Eight 2.6 mm screws
-
-
-
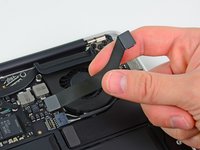
Grab the clear plastic pull tab attached to the battery connector and pull it toward the front edge of the Air to disconnect the battery from the logic board.
-
-
-
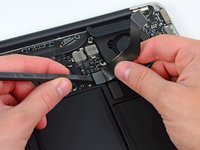
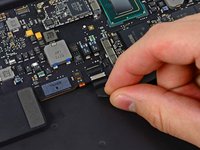
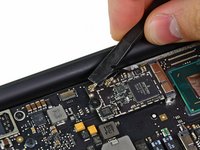
Use the flat end of a spudger to pry the I/O board cable connector upward out of its socket on the I/O board.
-
-
-
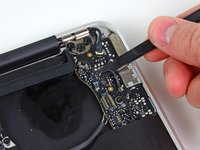
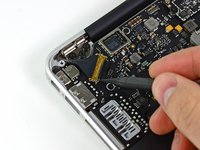
Use the tip of a spudger to carefully flip up the retaining flap on the fan cable ZIF socket.
-
-
-
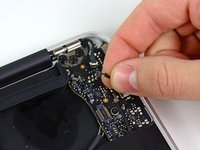
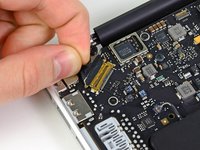
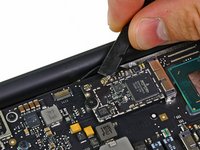
Disconnect the I/O board by pulling the power cable away from its socket on the logic board.
-
-
-
-
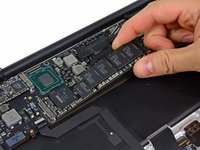
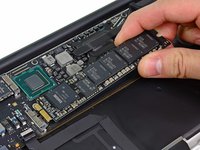
Remove the following five screws securing the battery to the upper case:
-
Three 6.3 mm T5 Torx screws
-
Two 2.4 mm T5 Torx screws
-
-
-
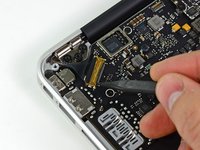
Use the tip of a spudger or your fingernail to flip up the retaining flap on the trackpad ribbon cable ZIF socket.
-
Be sure you are prying up on the hinged retaining flap, not the socket itself.
-
-
-
Gently push the tip of a spudger under the black plastic flap stuck to the display data cable lock to make the lock pop upward and away from the socket.
-
While holding the lock away from the socket, use the tip of a spudger and your fingers to gently remove the display data cable from its socket.
-
-
-
Gently de-route the antenna cables out of the channel cut into the upper case.
-


Annulation : je n'ai pas terminé ce tutoriel.
101 autres ont terminé cette réparation.
Pièces jointes

24 commentaires
Thanks a ton for this guide! I got my MBAir back in working order in about an hour. The only weird thing I noticed was my MBAir battery unexpectedly registering at 0% upon re-seating. But it's charging so I suppose all's well that ends well.
This guide is way more than needed for the display replacement. Until it gets edited down, all you need to do is steps 1-3, 12, 22-24, 28, 31-35 from the "upper case replacement" guide (which is apparently what this guide is right now, instead of a display replacement guide as it is labeled).
This is a really great comment! Thanks, you've saved me lots of time!
Charles -
Thank you! Valuable comment!