Aller au contenu principal

MacBook Pro 13" Retina Display Late 2012 Trackpad Replacement

Conditions préalables uniquement
Ce tutoriel est uniquement destiné à être utilisé comme prérequis d'autres tutoriels. Il ne se suffit pas à lui-même.

Ce dont vous avez besoin

  1. MacBook Pro 13" Retina Display Late 2012 Trackpad Replacement, Trackpad: étape 1, image 1 de 1
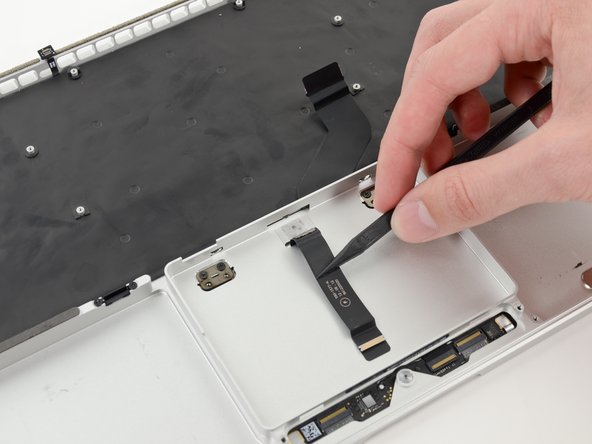
    • Remove the following screws securing the trackpad to the upper case:

    • Four 1.4 mm Phillips #000 screws
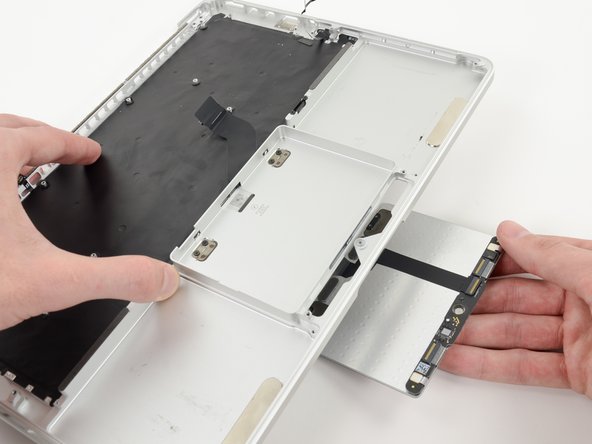
  2. MacBook Pro 13" Retina Display Late 2012 Trackpad Replacement: étape 2, image 1 de 2 MacBook Pro 13" Retina Display Late 2012 Trackpad Replacement: étape 2, image 2 de 2
    • Wedge the spudger between the trackpad ribbon cable and the upper case.

    • Run the spudger along the bottom to release the trackpad ribbon cable from the adhesive securing it to the upper case.

  3. MacBook Pro 13" Retina Display Late 2012 Trackpad Replacement: étape 3, image 1 de 2 MacBook Pro 13" Retina Display Late 2012 Trackpad Replacement: étape 3, image 2 de 2
    • Insert the tip of a spudger in between the trackpad ribbon cable and the upper case.

    • Carefully thread the trackpad ribbon cable out of the notch near the top of the SSD assembly cavity.

  4. MacBook Pro 13" Retina Display Late 2012 Trackpad Replacement: étape 4, image 1 de 2 MacBook Pro 13" Retina Display Late 2012 Trackpad Replacement: étape 4, image 2 de 2
    • Once the trackpad is free of the upper case, guide the trackpad ribbon cable through the slot cut in the upper case.

    • Remove the trackpad from the upper case.

Conclusion

To reassemble your device, follow these instructions in reverse order.

0 commentaires

Ajouter un commentaire

Nombre de vues :

Dernières 24 heures : 0

7 derniers jours : 0

30 derniers jours : 0

Total : 98