Aller au contenu principal

MacBook Pro 15" Core 2 Duo Models A1226 and A1260 Clutch Assembly Replacement

Conditions préalables uniquement
Ce tutoriel est uniquement destiné à être utilisé comme prérequis d'autres tutoriels. Il ne se suffit pas à lui-même.

Ce dont vous avez besoin

  1. MacBook Pro 15" Core 2 Duo Models A1226 and A1260 Clutch Assembly Replacement, Clutch Assembly: étape 1, image 1 de 2 MacBook Pro 15" Core 2 Duo Models A1226 and A1260 Clutch Assembly Replacement, Clutch Assembly: étape 1, image 2 de 2
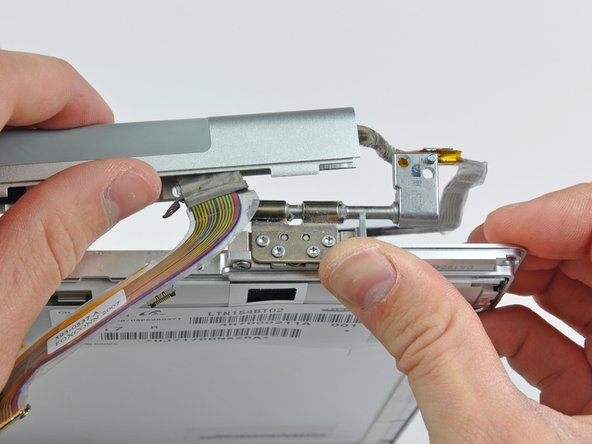
    • Remove the two pieces of kapton tape covering the display data cable.

    • Remove the strip of tape securing the iSight cable to the LCD.

    • Peel the three antenna straps off the lower edge of the LCD.

  2. MacBook Pro 15" Core 2 Duo Models A1226 and A1260 Clutch Assembly Replacement: étape 2, image 1 de 1
    • Disconnect the display data cable by pulling its connector toward the bottom edge of the display, away from the socket on the LCD.

  3. MacBook Pro 15" Core 2 Duo Models A1226 and A1260 Clutch Assembly Replacement: étape 3, image 1 de 1
    • Remove the two Phillips screws securing the ground straps for the display data cable and LED driver board cable to the clutch cover.

  4. MacBook Pro 15" Core 2 Duo Models A1226 and A1260 Clutch Assembly Replacement: étape 4, image 1 de 1
    • Remove the Phillips screw hidden behind the display data cable.

  5. MacBook Pro 15" Core 2 Duo Models A1226 and A1260 Clutch Assembly Replacement: étape 5, image 1 de 1
    • Remove the three Phillips screws behind antenna straps along the bottom edge of the display.

  6. MacBook Pro 15" Core 2 Duo Models A1226 and A1260 Clutch Assembly Replacement: étape 6, image 1 de 1
    • To remove the clutch assembly, first insert the flat end of a spudger into the gap between the clutch hinge and the clutch cover where the cables exit.

    • While prying the clutch assembly away from the clutch hinge with your spudger, use a plastic opening tool to increase the gap between the clutch cover and the front display bezel.

    • Work your way along the length of the clutch cover to fully separate the adhesive.

  7. MacBook Pro 15" Core 2 Duo Models A1226 and A1260 Clutch Assembly Replacement: étape 7, image 1 de 2 MacBook Pro 15" Core 2 Duo Models A1226 and A1260 Clutch Assembly Replacement: étape 7, image 2 de 2
    • Push the clutch assembly off each of the clutch hinges and remove it from the display.

Conclusion

To reassemble your device, follow these instructions in reverse order.

Une autre personne a terminé cette réparation.

0 commentaires

Ajouter un commentaire

Nombre de vues :

Dernières 24 heures : 0

7 derniers jours : 0

30 derniers jours : 0

Total : 1,092