Cette version peut contenir des modifications incorrectes. Passez au dernier aperçu vérifié.
Ce dont vous avez besoin
-
-
Poussez avec les doigts les deux loquets de déverrouillage de la batterie et retirez celle-ci de l'ordinateur.
-
-
-
Retirez les trois vis identiques Phillips de 2 mm du capot de la mémoire.
-
Soulevez le capot suffisamment pour le saisir et retirez-le en le faisant glisser vers vous.
-
-
-
Retirez les deux vis Phillips 2,8 mm situées près du loquet, dans le compartiment de la batterie.
-
-
-
-
Soulevez l'arrière du boîtier et à l'aide de vos doigts, libérez progressivement le boîtier par les côtés en allant de l'arrière vers l'avant. Une fois les côtés du boîtier libérés, vous devrez peut-être bouger le boîtier de bas en haut pour libérer la partie avant.
-
Quatre clips en plastique sont disposés au-dessus du logement du DVD et un autre au-dessus, à gauche du capteur infrarouge. Ces clips peuvent être très difficiles à désengager sans mouvement de levier. Ils peuvent également être difficiles à ré-engager lors du remontage.
-
-
Cette étape n’est pas traduite. Aidez à la traduire
-
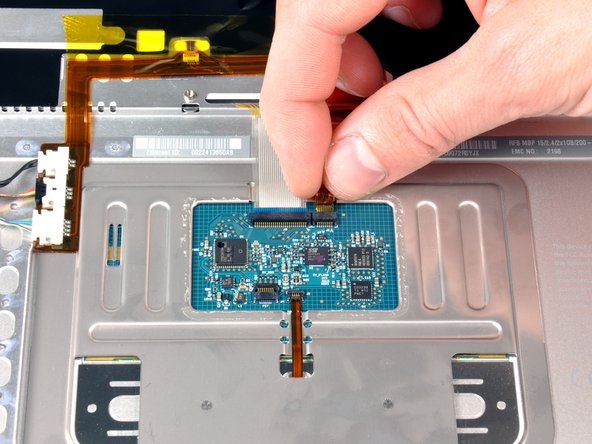
Use a spudger to pry up the translucent plastic sheath covering the keyboard connector.
-
-
Cette étape n’est pas traduite. Aidez à la traduire
-
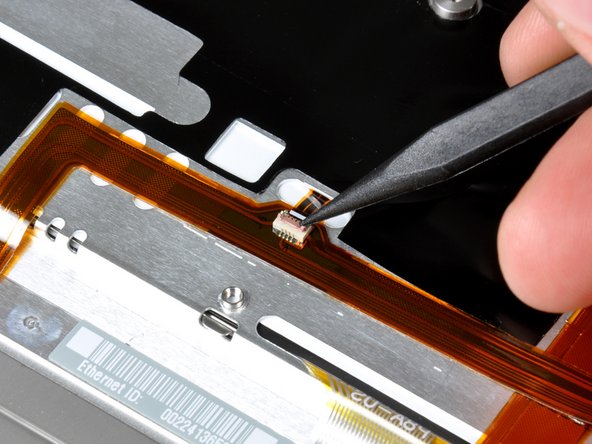
Use the tip of a spudger to flip up the black plastic flap locking down the keyboard ribbon cable.
-
-
Cette étape n’est pas traduite. Aidez à la traduire
-
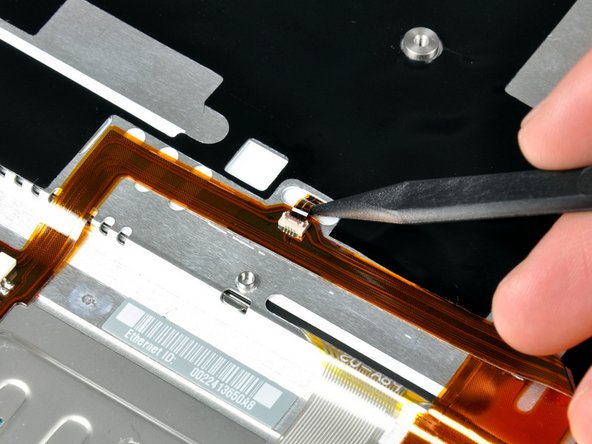
Peel up the orange tape covering the keyboard backlight connector.
-
-
Cette étape n’est pas traduite. Aidez à la traduire
-
Use the tip of a spudger to flip up the brown plastic flap locking down the keyboard backlight ribbon cable.
-
Use a spudger or your finger to slide the keyboard backlight ribbon out of its connector.
-
-
Cette étape n’est pas traduite. Aidez à la traduire
-
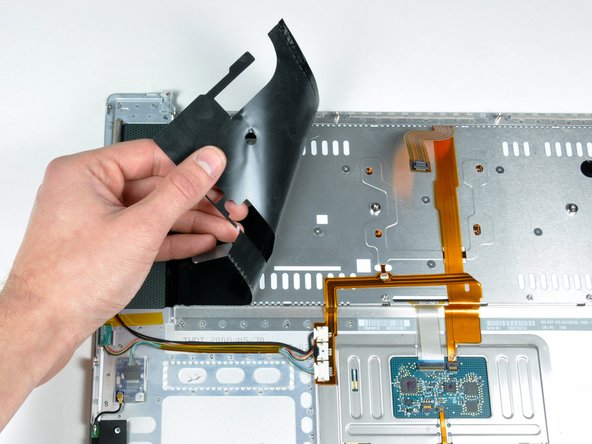
Peel back the black protective sheath on the right side of the upper case.
-
Similarly, peel the black protective sheath on the left side of the upper case.
-
-
Cette étape n’est pas traduite. Aidez à la traduire
-
Remove the 12 identical Phillips screws attaching the keyboard to the casing.
-
There are six locking tabs along the back edge of the keyboard holding it in place. These tabs must be straightened before you can remove the keyboard.
-
-
Cette étape n’est pas traduite. Aidez à la traduire
-
Place the upper casing on its edge and use a spudger to push the keyboard away from the casing, poking the spudger through the central keyboard screw hole. Grasp the keyboard as it separates from the casing.
-
Maintaining your hold on the keyboard, lay the casing flat and gently bow the keyboard until the two tabs on either side of the keyboard come free.
-
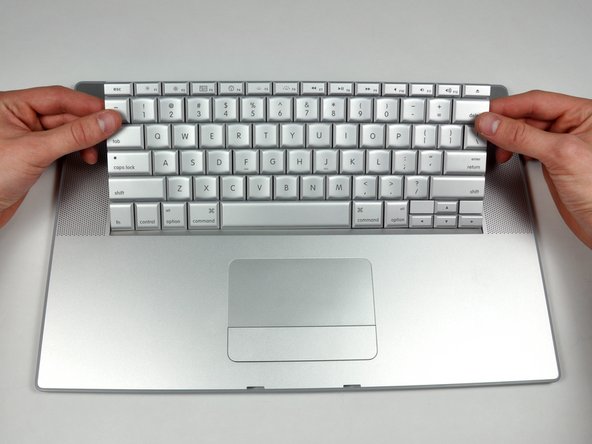
Slide the keyboard away from the trackpad and out of the upper case.
-


Annulation : je n'ai pas terminé ce tutoriel.
152 autres ont terminé cette réparation.

2 commentaires
Excellent guide as always. Both the keyboard I got from iFixIt and the guide worked perfectly. Thanks!
This was such an excellent fix-it guide. I was able to swap out my keyboard while watching the Seahawks lose to the St. Louis Rams (sadly). One recommendation: have 12 or so ziplock bags each numbered with a step number that requires a screw or part to be removed and put the screws/parts from that step in the bag and zip it closed. You won't mix up screw sizes from the various steps.
Thanks again to ifixit.com for this excellent repair tool. My new keyboard functions perfectly!!