Aller au contenu principal

MacBook Pro 15" Retina Display Mid 2012 LCD Cable Replacement

Ce dont vous avez besoin

  1. MacBook Pro 15" Retina Display Mid 2012 LCD Cable Replacement, housing base: étape 1, image 1 de 1
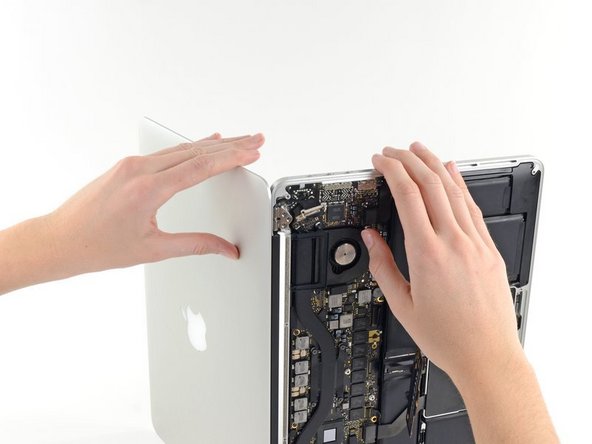
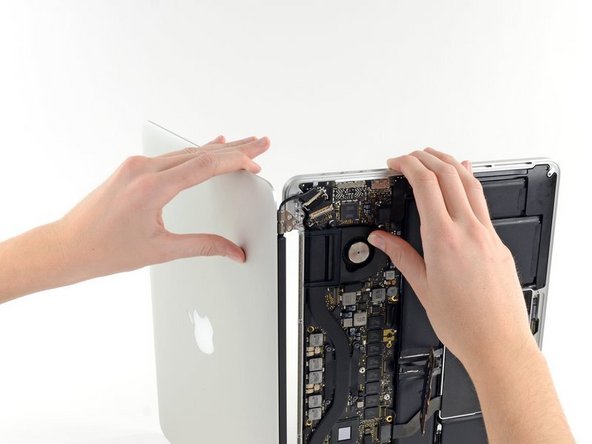
    • Remove the following P5 pentalobe screws securing the bottom case to the MacBook Pro:

    • Eight 3.0mm screws

    • Two 2.3mm screws

  2. MacBook Pro 15" Retina Display Mid 2012 LCD Cable Replacement: étape 2, image 1 de 1
    • Using the edge closest to the clutch cover, lift the bottom case off the MacBook Pro.

    • Set the bottom case aside.

  3. MacBook Pro 15" Retina Display Mid 2012 LCD Cable Replacement: étape 3, image 1 de 1
    • Peel off the warning sticker over the battery connector.

  4. MacBook Pro 15" Retina Display Mid 2012 LCD Cable Replacement: étape 4, image 1 de 2 MacBook Pro 15" Retina Display Mid 2012 LCD Cable Replacement: étape 4, image 2 de 2
    • Use the flat end of a spudger to gently pry the battery connector up from its socket on the logic board.

    • Bend the battery cables back and out of the way so the battery connector doesn't accidentally contact the logic board.

  5. MacBook Pro 15" Retina Display Mid 2012 LCD Cable Replacement: étape 5, image 1 de 1
    • Use a spudger or tweezers to slide the three AirPort antenna cables straight out of their sockets on the AirPort board.

    • The connection points on the cables are very sensitive. Make sure you only pick up the plug, not the port or the cable.

    • When reassembling, carefully align the connectors over the socket and press down firmly with your thumb or the flat end of a spudger.

  6. MacBook Pro 15" Retina Display Mid 2012 LCD Cable Replacement: étape 6, image 1 de 1
    • Use the tip of a spudger to push the camera cable connector out of its socket on the logic board toward the fan.

    • Be sure to slide the connector parallel to the logic board. It is best to slide it first on one side and then on the other side so that it gradually moves out of the socket. Do not pry up or you will damage the connector.

  7. MacBook Pro 15" Retina Display Mid 2012 LCD Cable Replacement: étape 7, image 1 de 3 MacBook Pro 15" Retina Display Mid 2012 LCD Cable Replacement: étape 7, image 2 de 3 MacBook Pro 15" Retina Display Mid 2012 LCD Cable Replacement: étape 7, image 3 de 3
    • Insert the flat end of a spudger under the rubber sleeve on the right fan heatsink.

    • Run the spudger under the entire length of the casing to loosen the adhesive.

    • Lift the sheath and fold it back so you can access the cables underneath.

  8. MacBook Pro 15" Retina Display Mid 2012 LCD Cable Replacement: étape 8, image 1 de 3 MacBook Pro 15" Retina Display Mid 2012 LCD Cable Replacement: étape 8, image 2 de 3 MacBook Pro 15" Retina Display Mid 2012 LCD Cable Replacement: étape 8, image 3 de 3
    • Use your fingers to pull the AirPort/camera cables up and away from the fan.

    • The cables are glued to the fan, so you must pull carefully to avoid damaging them.

    • Carefully unroute the cables from their plastic guides.

  9. MacBook Pro 15" Retina Display Mid 2012 LCD Cable Replacement: étape 9, image 1 de 2 MacBook Pro 15" Retina Display Mid 2012 LCD Cable Replacement: étape 9, image 2 de 2
    • Use the tip of a spudger to release the display data cable latch and rotate it toward the DC-in.

    • Unplug the display data cable from its socket on the logic board.

    • Do not lift the display data cable as its socket is very delicate. Disconnect the cable parallel to the face of the logic board.

  10. MacBook Pro 15" Retina Display Mid 2012 LCD Cable Replacement: étape 10, image 1 de 2 MacBook Pro 15" Retina Display Mid 2012 LCD Cable Replacement: étape 10, image 2 de 2
    • Use tweezers to lift the rubber covers over the left and right display hinges.

  11. MacBook Pro 15" Retina Display Mid 2012 LCD Cable Replacement: étape 11, image 1 de 2 MacBook Pro 15" Retina Display Mid 2012 LCD Cable Replacement: étape 11, image 2 de 2
    • Remove the two 3.1mm Torx T5 screws securing the aluminum hinge brackets.

  12. MacBook Pro 15" Retina Display Mid 2012 LCD Cable Replacement: étape 12, image 1 de 2 MacBook Pro 15" Retina Display Mid 2012 LCD Cable Replacement: étape 12, image 2 de 2
    • Use tweezers to lift up the left and right hinge aluminum brackets.

  13. MacBook Pro 15" Retina Display Mid 2012 LCD Cable Replacement: étape 13, image 1 de 2 MacBook Pro 15" Retina Display Mid 2012 LCD Cable Replacement: étape 13, image 2 de 2
    • Remove the four internal 5.3mm Torx T8 screws (two on each side) securing the display to the upper case.

  14. MacBook Pro 15" Retina Display Mid 2012 LCD Cable Replacement: étape 14, image 1 de 2 MacBook Pro 15" Retina Display Mid 2012 LCD Cable Replacement: étape 14, image 2 de 2
    • Open the MacBook Pro approximately 110° and place it sideways on the table as shown.

    • While holding the display and upper case together with your left hand, remove the last T8 Torx screw from the upper display bracket.

    • Be careful and hold the display and upper case together with your left hand. If you make mistakes, the exposed display/upper case may fall, damaging any of the components.

    • Remove the last Torx T8 screw holding the display to the upper case.

  15. MacBook Pro 15" Retina Display Mid 2012 LCD Cable Replacement: étape 15, image 1 de 3 MacBook Pro 15" Retina Display Mid 2012 LCD Cable Replacement: étape 15, image 2 de 3 MacBook Pro 15" Retina Display Mid 2012 LCD Cable Replacement: étape 15, image 3 de 3
    • Grasp both halves of the device, one in each hand.

    • Gently slide the bottom half of the device forward to separate it from the display assembly.

    • Carefully set each piece aside. Make sure the bottom half is keyboard-side down.

  16. MacBook Pro 15" Retina Display Mid 2012 LCD Cable Replacement, LCD cable: étape 16, image 1 de 2 MacBook Pro 15" Retina Display Mid 2012 LCD Cable Replacement, LCD cable: étape 16, image 2 de 2
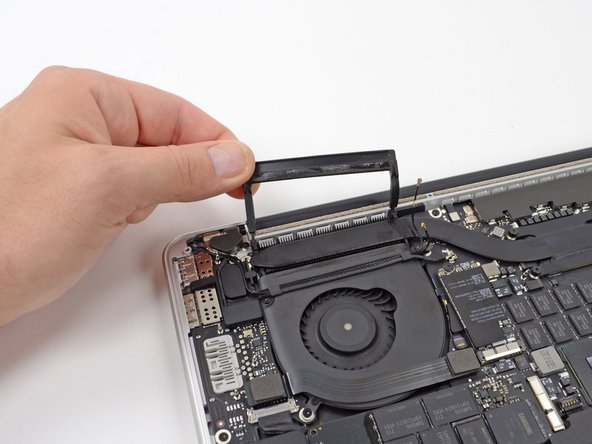
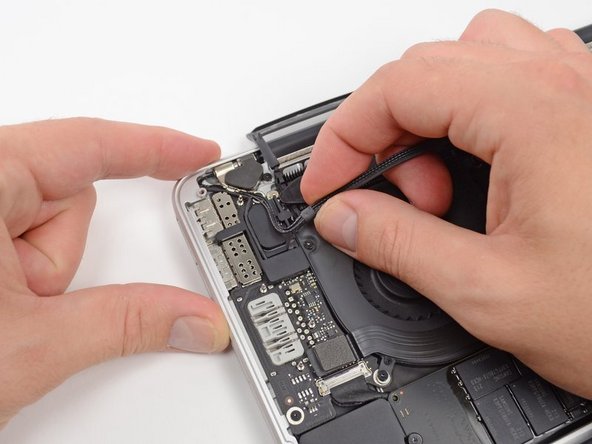
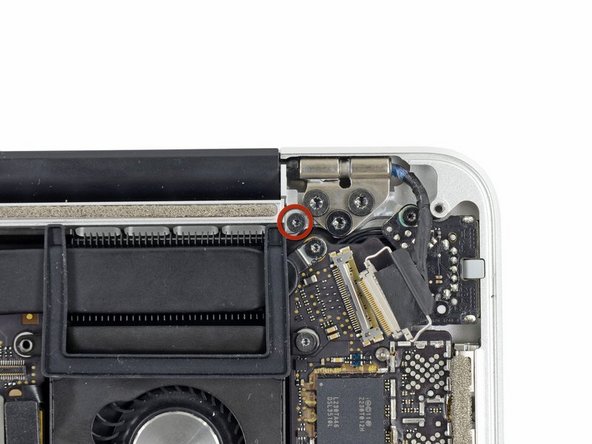
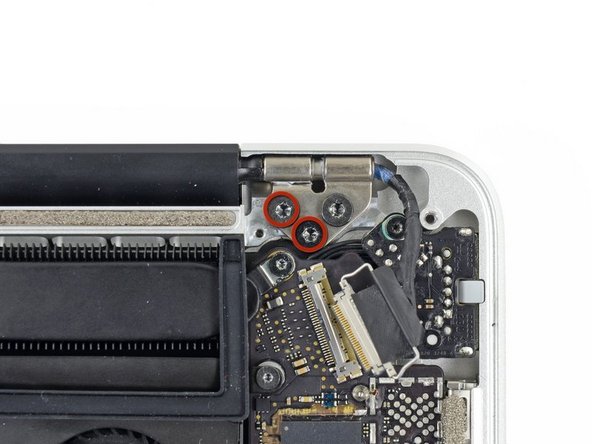
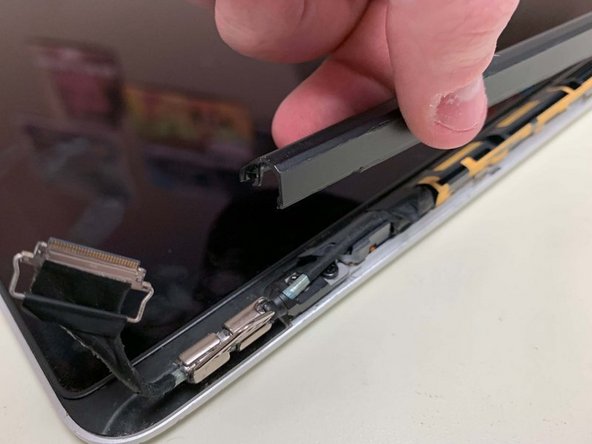
    • Lay the device with the display facing you and the plastic latch cover down. Grab the latch cover and slide it all the way to the right, toward the hinge.

    • There are covers on both ends of the clutch cover that are connected like a hinge. You slide the clutch cover to the right and then have to turn it counterclockwise. Then you will hear a click confirming that the clutch cover is released.

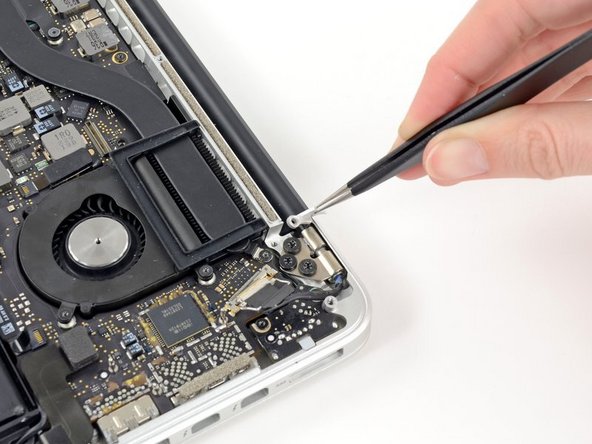
    • Lift the cover from below and remove it from the display.

  17. MacBook Pro 15" Retina Display Mid 2012 LCD Cable Replacement: étape 17, image 1 de 1
    • Peel the tape off the cable connector.

  18. MacBook Pro 15" Retina Display Mid 2012 LCD Cable Replacement: étape 18, image 1 de 1
    • Remove the two screws securing the cable to the case:

    • Two Torx T8 screws

  19. MacBook Pro 15" Retina Display Mid 2012 LCD Cable Replacement: étape 19, image 1 de 1
    • Remove the six screws securing the antenna assembly:

    • Six Phillips #00 screws

    • Lift the antenna unit so that the antenna cable connector is visible under the left side.

  20. MacBook Pro 15" Retina Display Mid 2012 LCD Cable Replacement: étape 20, image 1 de 1
    • Grasp the metal bar securing the LCD cable connector and rotate it toward the bottom edge of the display.

    • Pull the LCD cable straight out of its socket on the display.

    • Do not lift the display data cable, its connector is very delicate. Pull the cable parallel to the surface of the display.

Conclusion

Work the steps in reverse order to reassemble your device

2 autres ont terminé cette réparation.

Merci à ces traducteurs :

de en

100%

HelloMacOS nous aide à réparer le monde ! Vous voulez contribuer ?
Commencez à traduire ›

Stero Size

Membre depuis le 08/02/21

361 Réputation

1 tutoriel rédigé

Un commentaire

Super Anleitung, vielen Dank! Ich hatte einen Kabelbruch in meinem Macbook pro mid 2015 und konnte das Problem Dank Anleitung innerhalb von 45 min selbst beheben. Dank ifixit Werkzeug ohne Kollateralschäden :-)

jesill - Réponse

Ajouter un commentaire

Nombre de vues :

Dernières 24 heures : 5

7 derniers jours : 41

30 derniers jours : 151

Total : 3,207