Cette version peut contenir des modifications incorrectes. Passez au dernier aperçu vérifié.
Ce dont vous avez besoin
-
Cette étape n’est pas traduite. Aidez à la traduire
-
Orient the computer so the battery is facing you.
-
Slide the gray plastic battery cover to the right.
-
-
Cette étape n’est pas traduite. Aidez à la traduire
-
Pull the battery toward yourself until it is fully detached.
-
-
Cette étape n’est pas traduite. Aidez à la traduire
-
Orient the computer right side up with the rear facing you.
-
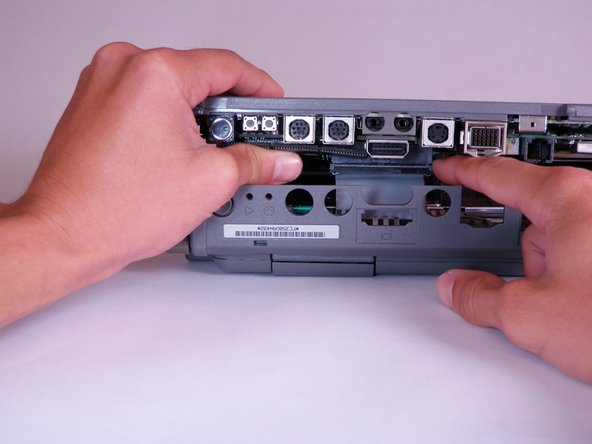
Open the Input/Output (I/O) door.
-
-
-
Cette étape n’est pas traduite. Aidez à la traduire
-
Carefully bend the door into an arch until one of the pins releases from its slot.
-
Once one of the pins is free, remove the I/O door from the computer.
-
-
Cette étape n’est pas traduite. Aidez à la traduire
-
Orient the computer with the bottom facing up and rear facing you. You should be able to read the Macintosh label in this position.
-
-
Cette étape n’est pas traduite. Aidez à la traduire
-
Use a T8 torx screwdriver to remove the 6.8mm long screw above and to the right of the modem jack.
-
Twist counter clockwise to remove the screw.
-
-
Cette étape n’est pas traduite. Aidez à la traduire
-
Use a T10 torx screwdriver to remove the four, 18mm long screws from the lower case.
-
-
Cette étape n’est pas traduite. Aidez à la traduire
-
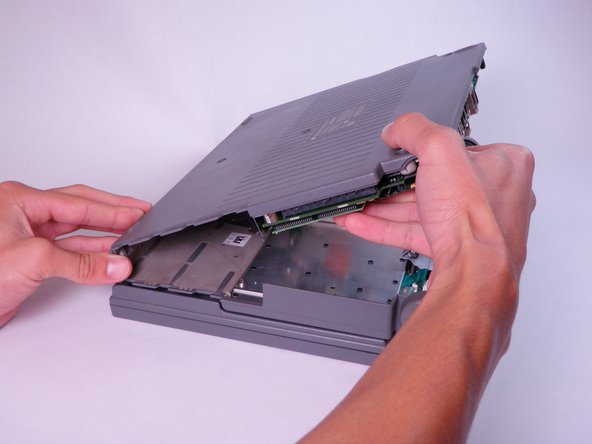
Place your hands on the lower case, just above the I/O panel, and slowly lift the lower case a few inches above the main body of the computer.
-
Release the large, gray interconnect ribbon cable just behind the I/O panel.
-
-
Cette étape n’est pas traduite. Aidez à la traduire
-
Place your thumb on the upper case, inside the empty battery slot, and your index finger near your thumb on the left side of the lower case.
-
Pinch your thumb and index finger towards each other to release the clip. Without releasing pressure on the pinch grip, use your index finger to push the lower case upwards.
-
Lift the lower case to remove it.
-


Équipe

Cal Poly, Team 6-3, Regan Fall 2011 Membre de l'équipe Cal Poly, Team 6-3, Regan Fall 2011
CPSU-REGAN-F11S6G3
4 membres
12 tutoriels rédigés