Aller au contenu principal

Makita GA4030K Switch Replacement

Ce dont vous avez besoin

  1. Makita GA4030K Switch Replacement, Back Cover: étape 1, image 1 de 2 Makita GA4030K Switch Replacement, Back Cover: étape 1, image 2 de 2
    • Unscrew the 20 mm tapping screw using a Philips #02 screwdriver.

  2. Makita GA4030K Switch Replacement: étape 2, image 1 de 1
    • Slide the back cover down the power cable.

  3. Makita GA4030K Switch Replacement, Switch: étape 3, image 1 de 3 Makita GA4030K Switch Replacement, Switch: étape 3, image 2 de 3 Makita GA4030K Switch Replacement, Switch: étape 3, image 3 de 3
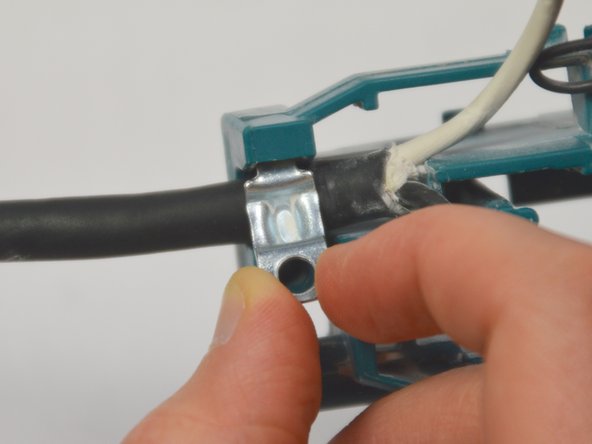
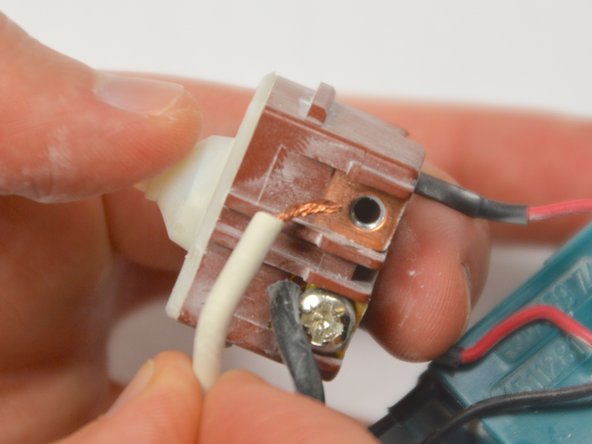
    • Unscrew the 20 mm tapping screw using a Phillips #02 screwdriver.

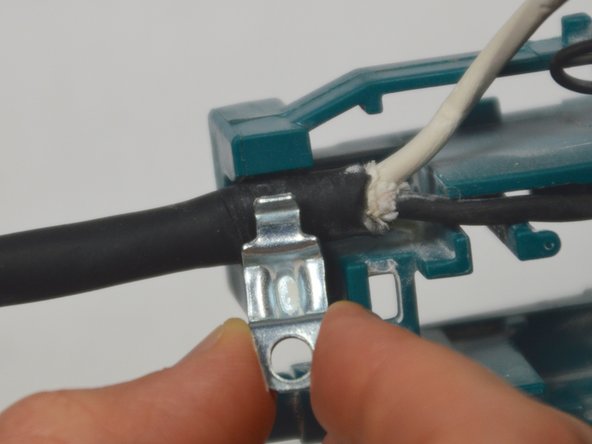
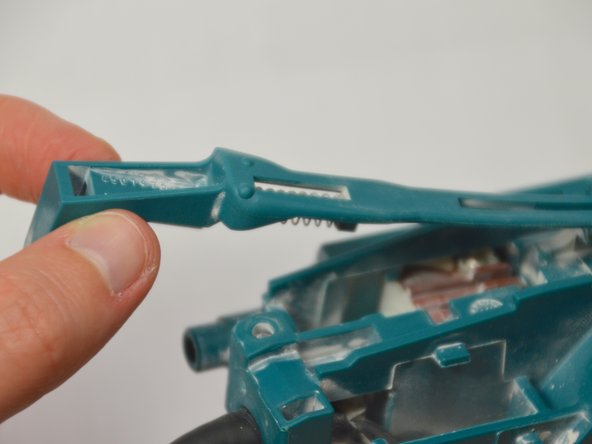
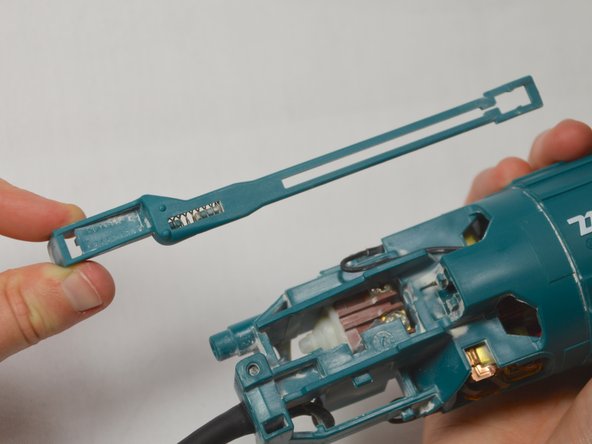
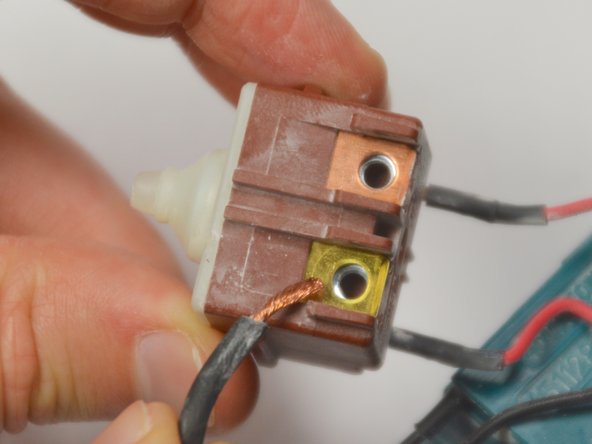
    • Lift the clasp up and out to remove.

  4. Makita GA4030K Switch Replacement: étape 4, image 1 de 3 Makita GA4030K Switch Replacement: étape 4, image 2 de 3 Makita GA4030K Switch Replacement: étape 4, image 3 de 3
    • Place your finger in the gap in front of the switch. Now, at the base of the device, push the switch lever into the 'on' position.

  5. Makita GA4030K Switch Replacement: étape 5, image 1 de 1
    • Keeping the switch lever in the 'on' position, remove the switch.

    • When reinserting the switch, place the switch in the hole without pressing the switch lever in. Holding the switch against the back edge of the hole, push the switch lever fully into the 'on' position and then let go. The switch should catch onto the switch lever and remain attached.

  6. Makita GA4030K Switch Replacement: étape 6, image 1 de 3 Makita GA4030K Switch Replacement: étape 6, image 2 de 3 Makita GA4030K Switch Replacement: étape 6, image 3 de 3
    • Pull the switch lever up and out of the body of the angle grinder.

  7. Makita GA4030K Switch Replacement: étape 7, image 1 de 3 Makita GA4030K Switch Replacement: étape 7, image 2 de 3 Makita GA4030K Switch Replacement: étape 7, image 3 de 3
    • Pull back the plastic clip and pull the internal switch up and out of the cavity.

  8. Makita GA4030K Switch Replacement: étape 8, image 1 de 3 Makita GA4030K Switch Replacement: étape 8, image 2 de 3 Makita GA4030K Switch Replacement: étape 8, image 3 de 3
    • Remove the two 10 mm screws holding the power cord leads in place using a Phillips #02 screwdriver.

    • When reassembling, be sure to attach the power cabling in the same positions.

  9. Makita GA4030K Switch Replacement: étape 9, image 1 de 3 Makita GA4030K Switch Replacement: étape 9, image 2 de 3 Makita GA4030K Switch Replacement: étape 9, image 3 de 3
    • Pull the two leads leading to the motor off of the switch.

    • When inserting the leads of the new switch make sure that they are inserted into the two outside spaces on the internal switch mechanism.

Conclusion

To reassemble your device, follow these instructions in reverse order.

2 autres ont terminé cette réparation.

Nyssa Backes

Membre depuis le 04/01/15

467 Réputation

3 tutoriels rédigés

Équipe

Cal Poly, Team 12-5, Lancaster Spring 2015 Membre de l'équipe Cal Poly, Team 12-5, Lancaster Spring 2015

CPSU-LANCASTER-S15S12G5

4 membres

13 tutoriels rédigés

0 commentaires

Ajouter un commentaire

Nombre de vues :

Dernières 24 heures : 0

7 derniers jours : 3

30 derniers jours : 13

Total : 2,031