Aller au contenu principal

Master and Dynamic MW50 Charging Port Replacement

Ce dont vous avez besoin

  1. Master and Dynamic MW50 Charging Port Replacement, Master and Dynamic MW50 Disassembly: étape 1, image 1 de 3 Master and Dynamic MW50 Charging Port Replacement, Master and Dynamic MW50 Disassembly: étape 1, image 2 de 3 Master and Dynamic MW50 Charging Port Replacement, Master and Dynamic MW50 Disassembly: étape 1, image 3 de 3
    • Pull the cushion off of the desired side by gripping the top of the headphones and pulling the cushion off.

  2. Master and Dynamic MW50 Charging Port Replacement: étape 2, image 1 de 1
    • Remove the four 5mm screws from the earpiece with a Y1 Triwing screwdriver.

  3. Master and Dynamic MW50 Charging Port Replacement: étape 3, image 1 de 1
    • Use the Jimmy to lift up the black cover to get inside the device.

  4. Master and Dynamic MW50 Charging Port Replacement, Charging Port: étape 4, image 1 de 2 Master and Dynamic MW50 Charging Port Replacement, Charging Port: étape 4, image 2 de 2
    • Remove the two 2mm screws pictured with a JIS #00 screwdriver.

    • Gently pull the silver cover off of the ear piece.

  5. Master and Dynamic MW50 Charging Port Replacement: étape 5, image 1 de 1
    • Remove the two 2mm screws shown with a JIS #00 screwdriver.

  6. Master and Dynamic MW50 Charging Port Replacement: étape 6, image 1 de 1
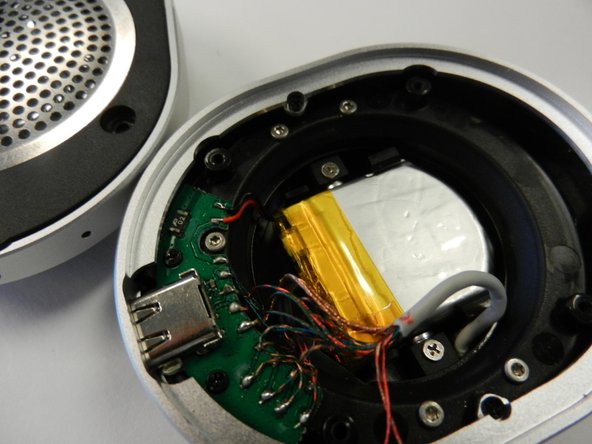
    • Lift up the mother board with the attached charging port to see the soldering points. You must desolder these points in order to detach (and re-attach) the charging port.

Conclusion

To reassemble your device, follow these instructions in reverse order.

Tyler Guffey

Membre depuis le 01/24/19

208 Réputation

2 tutoriels rédigés

Équipe

Cal Poly, Team S1-G4, White Winter 2019 Membre de l'équipe Cal Poly, Team S1-G4, White Winter 2019

CPSU-WHITE-W19S1G4

4 membres

12 tutoriels rédigés

0 commentaires

Ajouter un commentaire

Nombre de vues :

Dernières 24 heures : 0

7 derniers jours : 6

30 derniers jours : 8

Total : 305