Aller au contenu principal

Microsoft Surface Pro 2 SSD Replacement

Ce dont vous avez besoin

  1. Microsoft Surface Pro 2 SSD Replacement, SSD: étape 1, image 1 de 3 Microsoft Surface Pro 2 SSD Replacement, SSD: étape 1, image 2 de 3 Microsoft Surface Pro 2 SSD Replacement, SSD: étape 1, image 3 de 3
    • Remove the two T5 Torx screws, then take off the kickstand.

  2. Microsoft Surface Pro 2 SSD Replacement: étape 2, image 1 de 3 Microsoft Surface Pro 2 SSD Replacement: étape 2, image 2 de 3 Microsoft Surface Pro 2 SSD Replacement: étape 2, image 3 de 3
    • Use an iOpener or heat gun to melt the adhesive.

    • Insert 21 opening picks under the display.

    • Slowly lift off the display.

  3. Microsoft Surface Pro 2 SSD Replacement: étape 3, image 1 de 3 Microsoft Surface Pro 2 SSD Replacement: étape 3, image 2 de 3 Microsoft Surface Pro 2 SSD Replacement: étape 3, image 3 de 3
    • Remove the four ribbon cables connecting to the motherboard with a spudger.

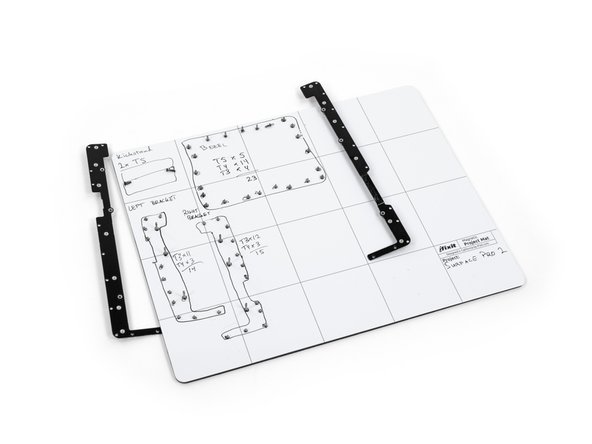
    • Remove the 52 screws securing the motherboard to the metal plates and the plastic bezel.

    • Lift off the motherboard.

  4. Microsoft Surface Pro 2 SSD Replacement: étape 4, image 1 de 1
    • Unscrew the two screws on the mSATA SSD and remove the SSD. (Note: This image is from a first generation Surface Pro, but it works)

Conclusion

To reassemble your device, follow these instructions in reverse order.

22 autres ont terminé cette réparation.

Ronnie

Membre depuis le 10/22/12

3 462 Réputation

5 tutoriels rédigés

13 commentaires

How do you glue the back on? It looks like the adhesive that holds it on is messed up bad when it's removed.

Nate Barnes - Réponse

Hi Nate,

Have you figured this out? I was wondering the same thing.

Adi V -

You have to use double sided tape for electronics. They sell it on amazon. Use 5mm or wider to make sure the screen doesn’t fall out. Heat after application to make sure the glue sets properly.

Aaron Payer -

Wow, I have been contemplating one of these but after seeing that picture with the heat gun, it looks like you might as well consider it a sealed box.

Mark T - Réponse

Screen came off just fine using a hair dryer, but my Surface Pro 2 differs from these directions. Specifically, I got stuck not being able to remove the bezel because I don't have a T2 bit. My bezel screws are 5 x T5, 14 x T3, and 4 x T2. That doesn't match the photo shown here in step 3.

Boyd Patterson - Réponse

Ajouter un commentaire

Nombre de vues :

Dernières 24 heures : 10

7 derniers jours : 67

30 derniers jours : 317

Total : 94,785