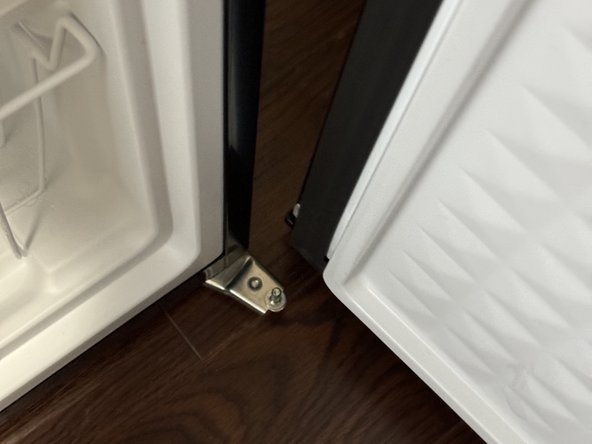
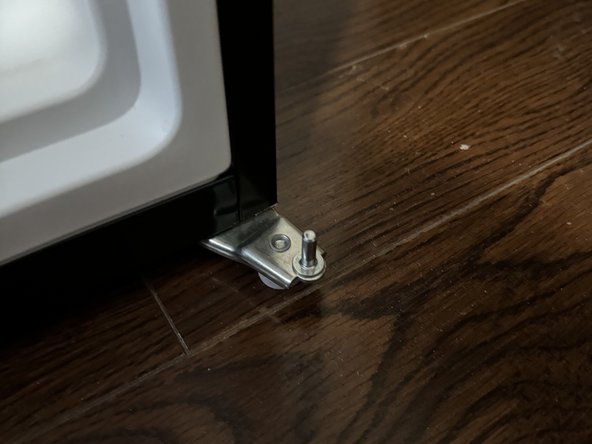
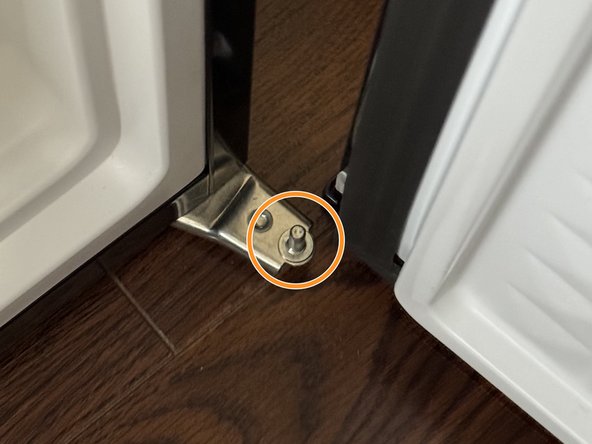
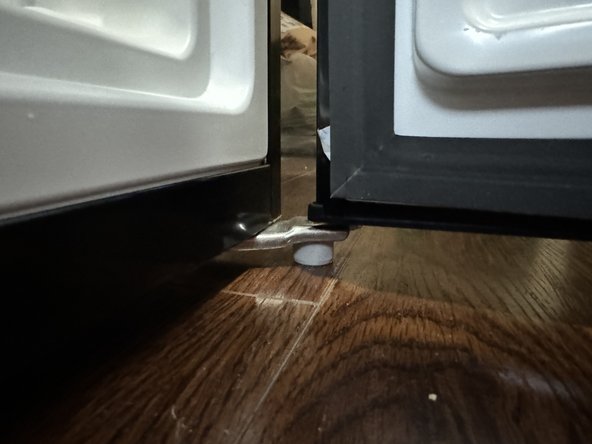
Aller au contenu principal

Midea MRU03M2ABB Upright Freezer Door Replacement

Ce dont vous avez besoin

  1. Midea MRU03M2ABB Upright Freezer Door Replacement, Door: étape 1, image 1 de 2 Midea MRU03M2ABB Upright Freezer Door Replacement, Door: étape 1, image 2 de 2
    • Unplug the device.

    • Only unplug when your hand is dry.

  2. Midea MRU03M2ABB Upright Freezer Door Replacement: étape 2, image 1 de 1
    • Empty the shelves.

  3. Midea MRU03M2ABB Upright Freezer Door Replacement: étape 3, image 1 de 3 Midea MRU03M2ABB Upright Freezer Door Replacement: étape 3, image 2 de 3 Midea MRU03M2ABB Upright Freezer Door Replacement: étape 3, image 3 de 3
    • Use a plastic spatula to remove the hinge cover on top of the freezer.

    • Pushing at the pointy part of the cover makes it easier to remove.

  4. Midea MRU03M2ABB Upright Freezer Door Replacement: étape 4, image 1 de 3 Midea MRU03M2ABB Upright Freezer Door Replacement: étape 4, image 2 de 3 Midea MRU03M2ABB Upright Freezer Door Replacement: étape 4, image 3 de 3
    • Unscrew the hinge counterclockwise.

  5. Midea MRU03M2ABB Upright Freezer Door Replacement: étape 5, image 1 de 2 Midea MRU03M2ABB Upright Freezer Door Replacement: étape 5, image 2 de 2
    • Lift the hinge out of the freezer and the door.

  6. Midea MRU03M2ABB Upright Freezer Door Replacement: étape 6, image 1 de 3 Midea MRU03M2ABB Upright Freezer Door Replacement: étape 6, image 2 de 3 Midea MRU03M2ABB Upright Freezer Door Replacement: étape 6, image 3 de 3
    • With two hands, gently hold and open the door as usual.

    • Lift the door up to remove it from the bottom hinge.

    • You have completely detached the door from the freezer.

  7. Midea MRU03M2ABB Upright Freezer Door Replacement: étape 7, image 1 de 3 Midea MRU03M2ABB Upright Freezer Door Replacement: étape 7, image 2 de 3 Midea MRU03M2ABB Upright Freezer Door Replacement: étape 7, image 3 de 3
    • With the new door, locate the hole underneath the door.

    • Using two hands, gently place the door on top of the hinge (the pointy part of the hinge should fit inside the hole).

    • Close the door.

  8. Midea MRU03M2ABB Upright Freezer Door Replacement: étape 8, image 1 de 3 Midea MRU03M2ABB Upright Freezer Door Replacement: étape 8, image 2 de 3 Midea MRU03M2ABB Upright Freezer Door Replacement: étape 8, image 3 de 3
    • Use your hand to align the door so these three screw holes stay on the same line.

    • Carefully place the top hinge to fit these holes.

  9. Midea MRU03M2ABB Upright Freezer Door Replacement: étape 9, image 1 de 2 Midea MRU03M2ABB Upright Freezer Door Replacement: étape 9, image 2 de 2
    • Thread and tighten the screws clockwise.

    • Gently swing the door to make sure it operates well.

  10. Midea MRU03M2ABB Upright Freezer Door Replacement: étape 11, image 1 de 2 Midea MRU03M2ABB Upright Freezer Door Replacement: étape 11, image 2 de 2
    • Finally, firmly press the cover onto the hinge to secure it. Now, you have completely replaced the door.

    • A "click" will indicate that the cover is finally in its place.

Ligne d'arrivée

Thinh Lang

Membre depuis le 01/16/24

193 Réputation

1 tutoriel rédigé

Équipe

York University, Team 1-31, O'Regan Winter 2024 Membre de l'équipe York University, Team 1-31, O'Regan Winter 2024

YORK-O'REGAN-W24S1G31

1 membre

1 tutoriel rédigé

0 commentaires

Ajouter un commentaire

Nombre de vues :

Dernières 24 heures : 0

7 derniers jours : 2

30 derniers jours : 10

Total : 83