Aller au contenu principal

Mill Cutter Paper Stripper Replacement

Ce dont vous avez besoin

  1. Mill Cutter Paper Stripper Replacement, Mill cutter paper stripper set and stripper guide set: étape 1, image 1 de 1
    • Unplug the shredder from the wall electrical outlet.

    • Remove the shredder from its catch basket and place it face down on a flat surface.

  2. Mill Cutter Paper Stripper Replacement: étape 2, image 1 de 3 Mill Cutter Paper Stripper Replacement: étape 2, image 2 de 3 Mill Cutter Paper Stripper Replacement: étape 2, image 3 de 3
    • Locate the seven case screws and remove them with a Phillips screwdriver. The screws are identified by the seven marked circles. The screws are 15 mm in length and the head diameter is 5 mm.

    • Remove the manufacturer’s label in order to get to one of the hidden screws, if applicable.

  3. Mill Cutter Paper Stripper Replacement: étape 3, image 1 de 2 Mill Cutter Paper Stripper Replacement: étape 3, image 2 de 2
    • Remove the screws connecting the stripper guide and the base of the shredder's housing unit with a Phillips screwdriver. The diameter head and screws are 10 mm in length.

  4. Mill Cutter Paper Stripper Replacement: étape 4, image 1 de 2 Mill Cutter Paper Stripper Replacement: étape 4, image 2 de 2
    • Once all of the screws have been removed, pull the casing apart.

    • Remove the stripper guide from the housing unit.

    • Use caution to prevent the trigger guard from falling apart.

  5. Mill Cutter Paper Stripper Replacement: étape 5, image 1 de 3 Mill Cutter Paper Stripper Replacement: étape 5, image 2 de 3 Mill Cutter Paper Stripper Replacement: étape 5, image 3 de 3
    • Remove the e-clips from the gears on the left side with a flathead screwdriver.

    • Remove screws from the gear box cover on the right side with a Phillips screwdriver. The screws are identified by the two marked circles. The screws are 7 mm in length and the head diameter is 3 mm.

  6. Mill Cutter Paper Stripper Replacement: étape 6, image 1 de 3 Mill Cutter Paper Stripper Replacement: étape 6, image 2 de 3 Mill Cutter Paper Stripper Replacement: étape 6, image 3 de 3
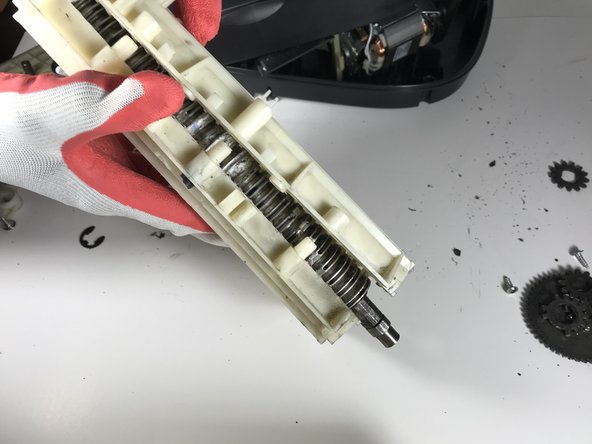
    • Remove the gears from both sides.

    • If the gears are hard to remove, use a flathead screwdriver to help remove them. The gears also may be greasy so place them on a paper towel or newspaper.

    • Remove the screws from the gearbox side plate with Phillips screwdriver to get to the gears. The screws are 7 mm in length and the head diameter is 3 mm.

  7. Mill Cutter Paper Stripper Replacement: étape 7, image 1 de 2 Mill Cutter Paper Stripper Replacement: étape 7, image 2 de 2
    • Replace the mill cutter paper stripper set and stripper guide set.

    • Use protective gloves as the blades are very sharp.

Conclusion

To reassemble your device, follow these instructions in reverse order.

Une autre personne a terminé cette réparation.

Takisha Parrish

Membre depuis le 01/21/18

175 Réputation

1 tutoriel rédigé

Équipe

USF Sarasota-Manatee, Team S1-G1, Stewart Spring 2018 Membre de l'équipe USF Sarasota-Manatee, Team S1-G1, Stewart Spring 2018

USFSM-STEWART-S18S1G1

15 membres

25 tutoriels rédigés

0 commentaires

Ajouter un commentaire

Nombre de vues :

Dernières 24 heures : 4

7 derniers jours : 5

30 derniers jours : 19

Total : 1,175