Aller au contenu principal

Milwaukee Hole Hawg 1675-1 Field Replacement

Ce dont vous avez besoin

  1. Milwaukee Hole Hawg 1675-1 Field Replacement, Motor Brushes: étape 1, image 1 de 1
    • Ensure that the drill is unplugged.

    • Position the drill so that it is on its side.

  2. Milwaukee Hole Hawg 1675-1 Field Replacement: étape 2, image 1 de 3 Milwaukee Hole Hawg 1675-1 Field Replacement: étape 2, image 2 de 3 Milwaukee Hole Hawg 1675-1 Field Replacement: étape 2, image 3 de 3
    • Remove the brush cap with a flathead screwdriver.

  3. Milwaukee Hole Hawg 1675-1 Field Replacement: étape 3, image 1 de 2 Milwaukee Hole Hawg 1675-1 Field Replacement: étape 3, image 2 de 2
    • Pry up on the copper brush holder with a screwdriver or spudger.

    • Continue lifting up the copper brush holder to remove the brush.

    • Repeat on the opposite side.

  4. Milwaukee Hole Hawg 1675-1 Field Replacement, Field: étape 4, image 1 de 2 Milwaukee Hole Hawg 1675-1 Field Replacement, Field: étape 4, image 2 de 2
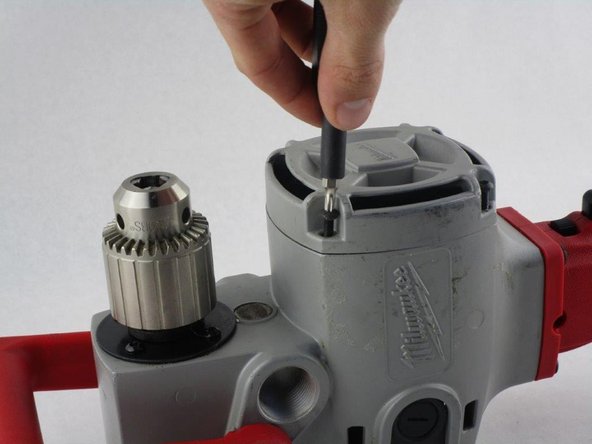
    • Position the the drill upright and remove the four 19mm Torx T15 screws securing the motor cover.

  5. Milwaukee Hole Hawg 1675-1 Field Replacement: étape 5, image 1 de 3 Milwaukee Hole Hawg 1675-1 Field Replacement: étape 5, image 2 de 3 Milwaukee Hole Hawg 1675-1 Field Replacement: étape 5, image 3 de 3
    • Remove the motor cover and withdraw the armature.

    • Take note to not lose the washer that sits on top of the armature.

  6. Milwaukee Hole Hawg 1675-1 Field Replacement: étape 6, image 1 de 2 Milwaukee Hole Hawg 1675-1 Field Replacement: étape 6, image 2 de 2
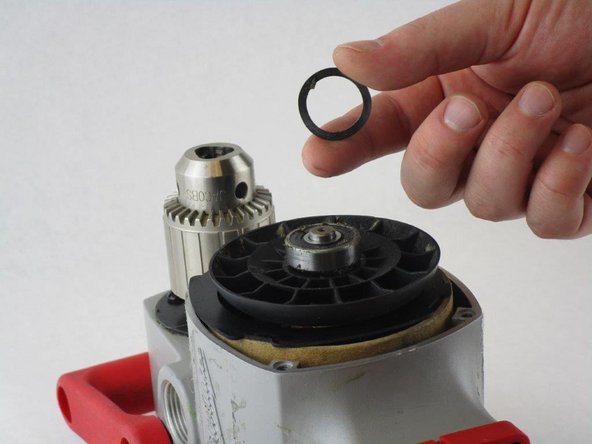
    • Remove the black insulator ring.

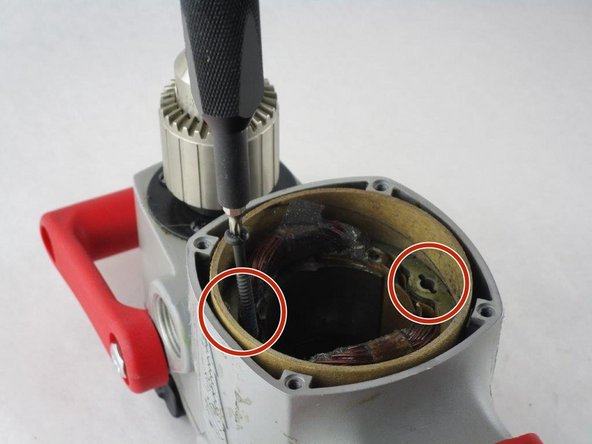
    • Remove the two 45mm Torx T15 screws securing the field to the drill.

  7. Milwaukee Hole Hawg 1675-1 Field Replacement: étape 7, image 1 de 3 Milwaukee Hole Hawg 1675-1 Field Replacement: étape 7, image 2 de 3 Milwaukee Hole Hawg 1675-1 Field Replacement: étape 7, image 3 de 3
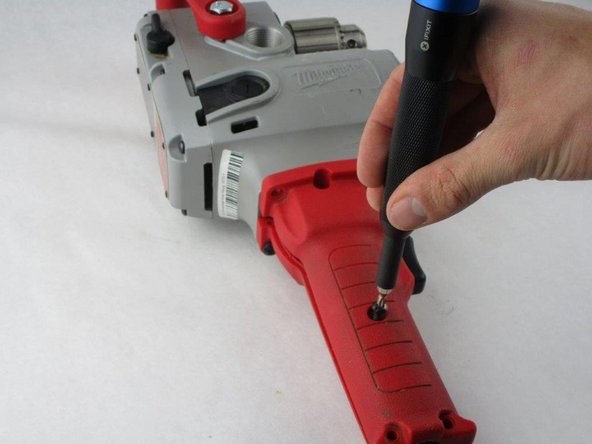
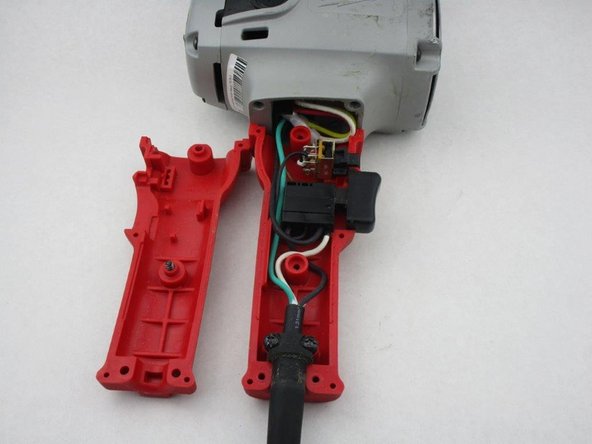
    • Position drill on its side.

    • Remove the four 19mm Torx T15 screws.

    • Remove the two 25mm Torx T27 screws.

    • Remove the top portion of the handle.

  8. Milwaukee Hole Hawg 1675-1 Field Replacement: étape 8, image 1 de 2 Milwaukee Hole Hawg 1675-1 Field Replacement: étape 8, image 2 de 2
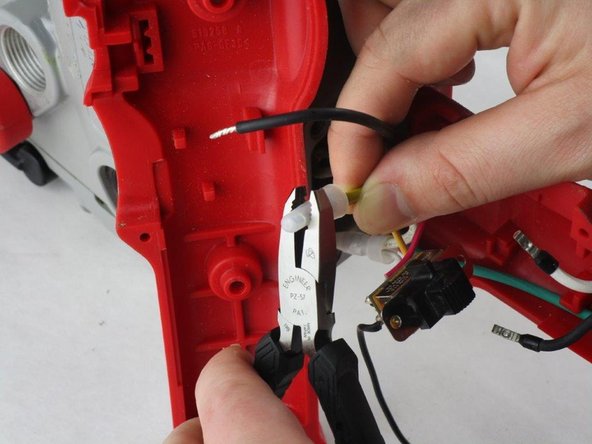
    • Lift the switch up and away to allow room to work.

    • Uncrimp the wire connector on the yellow field wire attached to the switch to disconnect it.

  9. Milwaukee Hole Hawg 1675-1 Field Replacement: étape 9, image 1 de 1
    • Lift the field out of the device, feeding the yellow wire through the handle.

Conclusion

To reassemble your device, follow these instructions in reverse order.

Colby Green

Membre depuis le 01/13/20

183 Réputation

1 tutoriel rédigé

0 commentaires

Ajouter un commentaire

Nombre de vues :

Dernières 24 heures : 0

7 derniers jours : 8

30 derniers jours : 19

Total : 585