Aller au contenu principal

Milwaukee M18 2606-20 Trigger Replacement

Ce dont vous avez besoin

  1. Milwaukee M18 2606-20 Trigger Replacement, Trigger: étape 1, image 1 de 2 Milwaukee M18 2606-20 Trigger Replacement, Trigger: étape 1, image 2 de 2
    • Remove the seven 18 mm screws, using the T3 Torx Screwdriver, from the handle area of the case.

    • Remove the two 21 mm screws, using the T3 Torx Screwdriver, from the top of the case.

  2. Milwaukee M18 2606-20 Trigger Replacement: étape 2, image 1 de 3 Milwaukee M18 2606-20 Trigger Replacement: étape 2, image 2 de 3 Milwaukee M18 2606-20 Trigger Replacement: étape 2, image 3 de 3
    • Remove the four 20 mm screws, using the T3 Torx Screwdriver, from the front of the case.

  3. Milwaukee M18 2606-20 Trigger Replacement: étape 3, image 1 de 2 Milwaukee M18 2606-20 Trigger Replacement: étape 3, image 2 de 2
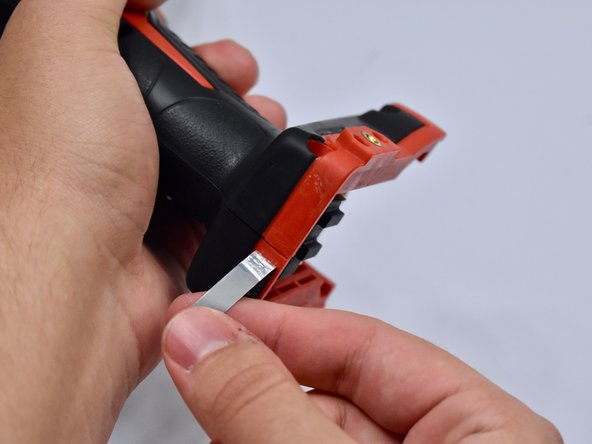
    • Peel back the sticker at the bottom of the drill handle.

  4. Milwaukee M18 2606-20 Trigger Replacement: étape 4, image 1 de 2 Milwaukee M18 2606-20 Trigger Replacement: étape 4, image 2 de 2
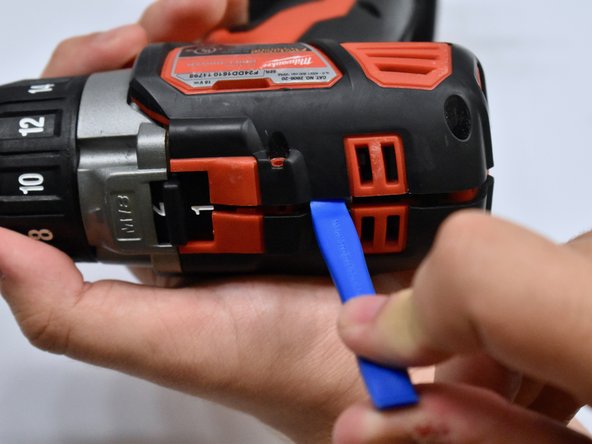
    • Open the case by sliding the opening tool all the way around the case to pry it apart.

  5. Milwaukee M18 2606-20 Trigger Replacement: étape 5, image 1 de 2 Milwaukee M18 2606-20 Trigger Replacement: étape 5, image 2 de 2
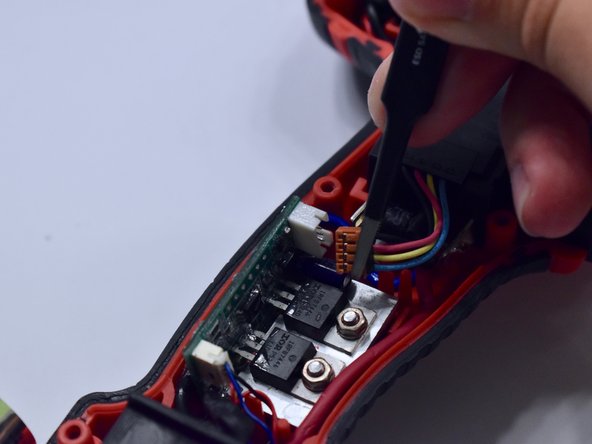
    • Unplug the 4-pin connector, using the tweezers, from the circuit board.

  6. Milwaukee M18 2606-20 Trigger Replacement: étape 6, image 1 de 3 Milwaukee M18 2606-20 Trigger Replacement: étape 6, image 2 de 3 Milwaukee M18 2606-20 Trigger Replacement: étape 6, image 3 de 3
    • Desolder the wires soldered to the trigger.

Conclusion

To reassemble your device, follow these instructions in reverse order.

0 commentaires

Ajouter un commentaire

Nombre de vues :

Dernières 24 heures : 2

7 derniers jours : 18

30 derniers jours : 75

Total : 4,411