Aller au contenu principal

Motorola 120c Microphone Replacement

Ce dont vous avez besoin

  1. Motorola 120c Microphone Replacement, Battery: étape 1, image 1 de 2 Motorola 120c Microphone Replacement, Battery: étape 1, image 2 de 2
    • Hold the phone and pull the back latch down towards the bottom.

    • Remove the back panel by releasing the latch and lifting from the top.

  2. Motorola 120c Microphone Replacement: étape 2, image 1 de 3 Motorola 120c Microphone Replacement: étape 2, image 2 de 3 Motorola 120c Microphone Replacement: étape 2, image 3 de 3
    • Remove the battery by pushing the bottom end towards the top, then lifting up.

  3. Motorola 120c Microphone Replacement, Motherboard: étape 3, image 1 de 3 Motorola 120c Microphone Replacement, Motherboard: étape 3, image 2 de 3 Motorola 120c Microphone Replacement, Motherboard: étape 3, image 3 de 3
    • Once the battery is out, unscrew the six 7.0 mm screws with T-6 screwdriver.

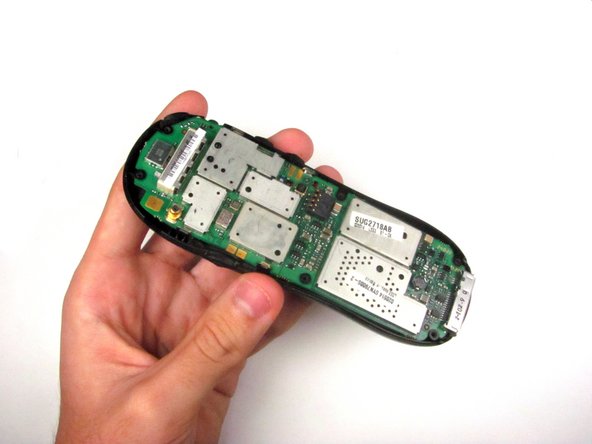
    • Once the screws are removed, simply lift the back panel off

  4. Motorola 120c Microphone Replacement: étape 4, image 1 de 3 Motorola 120c Microphone Replacement: étape 4, image 2 de 3 Motorola 120c Microphone Replacement: étape 4, image 3 de 3
    • Remove the motherboard by lifting it up and out.

  5. Motorola 120c Microphone Replacement, Microphone: étape 5, image 1 de 2 Motorola 120c Microphone Replacement, Microphone: étape 5, image 2 de 2
    • Use tweezers or fingers to remove the microphone.

    • Note that the keypad does not need to be removed to get to the microphone.

Conclusion

To reassemble your device, follow these instructions in reverse order.

Megan Elrod

Membre depuis le 04/15/12

7 Réputation

2 tutoriels rédigés

Équipe

Cal Poly, Team 6-21, Amido Spring 2012 Membre de l'équipe Cal Poly, Team 6-21, Amido Spring 2012

CPSU-AMIDO-S12S6G21

4 membres

18 tutoriels rédigés

0 commentaires

Ajouter un commentaire

Nombre de vues :

Dernières 24 heures : 0

7 derniers jours : 1

30 derniers jours : 1

Total : 543