Aller au contenu principal

Motorola Moto E6 Play Circuit Board Covers Replacement

Ce dont vous avez besoin

  1. Motorola Moto E6 Play Circuit Board Covers Replacement, Back Cover: étape 1, image 1 de 2 Motorola Moto E6 Play Circuit Board Covers Replacement, Back Cover: étape 1, image 2 de 2
    • Run the halberd spudger along the edges of the device. The back cover should easily pop off.

    • Gently remove the back cover. Do not pull hard, as it is still connected to the fingerprint scanner inside the phone.

  2. Motorola Moto E6 Play Circuit Board Covers Replacement, Circuit Board Covers: étape 2, image 1 de 2 Motorola Moto E6 Play Circuit Board Covers Replacement, Circuit Board Covers: étape 2, image 2 de 2
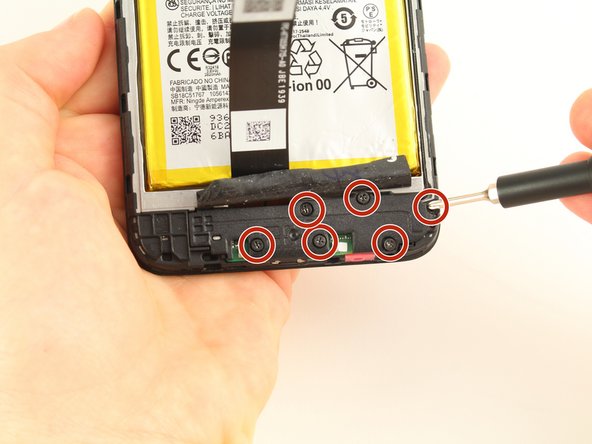
    • To remove the cover on the motherboard, remove the 10 silver 3.90 mm Phillips screws attaching the cover to the board using the Phillips #0 screwdriver.

    • One of these ten screws is covered by black tape located at the bottom left corner of the black cover. Peel back the black tape to access this screw.

  3. Motorola Moto E6 Play Circuit Board Covers Replacement: étape 3, image 1 de 2 Motorola Moto E6 Play Circuit Board Covers Replacement: étape 3, image 2 de 2
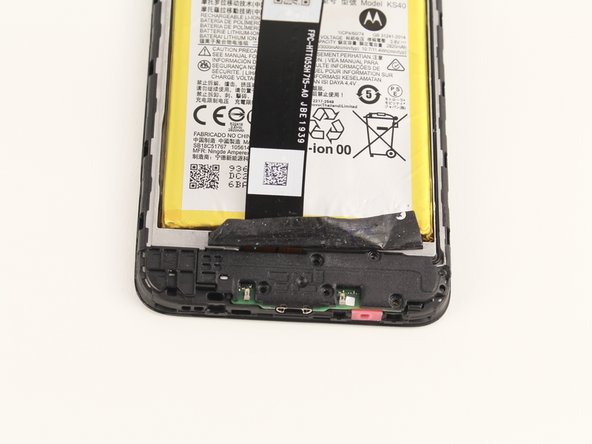
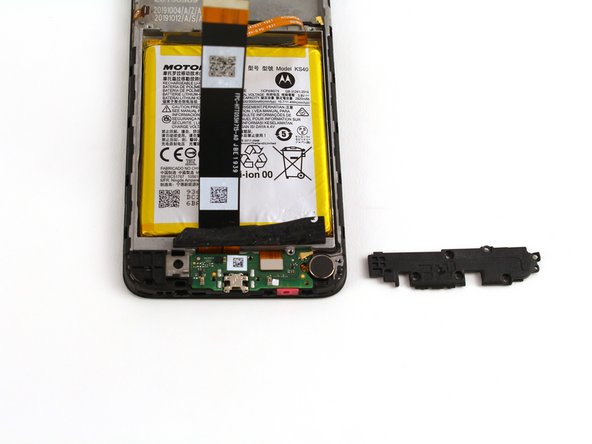
    • With the angled tweezers, remove the black cover to reveal the motherboard underneath.

    • Remove the black piece cover with caution to avoid puncturing the motherboard with the tweezers.

  4. Motorola Moto E6 Play Circuit Board Covers Replacement: étape 4, image 1 de 3 Motorola Moto E6 Play Circuit Board Covers Replacement: étape 4, image 2 de 3 Motorola Moto E6 Play Circuit Board Covers Replacement: étape 4, image 3 de 3
    • The bottom plastic piece covering the daughterboard can be seen by peeling back the tape covering the bottom section of the phone below the battery.

    • To remove the cover, unscrew the six black 3.45 mm Phillips screws holding the cover in place using the Phillips #0 screwdriver.

  5. Motorola Moto E6 Play Circuit Board Covers Replacement: étape 5, image 1 de 2 Motorola Moto E6 Play Circuit Board Covers Replacement: étape 5, image 2 de 2
    • Remove the black cover piece using the angled tweezers.

Conclusion

To reassemble your device, follow these instructions in reverse order.

Charlie Priebe

Membre depuis le 02/10/20

824 Réputation

5 tutoriels rédigés

Équipe

Cal Poly, Team S22-G4, Regan Winter 2020 Membre de l'équipe Cal Poly, Team S22-G4, Regan Winter 2020

CPSU-REGAN-W20S22G4

4 membres

14 tutoriels rédigés

0 commentaires

Ajouter un commentaire

Nombre de vues :

Dernières 24 heures : 0

7 derniers jours : 0

30 derniers jours : 2

Total : 522