Aller au contenu principal

Motorola Moto G XT1034 Back Case and Battery Cover Disassembly

Ce dont vous avez besoin

  1. Motorola Moto G XT1034 Back Case and Battery Cover Disassembly, Rear Panel: étape 1, image 1 de 3 Motorola Moto G XT1034 Back Case and Battery Cover Disassembly, Rear Panel: étape 1, image 2 de 3 Motorola Moto G XT1034 Back Case and Battery Cover Disassembly, Rear Panel: étape 1, image 3 de 3
    • Before you start following any of the steps of this guide, completely turn the device off.

    • Take the plastic back cover off by either using a plastic Pry tool or simply using your hands. Start from the bottom by the charging port

  2. Motorola Moto G XT1034 Back Case and Battery Cover Disassembly, Removing the Screws: étape 2, image 1 de 1
    • Unscrew the 3.5mm screws, total of 14, located on the back protective cover by using a T5 Torx screwdriver.

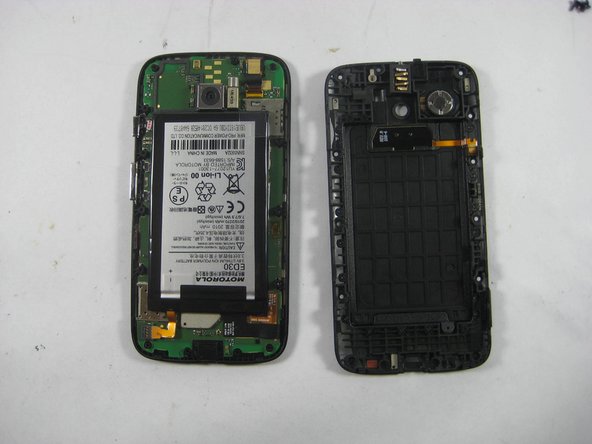
  3. Motorola Moto G XT1034 Back Case and Battery Cover Disassembly, Removing the Battery Cover: étape 3, image 1 de 2 Motorola Moto G XT1034 Back Case and Battery Cover Disassembly, Removing the Battery Cover: étape 3, image 2 de 2
    • Use a plastic opening tool to remove the protective cover.

    • Carefully work the plastic tool around all the edges of the phone.

    • The protective cover holds the Volume and the Home buttons which might fall off the assembly when the cover is removed.

Conclusion

To reassemble your device, follow these instructions in reverse order.

7 autres ont terminé cette réparation.

Radostin Lobodov

Membre depuis le 10/16/14

2 904 Réputation

6 tutoriels rédigés

Équipe

UMass Dartmouth, Team 5-7, Vijaybhaskar Fall 2014 Membre de l'équipe UMass Dartmouth, Team 5-7, Vijaybhaskar Fall 2014

UMASSD-VIJAYBHASKAR-F14S5G7

3 membres

8 tutoriels rédigés

0 commentaires

Ajouter un commentaire

Nombre de vues :

Dernières 24 heures : 0

7 derniers jours : 0

30 derniers jours : 1

Total : 1,671