Aller au contenu principal

Motorola Moto G3 Motherboard Replacement

Tutoriel Archivé
Ce tutoriel est conservé uniquement à des fins de suivis historiques. Utilisez la version actuelle du tutoriel pour effectuer votre réparation.

Ce dont vous avez besoin

  1. Motorola Moto G3 Motherboard  Replacement, Prerequisite Guide: étape 1, image 1 de 2 Motorola Moto G3 Motherboard  Replacement, Prerequisite Guide: étape 1, image 2 de 2
    • Use the plastic opening tool to open the back cover as shown in the photo.

  2. Motorola Moto G3 Motherboard  Replacement: étape 2, image 1 de 1
    • Heat an iOpener in the microwave for 30 seconds.

    • Place the heated iOpener on all four edges of the screen for approximately 2 minutes.

  3. Motorola Moto G3 Motherboard  Replacement: étape 3, image 1 de 1
    • Apply the plastic opening tool on the edge of the screen near the front camera.

    • After creating enough space, allow the opening tool to be inserted on the side of the phone.

    • Create another space on the other side of the screen.

    • Leave the opening tool inserted.

    • Carefully apply the larger plastic opening tool by sliding it through the longer edge of the screen.

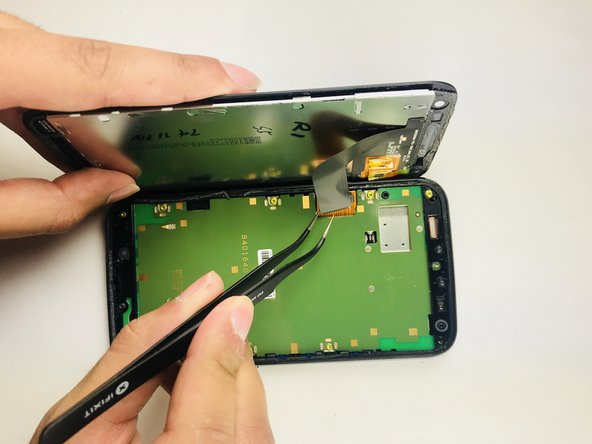
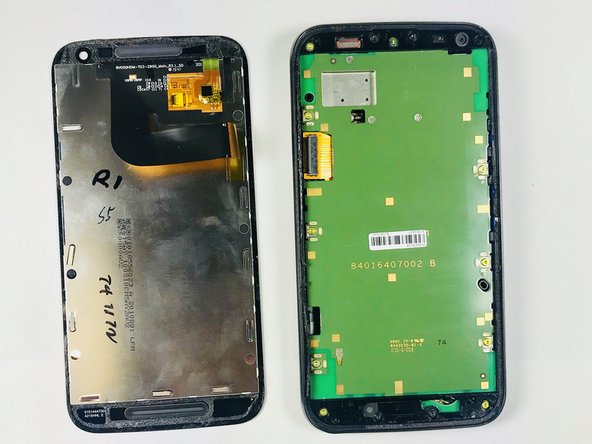
  4. Motorola Moto G3 Motherboard  Replacement: étape 4, image 1 de 3 Motorola Moto G3 Motherboard  Replacement: étape 4, image 2 de 3 Motorola Moto G3 Motherboard  Replacement: étape 4, image 3 de 3
    • A strip will be attached to the motherboard as shown.

    • Using tweezers, carefully detach the strip from the motherboard.

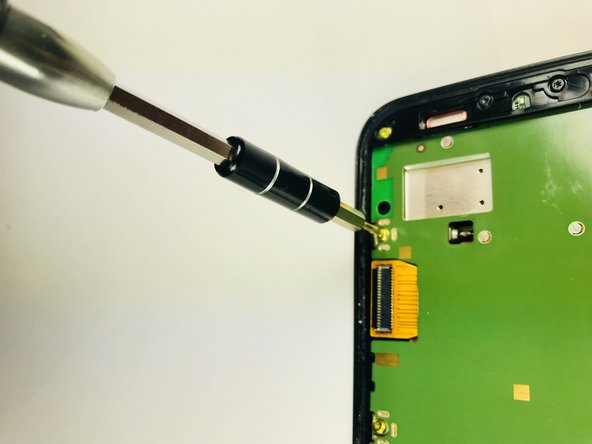
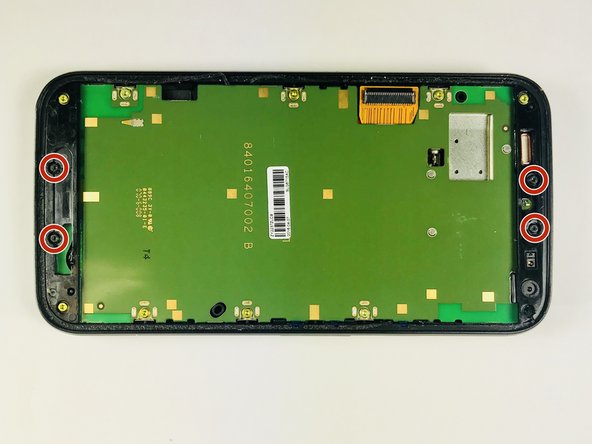
  5. Motorola Moto G3 Motherboard  Replacement, Motherboard: étape 5, image 1 de 3 Motorola Moto G3 Motherboard  Replacement, Motherboard: étape 5, image 2 de 3 Motorola Moto G3 Motherboard  Replacement, Motherboard: étape 5, image 3 de 3
    • With a T4 screwdriver, remove the10 "yellow" 2mm screws and 4 "black" 2mm screws.

  6. Motorola Moto G3 Motherboard  Replacement: étape 6, image 1 de 2 Motorola Moto G3 Motherboard  Replacement: étape 6, image 2 de 2
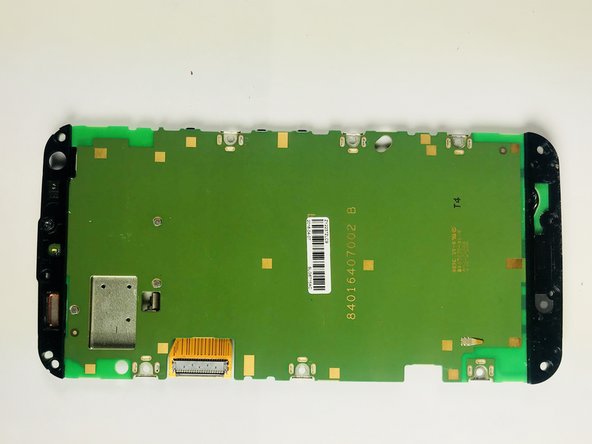
    • Use the metal spudger and lift the back cover on the bottom side of the phone (this is attached to the motherboard).

    • Remove the motherboard from the device.

Conclusion

To reassemble your device, follow these instructions in reverse order.

3 autres ont terminé cette réparation.

Irkan Notta

Membre depuis le 03/19/18

1 034 Réputation

7 tutoriels rédigés

Équipe

Baylor, Team S5-G3, Williams Spring 2018 Membre de l'équipe Baylor, Team S5-G3, Williams Spring 2018

BU-WILLIAMS-S18S5G3

3 membres

9 tutoriels rédigés

Un commentaire

i broke my battery connectig port where we plug in the battery. What should i do?

PLZ answer

All you need to Know (SAMMY) - Réponse

Ajouter un commentaire

Nombre de vues :

Dernières 24 heures : 0

7 derniers jours : 0

30 derniers jours : 0

Total : 471