Introduction
Le bouton home du Motorola Moto G5 plus peut cesser de fonctionner. Si vous constatez que le bouton d'accueil est bloqué et ne répond pas, utilisez ce guide pour le remplacer par un nouveau.
Ce dont vous avez besoin
-
-
Utilisez un embout ou un outil éjecteur de carte SIM, ou bien un trombone pour retirer la carte SIM de votre téléphone.
-
-
-
Préparez un iOpener et posez-le sur le bord gauche de l'écran du téléphone pendant environ deux minutes ou jusqu'à ce qu'il soit légèrement trop chaud au toucher. Cela contribuera à ramollir l'adhésif qui fixe l'écran.
Heat not only along the phone’s left edge, right?
I used two suction cups on the screen. Just above the finger print reader and the other near the top. Then used my heatgun set at 390 degrees. Low speed and had the wide, flat blade attachment so the heat spread to a narrow/wide area. Heated the left edge from corner to corner, then pulled up on the suction cups until I could work in a plastic triangle guitar-like-pic under the screen. Continued to heat and add another pick around the screen . Do not rush and take your time. Got the screen off and didn’t damage the adhesive too bad. Was able to reuse it. Once reassembled, I heated the screen around the edge and rubbed with a plastic tool to make sure the adhesive was working. So far so good with the adhesive. Good Luck!
-
-
-
Référez-vous à la deuxième et la troisième photo pour vous familiariser avec l'épaisseur de l'adhésif le long des bords de l'écran.
2mm ONLY on the SIDES of the display. The top can have adhesive as far as 10mm from the edge, and at the bottom as much as 12mm. And there’s no way to cut this adhesive with the tools at 45 degrees. Once the left side is open, carefully insert the tool a little further at a time on the top and bottom, whilst attempting to keep a little pull force on the suction cup. Hard to do, and almost inevitably the on-off button will be hit at some point unless you’re really careful. The adhesive pieces are quite tough, and I used a tiny scissors to cut some of the adhesive “ropes” when the case was far enough open. A highly detailed photo of the adhesive locations top and bottom (and on both parts) would help here. This is likely the most difficult step (well, don’t know for certain, ‘cause I haven’t got further yet…), and warrants better photos and explanation IMO.
-
-
-
Posez une ventouse sur l'écran, au milieu du bord gauche.
-
Tirez fermement et constamment sur la ventouse pour ouvrir un léger espace entre la dalle de l'écran et la coque arrière.
-
Si vous n'arrivez pas à soulever l'écran, même en faisant des gros efforts, chauffez plus pour continuer à ramollir l'adhésif et réessayez. L'adhésif refroidit rapidement, vous devrez donc peut-être faire chauffer plusieurs fois.
-
-
-
-
Continuez à couper l'adhésif sur les bords supérieur et droit du téléphone.
Pues se me fastidia la pantalla al hacer esto
This is a great guide except for one thing. My screen works fine but it is separating from the phone on both sides. I need to remove it just enough to clean up the old adhesive and reattach. The instructions on repeating the steps in reverse order to replace the screen doesn't help with getting the regluing right, what kind of glue or double sided tape to use, etc …
-
-
-
Une fois que tout l'adhésif a été tranché, soulevez soigneusement le bord gauche de l'écran.
-
Calez l'écran à la verticale contre une boîte pour éviter de déformer ou d'arracher les nappes de l'écran et du lecteur d'empreintes digitales.
-
-
-
Détachez l'autocollant jaune qui recouvre deux des vis cruciformes noires sous le haut-parleur interne.
Attention must be paid not to lose the small rubber gasket around the proximity sensor - I found it best to collect it with all the screws of the midframe and reinstall it at the end during re-assembly.
-
-
-
Dévissez les vis cruciformes suivantes du châssis central :
-
Seize vis noires de 3,8 mm
-
Trois vis argentées de 2,4 mm
Esa placa se levanta por el otro lado, por donde estan los botones de volumen por ahi se puede levantar de una mejor manera.
-
-
-
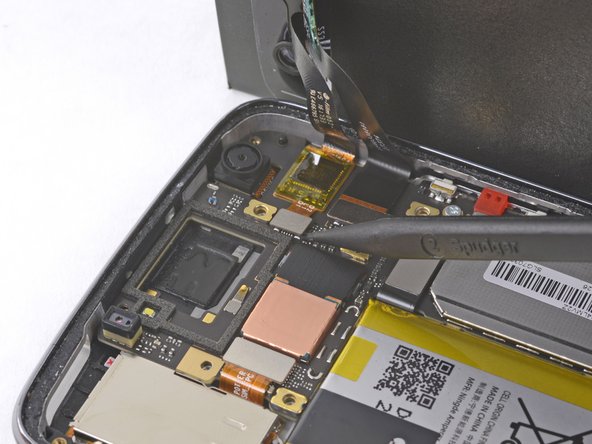
Insérez l'extrémité plate d'une spatule entre le châssis central et le bord gauche du téléphone, puis faites délicatement levier pour défaire les deux clips qui maintiennent le châssis central en place.
-
-
-
Ôtez l'ensemble écran du téléphone.
If your digitizer appears to be "dead", power down the phone (which you can't because the digitizer is dead) and disconnect the battery connector by prying the connector up out of its socket (with something NONE conductive like your spudge tool) for few seconds. (It does not "slide" out, but pries straight up.) This will FORCE a cold boot and initialize the digitizer WITHOUT a factory reset, preserving all setups and all your files. :-)
-
-
-
Retirez le bouton du capteur d'empreintes digitales de l'écran en le poussant avec vos doigts.
-


Pour remonter votre appareil, suivez ces instructions dans l'ordre inverse.
Pour remonter votre appareil, suivez ces instructions dans l'ordre inverse.
Annulation : je n'ai pas terminé ce tutoriel.
4 autres ont terminé cette réparation.
Merci à ces traducteurs :
100%
[deleted] nous aide à réparer le monde ! Vous voulez contribuer ?
Commencez à traduire ›
Équipe

USF Tampa, Team S1-G6, Leahy Fall 2017 Membre de l'équipe USF Tampa, Team S1-G6, Leahy Fall 2017
USFT-LEAHY-F17S1G6
5 membres
21 tutoriels rédigés
2 commentaires
Any way to just clean the edges of the sensor without taking apart the entire phone?
Finger print scanner connector port get completely damaged. is this the reason my phone is not getting started