Introduction
Use this guide to replace a dead or faulty battery in your Moto Z Force Droid.
Before you begin, download the Rescue and Smart Assistant app to backup your device and diagnose whether your problem is software or hardware related.
For your safety, discharge your existing battery below 25% before disassembling your phone. This reduces the risk of a dangerous thermal event if the battery is accidentally damaged during the repair.
If your battery is swollen, take appropriate precautions.
Ce dont vous avez besoin
-
-
Apply a heated iOpener to the lower glass panel on the back of the phone for five minutes.
-
-
-
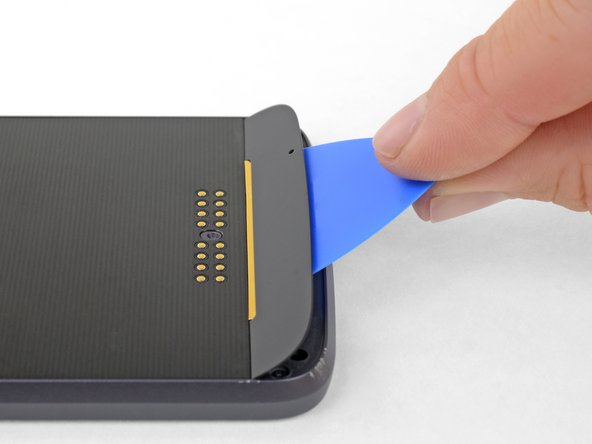
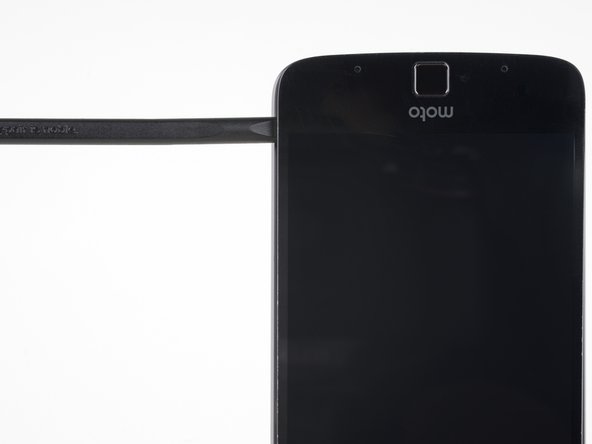
Insert an opening pick into the small gap between the rear case and the glass panel.
-
With tip of the pick under the glass panel, carefully pry upward to slightly separate the rear case and the panel.
The opening picks are too thick and weak to accomplish this step. Plan on breaking the glass with a knife and replacing it with new glass from ebay. Search Dogxiong For Motorola Moto Z/Moto Z Force Black Back Rear Battery Housing Top if the following link doesn’t work: https://www.ebay.com/i/123308522723?chn=...
This step was a challenge. The picks are quite thick. I ended up using a box cutter knife to carefully separate one corner. Then I used one of the picks to complete this procedure. Once I realized that this worked, I breathed a sigh of relief. Then I did the same thing for steps 5 & 6.
I used a single edge razor blade in a holder. This worked much better then trying to get a pick inserted. Also, you really have to get the panel warm to heat up the glue enough to break it loose.
I managed to remove the remove the panel without a heat gun, but I did carefully use a square end hobby knife blade to life the glass far enough to insert the pick. The adhesive is across the entire panel, so it does not feel like it is lifting correctly as only the local area will actually lift.
IO found the Jimmy from my iFixit tool kit worked well with the iOpener and letting the opener sit for about 10 minutes then using a pick to keep the glass separated.
iOpener then blow dryer. Used tweezers to lift the paper thin glass. Once I got movement I shoved the pick in to cut the rest of the glue.
If you use a back cover like me, don't worry about scratching these glass panels. They're entirely pointless and not visible to be honest.
Took maybe an hour to get through this part.
Agreed. Hope you play guitar…because these picks are worthless for anything else. Use an exacto knife or razor blades of some sort.
Boxcutter blade, hair dryer, and just bust the glass off. Not worth trying to save!
-
-
-
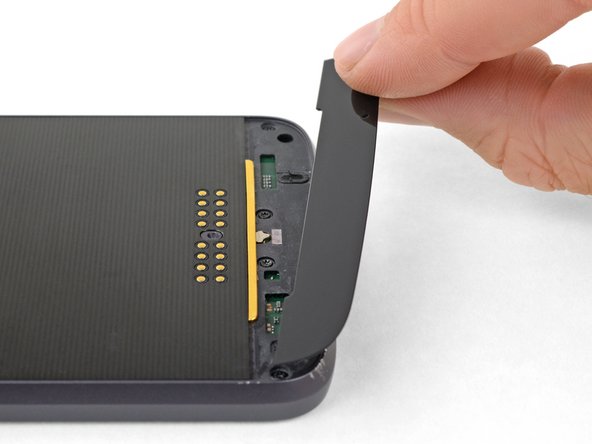
Slide the pick in between the panel and the rear case.
-
Slide the pick across the length of the panel to slice the adhesive holding it to the rear case.
I used the heat gun and it worked great.
-
-
-
Repeat the previous four heating and removal steps for the upper glass panel.
When cleaning the Glass Panes, DO NOT use metal tools, This will scrape the paint off of the back of the glass and damage the glass. Use of Alcohol helps loosen and remove the glue. I used a small plastic scraper and alcohol. Just takes a little bit of time.
I was unable to remove the top one with the tools provided. I ended up breaking the glass and had to take it piece by piece. It depends the age of the phone and how strong the adhesive was. You can buy replacements on eBay or Amazon ( https://www.amazon.com/Dogxiong-Battery-... ). I bought it while I was fixing the phone since I broke the glass.
The upper glass panel proved to be more tricky. The previous square end hobby knife blade kept breaking, so I had to get a new regular hobby knife blade, which still broke, but managed to pry the panel up enough to get the other blade and eventually the pick in it. Wear safety glasses when prying with a metal blade The entire panel has adhesive, but the right side when viewed in the above photo has less, so it should be easier to lift. Additional examination of the adhesive reveals that there is a small spot in the corner that does not have any adhesive, presumably to aid with disassembly.
Got it off but it is all broken up, The top is definitely better adhered than the bottom.
SO MUCH ADHESIVE!! Just break it off and get replacement glass for $7.
I was unable to get the adhesive off without breaking it using the iopener, but a heat gun did the trick real fast. would definitely recommend over the iopener
-
-
-
Remove the six 4 mm T3 Torx screws securing the display assembly.
Why did they give me a T5 when it clearly states a T3?
Good thing I had their other tool kit with all of the bits.
what do you do if one of the Torx screw heads falls apart so you can’t turn the screw?
I ground the head off with a very small Dremel grinding tip. I wil find out if I created any new problems when I connect the new battery. Not even sure the battery is the problem. My daughters phone just stopped working and wouldn’t turn on even when plugged in.
I guess if the battery isn’t the problem, then I cna’t make it any worse.
I ordered the sjtek kit:
“Motorola Moto Z Force Droid XLTE XT1650-02 Screen Replacement LCD Display Touch Screen Digitizer Glass Assembly Parts 5.5" AMOLED Black with Frame”
It came with the wrong sized screwdriver as the previous poster described. By the time I could tell something was wrong with the screwdriver, I had two stripped screw heads. Don’t order this kit unless you have your own set of phone repair tools
@ewb62 The iFixit kit includes both the T3 and T5 driver bits—however, the T3 is commonly packed in the parts tray, rather than the tools tray with the other driver bits. Check the entire package carefully and you should find it. If not, contact customer support so they can ship the missing bit out to you ASAP. Sorry for the confusion!
I have the T5!!! Where's the T3??? Unbelievable.
So now what?
Never mind. I ordered the wrong kit. The Z force has the 4 bits
-
-
-
-
Use a finger to maintain separation between the display assembly and the rear case while you remove the spudger.
-
Reinsert the flat end of the spudger in the gap between the display assembly and the rear case.
I broke the display and had to buy another one because I didn't realize this part is 3- layered. I accidentally separated the glass from the digitizer. : ( so make sure you pop out the entire thicknesses with the spudger before you try lifting it away from the phone.
-
-
-
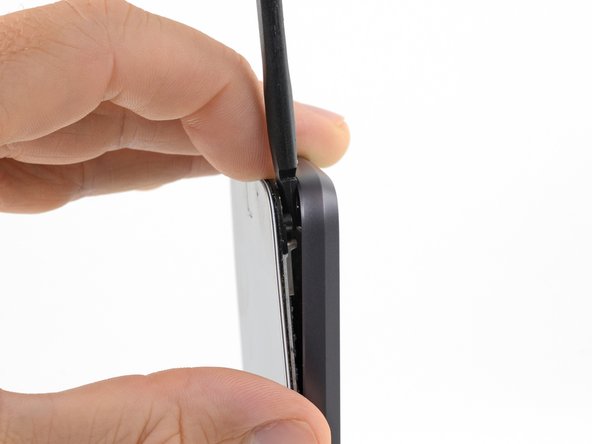
Slide the spudger along the side of the phone until you get to the clip securing the display to the rear case.
-
With the spudger right next to the clip, carefully twist the spudger to pry the display away from the rear case and release the clip.
If it is being difficult, confirm that you have removed all 6 (SIX) screws. This is from personal experience.
BECAREFUL twisting the spudger. You need to be right on the clip. If you are too far away from the clip you will crack the LCD screen from the inside (happened to me and ended up having to buy a new screen). I found a video where it shows working one of the picks all the way around the screen first to separate the glue / sealant that is used FIRST. then you can locate the clips easier Prying after all the glue is worked loose make it sperate a lot easier.
HINT - The clip on the button side is not in the middle of the side it is slightly higher towards the Power button. The left side (no buttons) the clip is directly in the middle of the side.
-
-
-
Repeat the separation and prying process for the other side of the phone.
On this side, I got the spudger 1/2 way up, and it wouldn’t give. I wound up working around from the other side, then down from the top to finally release it. It felt like the tension was released after everything else came out, and it popped right out. jml.
Clips are a broad term. No pictures of what to release and how. Ruined digitizer following these instructions.
-
-
-
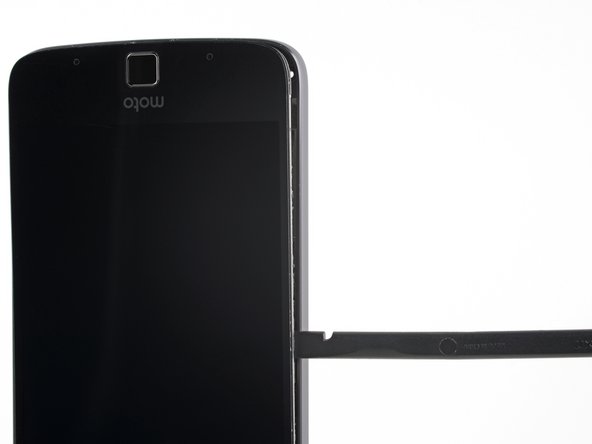
Tilt the top right corner of the display down to disengage one of the tabs that secure the top of the display.
-
Tilt the other corner down next, to disengage the other tab.
I also agree with this. I just kept shaking things until it loosened. Getting it back on was just as a struggle and took some forcing.
I found the previous step wasn’t clear enough about prying the screen past the midway point once you get to those 2 side tabs. I used the pick to keep separating the screen past those side tabs up until I reached the top corners. Then I laid the phone down, screen side up. I held onto the metal frame with one hand, and with my other hand I grasped the screen near the bottom side (by the fingerprint reader) and gently wriggled the screen left and right, with slight pressure in the direction of the fingerprint reader, and a little torque in the direction of opening in the “book” layout shown above. Voila! Opened like a charm.
-
-
-
Lift the right edge of the display to hinge the phone open like a book, no more than 45°.
-
Gently lift the display enough to clear the clip from the edge of the rear case, maintaining the 45º angle.
-
Rest the display on the table behind the phone and open to 90º to allow access to the display cable.
Note that there are several strips of glue along the edges of the display which will need to be reapplied during reassembly.
During reassembly (once you have put the display cable back into its socket), I recommend plugging the charger cable into the phone for a few seconds to see if you see the lightening bolt (charging indicator) on the front panel. This will allow you to be certain that, both, the battery and display connectors have been properly and securely connected.
-
-
-
Use the flat end of a spudger to lift the display cable connector up out of its socket.
-
-
-
Use tweezers to peel the black tape on the top of the battery up from the motherboard EMI shielding.
Someone way more delicate than me may be able to remove this tape without ripping it, but I would love to meet that person and verify they are working on a phone that is more than a few days old. the tape on my phone was glued way too much to get it to peel without ripping. Order more tape.
I personally gave up on the tape. I’m not delicate, that much became clear. But really, of all the things, I’d rather just replace the tape.
I ripped the tape as well, but was able to use it again (hopefully). I don’t know if it completed a circuit or not but we will see how important it is.
-
-
-
Use tweezers to gently peel the battery pull tab up enough to grab.
-
Use your fingers to grip the battery pull tab and lift the battery up from the phone.
-
If the pull tab breaks, use the flat end of a spudger or an old credit card to pry up carefully on the edges of the battery until it comes loose.
I agree with the above comment. My battery came out bent after trying to pry it so much.
-
-
-
Remove the battery.
It is a good idea to reconnect the Display and check to see if the battery will charge and the system turns on prior to reassembly. This makes sure that your battery connection is good and that your display connection is good. You don’t want to reassemble the phone only to find out your battery connection isn’t good. Just note that the speakers only work once the display is in place and is making contact with the back board. Testing the battery and display may warrant being another step or section.
totally failed. The display cable is ripped. Very Frustrated!
The second piece of black tape on the battery will be ripped when removed as it goes under the PCB.
That happened to me as well. It was only after I tore it that I realised that I could have simply carefully peeled it off the battery first and avoided tearing it, or at least avoided tearing it completely.
Aaron -
I found the easiest way to remove adhesive was to use a plastic spudger as an applicator for 91% isopropyl alcohol. Then, I would use the spudger to scrape the adhesive off. Applying the alcohol to it as needed before hand loosened it considerably and it would come off relatively easily as a black goo. I also found that dipping the spudger in alcohol before and as needed while scraping helped accelerate what is admittedly a tedious process. Small, loose parts such as the battery connector cover can simply be soaked in alcohol to loosen the adhesive before scraping it off with a spudger.
-


To reassemble your device, follow the above steps in reverse order.
After completing this guide, calibrate your newly-installed battery.
Take your e-waste to an R2 or e-Stewards certified recycler.
Repair didn’t go as planned? Check out our Answers community for troubleshooting help.
To reassemble your device, follow the above steps in reverse order.
After completing this guide, calibrate your newly-installed battery.
Take your e-waste to an R2 or e-Stewards certified recycler.
Repair didn’t go as planned? Check out our Answers community for troubleshooting help.
Annulation : je n'ai pas terminé ce tutoriel.
40 autres ont terminé cette réparation.

14 commentaires
You mention discharging the battery below 25%, but my battery is at the point where it shuts off within 30 seconds if it isn’t plugged into a power source. The charge percentage on my phone always hovers just below 100% if plugged in, but if I unplug it and try to turn it on several times without an adequate power source that percentage can vary wildly. Should I just assume at this point that if it isn’t plugged in and has shut off on its own, it’s discharged?
Hi Greg, if the phone shuts off on its own, it’s usually safe to assume the battery is drained below 25%. It sounds like there’s a problem with the control board on your battery causing a faulty capacity reading. As always, be careful not to bend or puncture the battery. Discharging the battery is a precaution to prevent a thermal event if the battery is punctured, but the best safety measure you can take is to just handle the battery carefully. Good luck on your repair!
Only issue I ran into, and no fault of the author, was the little glass top panel. Cracked it to oblivion with one slip. But ebay has replacements for $9 for the set, so can’t complain. The rest of the description was FANTASTIC and got me through the installation with no problem. Took and hour total. Thank you!
The user comments greatly expanded the already decent instructions; READ THEM! IMHO, just buy the back glass beforehand. Once I broke the bottom one and ordered replacements, the job moved right along. I took about 1:45, most of which I spent heating those two stupid little pieces of glass.
Great instructions. Took 2 full hours but had problem with one of the 6 screws stripped head, had to drill it out, yuck. Besides that, this requires considerable patience and dexterity, but it does work. Just take your time and take a breather part way through to keep from stressing and messing it up.
Instructions were perfect but I wish they would also go through the reassembly and talk about how much adhesive is needed and the best way to cut and place it.
I’ve got a Moto z force droid here that was drawing no power, replaced the battery and I’m getting a fairly steady 0.25 A draw. I have tried another replacement battery and have the same issue. Just looking for data recovery from this device, any ideas anyone?
From start to finish, this is definitely not an easy DIY. It will probably take at 2 hours to attempt this. This is a great tutorial to see what's ahead. If you get impatient or frustrated, walk away and try again later. There's so many risks for bringing your phone at each step. Make sure to have a super thin metal putty knife to lift the top and bottom glass pieces
Great instructions! I ran into issues with the adhesive that was previously applied. My device was refurbished, the screen and battery dates didn’t match(over a year apart), and 1 of the 6 screws were missing. The hardest part was getting the top and bottom panels off. Just use and reuse the iOpener many many times! The heat helps a lot Also be sure to apply some adhesive to the display cable connector or it might disconnect from the board when you’re moving the screen back into place.
I replaced the battery in my Moto Z force, but now it will not charge and reports low battery temperature -32. What did I do wrong?
Hi Sandy,
Check and re-seat the battery connector. If you still have your original battery, temporarily re-connect it and see if the issue persists. If it does, you may have received a defective replacement battery.
I have a Moto Z Force 2 from T-Mobile. The battery swole the screen off back in mid 2019. I’ve ordered 2 replacement batteries that only work if I physically hold them in place. The moment I let go the connector unseats itself. I addition I’ve lost the little plastic piece that holds the battery down, not that it helped it all with the problem. the moment I would try to place the screen back on, it would disconnect and not start.
It was a nice phone while it lasted, To bad that was only 1 1/2 years. I only went with it because of the promise of the Force physical keyboard add one. That was of course sabotaged my Motorola.
I will never again buy a phone I can’t replace the battery one. A battery that holds a charge for days, is no replacement for one that can be replaced for years.
Battery jack remove is motherboard direct jumper wire connect solution please.....
I was unable to get the iOpener to heat the glass panes hot enough to loosen the glue. I was able to use a heat gun. Just heat it on low setting for about 1.5 min. (Any longer and you risk damaging the phone.
Kimball Marston - Réponse
I heated the iOpener several times to no avail. Then when i switched from the pick to a box cutter (see my comment on next step) it turned out that the glue WAS heated enough.
Michael Roland - Réponse
I agree with the heat gun. Only needed to use it on low for a few seconds. iOpener did not work, ended up using an exacto knife and heat gun after breaking the bottom glass. Found the replacement glass on Amazon for 6.99 for both pieces.
zx12bullet - Réponse
I did this with the iOpener, about 45 seconds on a 1200W+ microwave. The mistake I made was not realizing how thin the glass is. Think paper thin. You do not have to dig far to get into it. I did peel off a protective outer plastic that was on both of mine. Shattered the top one, learned, bottom one came out without issues.
Paul Porter - Réponse
The iOpener was completely useless. use he heat gun as suggested above.
Patrick Connerney - Réponse
Before you start, get some 91% Isopropyl Alcohol from the drug store, find an 1800 watt hair dryer and a box cutter blade, and order the replacement glass pieces from ebay or amazon. Once you have it all, put some alcohol on the edges, wait a couple of minutes, heat the glass for 30-60 sec with the hair dryer, and bulldoze the glass pieces with the blade and spudger. Unless you value your time at less than $7/hr, you’ll be happy you didn’t bother trying the 1% chance to save the original glass.
Udo Dirkschneider - Réponse