Aller au contenu principal

Motorola RAZR2 v9m SD Card Replacement

  1. Motorola RAZR2 v9m SD Card Replacement, Battery: étape 1, image 1 de 2 Motorola RAZR2 v9m SD Card Replacement, Battery: étape 1, image 2 de 2
    • Push the rear cover toward the hinge of the RAZR2. The panel will slide about 3 mm.

  2. Motorola RAZR2 v9m SD Card Replacement: étape 2, image 1 de 3 Motorola RAZR2 v9m SD Card Replacement: étape 2, image 2 de 3 Motorola RAZR2 v9m SD Card Replacement: étape 2, image 3 de 3
    • Pinch the top and bottom edges of the panel and pull it away from the RAZR2.

    • The rear panel uses four small hooks to hold it in place. If the panel will not easily pull away, slide the panel more toward the hinge.

  3. Motorola RAZR2 v9m SD Card Replacement: étape 3, image 1 de 2 Motorola RAZR2 v9m SD Card Replacement: étape 3, image 2 de 2
    • Gently pull the white plastic tab to lift the battery away from the RAZR2.

    • The white plastic tab is attached to the phone. Only pull it enough to expose the edges of the battery.

  4. Motorola RAZR2 v9m SD Card Replacement: étape 4, image 1 de 2 Motorola RAZR2 v9m SD Card Replacement: étape 4, image 2 de 2
    • To remove the battery, grasp its edges pull away from the phone.

    • When installing a new battery, be sure the metal contacts on the phone line up with the ones on the battery.

  5. Motorola RAZR2 v9m SD Card Replacement, SD Card: étape 5, image 1 de 2 Motorola RAZR2 v9m SD Card Replacement, SD Card: étape 5, image 2 de 2
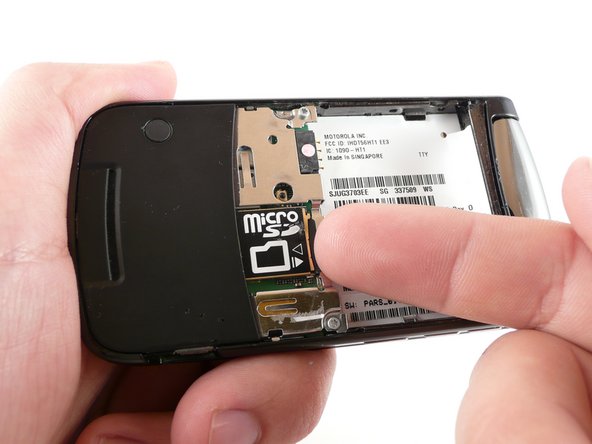
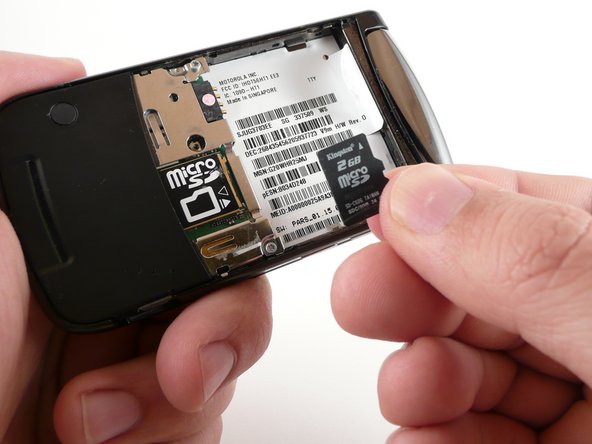
    • Press the exposed portion of the SD card towards the bottom of the phone until you hear a click. The SD card will slide into the phone about 10 mm.

  6. Motorola RAZR2 v9m SD Card Replacement: étape 6, image 1 de 2 Motorola RAZR2 v9m SD Card Replacement: étape 6, image 2 de 2
    • Release the SD card. A spring will push it partially out of the phone.

    • Grasp the card by the edges and remove.

    • When installing a new SD card, remember that it must be 2 GB or less.

Conclusion

To reassemble your device, follow these instructions in reverse order.

Une autre personne a terminé cette réparation.

John T Roller

Membre depuis le 06/04/13

800 Réputation

6 tutoriels rédigés

0 commentaires

Ajouter un commentaire

Nombre de vues :

Dernières 24 heures : 1

7 derniers jours : 1

30 derniers jours : 2

Total : 786