Aller au contenu principal

Motorola RIZR Z3 Screen Replacement

Ce dont vous avez besoin

  1. Motorola RIZR Z3 Screen Replacement, Battery: étape 1, image 1 de 2 Motorola RIZR Z3 Screen Replacement, Battery: étape 1, image 2 de 2
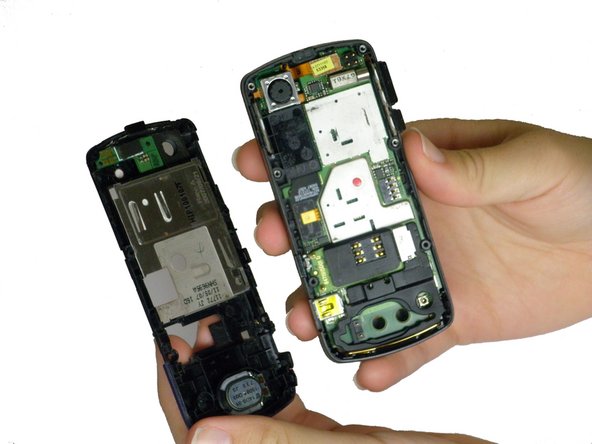
    • Press the panel release button on the top of the phone and simultaneously pull the rear panel away from the phone.

  2. Motorola RIZR Z3 Screen Replacement: étape 2, image 1 de 2 Motorola RIZR Z3 Screen Replacement: étape 2, image 2 de 2
    • Tilt the battery by lifting at the exposed notch.

    • Slide the battery out of its casing.

  3. Motorola RIZR Z3 Screen Replacement, Motherboard: étape 3, image 1 de 1
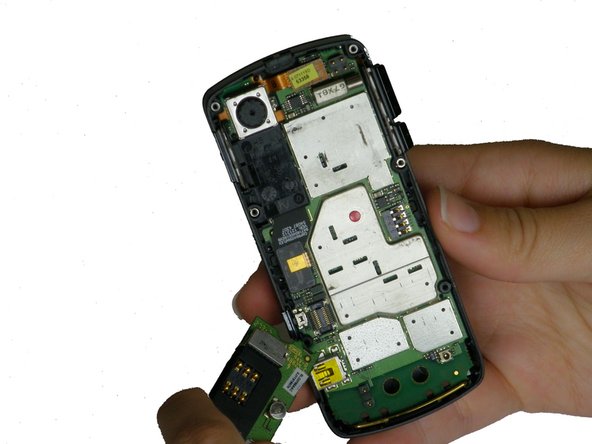
    • Use a T4 screwdriver to unscrew all six of the .216 inch screws that attach the housing to the case.

  4. Motorola RIZR Z3 Screen Replacement: étape 4, image 1 de 2 Motorola RIZR Z3 Screen Replacement: étape 4, image 2 de 2
    • Use a plastic opening tool to lift the plastic casing.

    • Pull the plastic casing directly away from the phone.

  5. Motorola RIZR Z3 Screen Replacement: étape 5, image 1 de 1
    • Lift the black rubber loudspeaker housing up and out of the plastic casing.

  6. Motorola RIZR Z3 Screen Replacement: étape 6, image 1 de 2 Motorola RIZR Z3 Screen Replacement: étape 6, image 2 de 2
    • Use a plastic opening tool to gently lift up the SIM card reader, located above the rubber antenna casing. You should hear a click as it releases.

    • Caution: Remove carefully, if broken, the phone will not be able to make calls.

  7. Motorola RIZR Z3 Screen Replacement: étape 7, image 1 de 2 Motorola RIZR Z3 Screen Replacement: étape 7, image 2 de 2
    • Use a plastic opening tool to pry the two ribbon cable connectors, unclipping them from their sockets on the motherboard.

    • Caution: Remove carefully, if broken, the phone will not function properly.

  8. Motorola RIZR Z3 Screen Replacement: étape 8, image 1 de 2 Motorola RIZR Z3 Screen Replacement: étape 8, image 2 de 2
    • Use a plastic opening tool to gently pry the motherboard up until you can tilt it with your fingers. Unhook it from the casing and slowly pull it out.

    • Caution: Do this gently Unclipping too fast may cause damage to your phone.

  9. Motorola RIZR Z3 Screen Replacement, Screen: étape 9, image 1 de 1
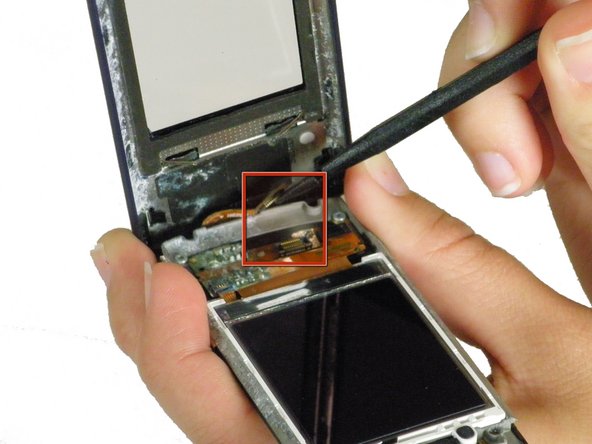
    • Turn the phone to the front.

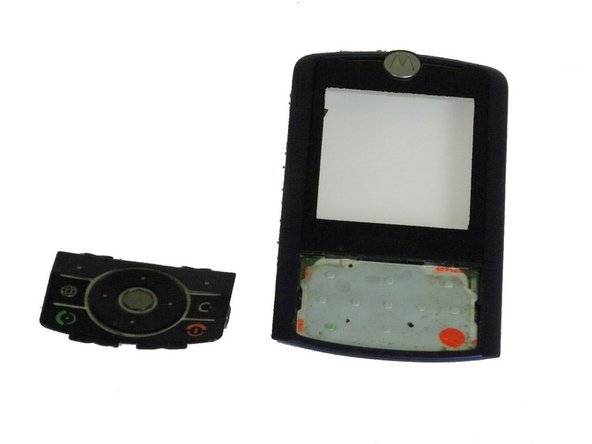
    • Push the keypad out through the plastic casing.
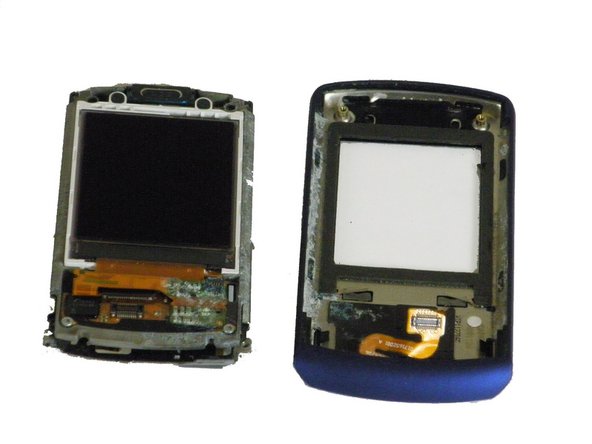
  10. Motorola RIZR Z3 Screen Replacement: étape 10, image 1 de 1
    • Turn the phone to the side.

    • Thread the hinges of the slider through their holes in the casing and pull the slider down and away from the casing.

  11. Motorola RIZR Z3 Screen Replacement: étape 11, image 1 de 1
    • Use a T4 screwdriver to unscrew the two .15 inch screws holding the LCD to the faceplate.

  12. Motorola RIZR Z3 Screen Replacement: étape 12, image 1 de 3 Motorola RIZR Z3 Screen Replacement: étape 12, image 2 de 3 Motorola RIZR Z3 Screen Replacement: étape 12, image 3 de 3
    • Use a spudger to pry the plastic screen casing partially up from the LCD unit.

    • Use the spudger to pry the ribbon cable away from its clip on the LCD unit.

    • Caution: If the LCD will not function properly if this ribbon cable is broken.

    • Pull the plastic screen casing directly away from the LCD unit.

  13. Motorola RIZR Z3 Screen Replacement: étape 13, image 1 de 1
    • Turn the plastic screen casing over.

    • Carefully use a spudger to push the on the two clips holding the navigational pad in place.

    • You may have to pry the pad away from the plastic screen casing with the spudger.

  14. Motorola RIZR Z3 Screen Replacement: étape 14, image 1 de 2 Motorola RIZR Z3 Screen Replacement: étape 14, image 2 de 2
    • Use a plastic opening tool to pry the screen up, being mindful of the glue holding the screen to its casing.

    • Pull the screen directly away from the casing.

Conclusion

To reassemble your device, follow these instructions in reverse order.

Brooke Shuford

Membre depuis le 10/10/11

65 Réputation

3 tutoriels rédigés

Équipe

Cal Poly, Team 5-34, Amido Fall 2011 Membre de l'équipe Cal Poly, Team 5-34, Amido Fall 2011

CPSU-AMIDO-F11S5G34

4 membres

6 tutoriels rédigés

0 commentaires

Ajouter un commentaire

Nombre de vues :

Dernières 24 heures : 0

7 derniers jours : 0

30 derniers jours : 1

Total : 1,352