Aller au contenu principal

Motorola Razr V3c Screen (CDMA) Replacement

Ce dont vous avez besoin

  1. Motorola Razr V3c Screen (CDMA) Replacement, Upper Casing (CDMA): étape 1, image 1 de 1
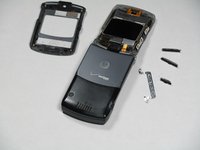
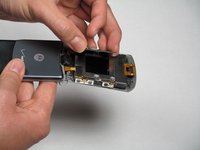
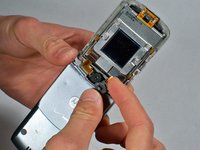
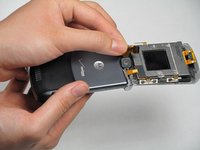
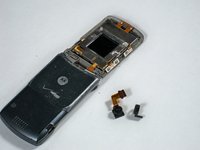
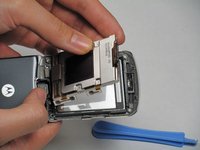
    • Remove the four rubber pieces from all corners of the area around the screen.

  2. Motorola Razr V3c Screen (CDMA) Replacement: étape 2, image 1 de 1
    • Use a T4 screwdriver to carefully unscrew all four screws on the outer screen.

    • Be sure that you do not strip or damage the screws.

  3. Motorola Razr V3c Screen (CDMA) Replacement: étape 3, image 1 de 1
    • Carefully pry the screen away from the phone using a plastic spudger.

    • Pry slowly, as too much bending will crack the screen. There are also two fragile ribbon cables that connect the screen and camera to the phone.

  4. Motorola Razr V3c Screen (CDMA) Replacement: étape 4, image 1 de 3 Motorola Razr V3c Screen (CDMA) Replacement: étape 4, image 2 de 3 Motorola Razr V3c Screen (CDMA) Replacement: étape 4, image 3 de 3
    • Take the screen housing off of the casing.

    • Watch for small pieces falling out of the screen during this step. Keep track of these pieces.

  5. Motorola Razr V3c Screen (CDMA) Replacement, Camera (CDMA): étape 5, image 1 de 2 Motorola Razr V3c Screen (CDMA) Replacement, Camera (CDMA): étape 5, image 2 de 2
    • Pry screen cover off with plastic opening tool.

    • The screen cover has some adhesive holding it to the screen.

  6. Motorola Razr V3c Screen (CDMA) Replacement: étape 6, image 1 de 1
    • Remove small black sticker covering the camera ribbon connector.

  7. Motorola Razr V3c Screen (CDMA) Replacement: étape 7, image 1 de 1
    • Flip over small hinge that covers the camera ribbon connection.

  8. Motorola Razr V3c Screen (CDMA) Replacement: étape 8, image 1 de 3 Motorola Razr V3c Screen (CDMA) Replacement: étape 8, image 2 de 3 Motorola Razr V3c Screen (CDMA) Replacement: étape 8, image 3 de 3
    • Pull off the rubber camera cover and camera.

    • The camera and camera cover may come off either separately or together.

  9. Motorola Razr V3c Screen (CDMA) Replacement, Screen (CDMA): étape 9, image 1 de 1
    • Disconnect the metallic ribbon cover.

  10. Motorola Razr V3c Screen (CDMA) Replacement: étape 10, image 1 de 2 Motorola Razr V3c Screen (CDMA) Replacement: étape 10, image 2 de 2
    • Remove and replace the screen.

Ligne d'arrivée

Une autre personne a terminé cette réparation.

Joshua Ruehlig

Membre depuis le 01/14/10

506 Réputation

4 tutoriels rédigés

Équipe

Cal Poly, Team 11-4, Forte Winter 2010 Membre de l'équipe Cal Poly, Team 11-4, Forte Winter 2010

CPSU-FORTE-W10S11G4

3 membres

8 tutoriels rédigés

Un commentaire

Is it a T5 or a T4 for removing the screws?

Francis Reyes - Réponse

Ajouter un commentaire

Nombre de vues :

Dernières 24 heures : 0

7 derniers jours : 0

30 derniers jours : 3

Total : 9,385