Cette version peut contenir des modifications incorrectes. Passez au dernier aperçu vérifié.
Ce dont vous avez besoin
-
Cette étape n’est pas traduite. Aidez à la traduire
-
Turn off your phone before beginning disassembly.
-
To replace the Front Panel, first begin by removing the battery.
-
Push down on the black tab located on the top center of the phone to access the battery.
-
-
Cette étape n’est pas traduite. Aidez à la traduire
-
Remove the battery by pulling it away from the back of the phone.
-
-
Cette étape n’est pas traduite. Aidez à la traduire
-
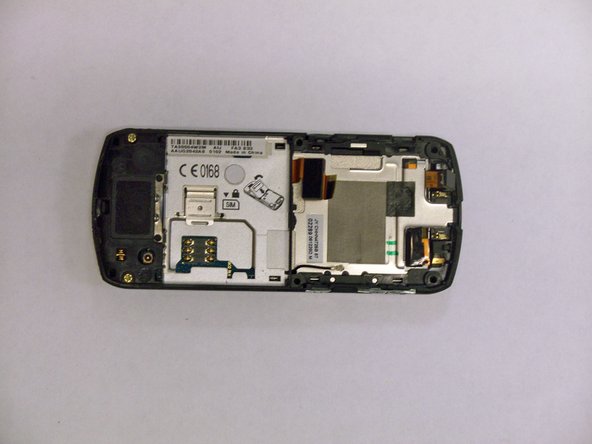
Using the T6 Torx Screwdriver, remove the four (4) T6 2mm Torx screws from the metal cover.
-
-
-
Cette étape n’est pas traduite. Aidez à la traduire
-
Remove the metal cover by inserting the flat end of the iFixit Opening Tool under the side of the cover, prying it away from the phone.
-
-
Cette étape n’est pas traduite. Aidez à la traduire
-
Carefully disconnect the two connectors from their sockets located on the motherboard using the flat end of the iFixit Opening Tool.
-
-
Cette étape n’est pas traduite. Aidez à la traduire
-
Use the flat end of the iFixit Opening Tool to pry the antenna cable connectors from their sockets located on the motherboard.
-
Pull the antenna cable out to de-route it from the phone.
-
-
Cette étape n’est pas traduite. Aidez à la traduire
-
Use the iFixit Opening Tool to pry the black plastic screw cover away from the bottom of the phone.
-
-
Cette étape n’est pas traduite. Aidez à la traduire
-
Remove the frame by inserting the flat end of the iFixit Opening Tool under the frame and prying it away from the phone.
-


Annulation : je n'ai pas terminé ce tutoriel.
2 autres ont terminé cette réparation.
Équipe

CSU Los Angeles, Team 1-1, Nelson Spring 2011 Membre de l'équipe CSU Los Angeles, Team 1-1, Nelson Spring 2011
CSULA-NELSON-S11S1G1
2 membres
4 tutoriels rédigés