Aller au contenu principal

Motorola V276 Headphone Jack Replacement

Ce dont vous avez besoin

  1. Motorola V276 Headphone Jack Replacement, Battery: étape 1, image 1 de 1
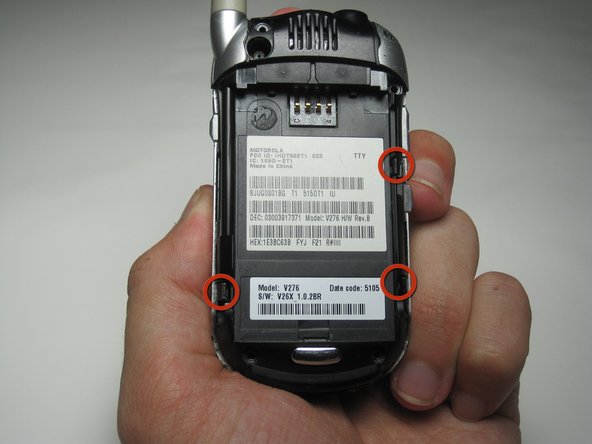
    • Locate the silver button on the back of the phone, near the bottom.

    • Depress the silver button with one hand and slide the back cover of the phone away from the antenna.

    • The back cover should slide off easily.

  2. Motorola V276 Headphone Jack Replacement: étape 2, image 1 de 1
    • Insert a plastic spudger near one corner of the battery (preferably one furthest from the phone's antenna).

    • Gently pry the battery up and away from the phone. The battery should easily raise out of its place.

    • Now that the battery is exposed, use your fingers to remove the it from the phone.

  3. Motorola V276 Headphone Jack Replacement: étape 3, image 1 de 2 Motorola V276 Headphone Jack Replacement: étape 3, image 2 de 2
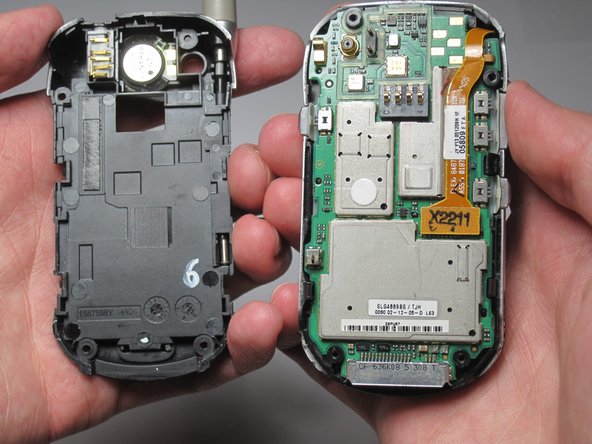
    • Note the metal connections on the phone, which are now exposed with the battery removed.

    • There are corresponding metal connectors on the replacement battery.

    • When you install the battery, be sure both connectors are matched up. Otherwise, your battery will be unable to supply power to your phone.

  4. Motorola V276 Headphone Jack Replacement, Headphone Jack: étape 4, image 1 de 1
    • Use Spudger to remove rubber plug from upper left corner of the back of the phone

  5. Motorola V276 Headphone Jack Replacement: étape 5, image 1 de 1
    • Using a Hex T6 screwdriver, remove the 4 screws holding the back plate of the phone in place

  6. Motorola V276 Headphone Jack Replacement: étape 6, image 1 de 3 Motorola V276 Headphone Jack Replacement: étape 6, image 2 de 3 Motorola V276 Headphone Jack Replacement: étape 6, image 3 de 3
    • Using your hands, pull up on the back plate while pulling on the 3 side tabs to remove the back plate.

    • Be careful when removing the back plate; don't put too much stress on the back plate or the plastic may snap

  7. Motorola V276 Headphone Jack Replacement: étape 7, image 1 de 1
    • On the back casing, using a spudger, push into the headphone jack at an upward angle to pop it out

Conclusion

To reassemble your device, follow these instructions in reverse order.

Jason Kilroy

Membre depuis le 04/11/10

1 Réputation

3 tutoriels rédigés

Équipe

Cal Poly, Team 27-96, Amido Spring 2010 Membre de l'équipe Cal Poly, Team 27-96, Amido Spring 2010

CPSU-AMIDO-S10S27G96

4 membres

15 tutoriels rédigés

0 commentaires

Ajouter un commentaire

Nombre de vues :

Dernières 24 heures : 0

7 derniers jours : 1

30 derniers jours : 1

Total : 864