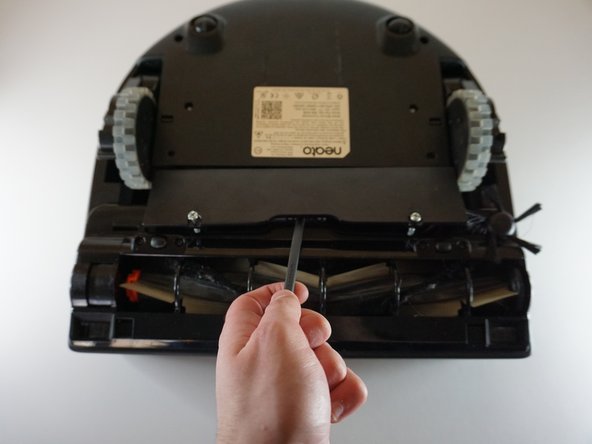
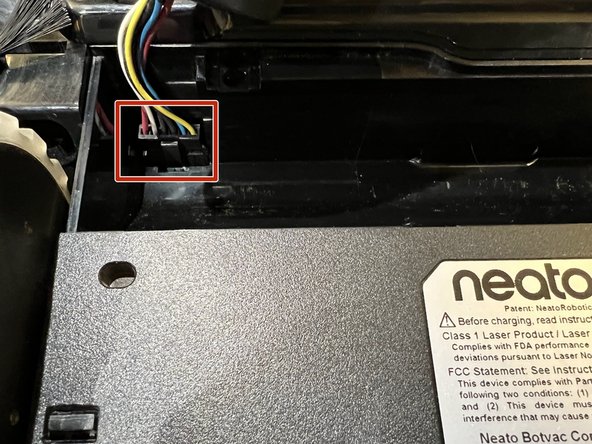
Aller au contenu principal

Neato BOTVAC CONNECTED Battery Replacement

Ce dont vous avez besoin

  1. Neato BOTVAC CONNECTED Battery Replacement, Battery: étape 1, image 1 de 1
    • Place the top of the Neato Botvac Connected against a flat surface.

  2. Neato BOTVAC CONNECTED Battery Replacement: étape 2, image 1 de 2 Neato BOTVAC CONNECTED Battery Replacement: étape 2, image 2 de 2
    • Remove the two 5.5 mm screws with a Phillips #2 screwdriver.

  3. Neato BOTVAC CONNECTED Battery Replacement: étape 3, image 1 de 2 Neato BOTVAC CONNECTED Battery Replacement: étape 3, image 2 de 2
    • Using the spudger, remove the panel covering the battery.

  4. Neato BOTVAC CONNECTED Battery Replacement: étape 4, image 1 de 3 Neato BOTVAC CONNECTED Battery Replacement: étape 4, image 2 de 3 Neato BOTVAC CONNECTED Battery Replacement: étape 4, image 3 de 3
    • Gently remove the connecting wires attached to the battery.

    • The wires are attached to the vacuum through a clip.

  5. Neato BOTVAC CONNECTED Battery Replacement: étape 5, image 1 de 1
    • Using the spudger, gently remove the battery from the device.

Conclusion

To reassemble your device, follow these instructions in reverse order.

Justin Silva

Membre depuis le 03/20/23

645 Réputation

5 tutoriels rédigés

Équipe

UMass Dartmouth, Team 6-3, Botvin Spring 2023 Membre de l'équipe UMass Dartmouth, Team 6-3, Botvin Spring 2023

UMASSD-BOTVIN-S23S6G3

4 membres

5 tutoriels rédigés

0 commentaires

Ajouter un commentaire

Nombre de vues :

Dernières 24 heures : 1

7 derniers jours : 6

30 derniers jours : 33

Total : 348