Aller au contenu principal

Nerf N-Strike Elite Rough Cut 2x4 Springs Replacement

Ce dont vous avez besoin

  1. Nerf N-Strike Elite Rough Cut 2x4 Springs Replacement, Springs: étape 1, image 1 de 2 Nerf N-Strike Elite Rough Cut 2x4 Springs Replacement, Springs: étape 1, image 2 de 2
    • Remove three screws with a Phillips #1 screwdriver.

    • Remove the pump grip.

  2. Nerf N-Strike Elite Rough Cut 2x4 Springs Replacement: étape 2, image 1 de 1
    • Remove thirteen highlighted screws using a Phillips #1 screwdriver.

    • The top rail has shorter screws than the rest.

    • Some of these are captive screws and cannot be removed.

  3. Nerf N-Strike Elite Rough Cut 2x4 Springs Replacement: étape 3, image 1 de 3 Nerf N-Strike Elite Rough Cut 2x4 Springs Replacement: étape 3, image 2 de 3 Nerf N-Strike Elite Rough Cut 2x4 Springs Replacement: étape 3, image 3 de 3
    • Remove the backside by sliding the plastic spudger across the seam.

    • There are loose parts that can fall out. Take these off and put them aside.

  4. Nerf N-Strike Elite Rough Cut 2x4 Springs Replacement: étape 4, image 1 de 3 Nerf N-Strike Elite Rough Cut 2x4 Springs Replacement: étape 4, image 2 de 3 Nerf N-Strike Elite Rough Cut 2x4 Springs Replacement: étape 4, image 3 de 3
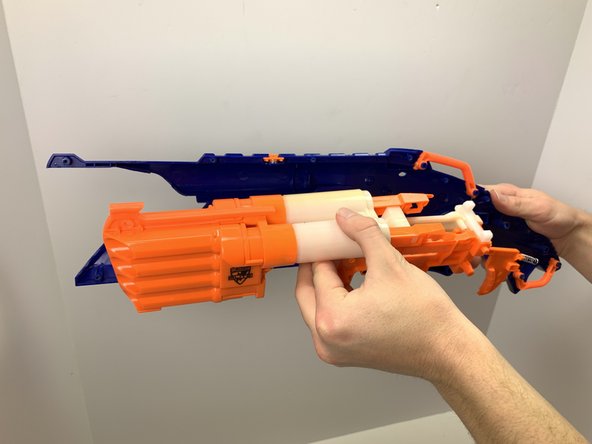
    • Separate the trigger mechanism from the barrel.

  5. Nerf N-Strike Elite Rough Cut 2x4 Springs Replacement: étape 5, image 1 de 3 Nerf N-Strike Elite Rough Cut 2x4 Springs Replacement: étape 5, image 2 de 3 Nerf N-Strike Elite Rough Cut 2x4 Springs Replacement: étape 5, image 3 de 3
    • Remove the plunger springs from the mechanism by pulling one of the springs back then bending it off the connection.

    • These are tricky to remove, so be careful when pulling them off.

  6. Nerf N-Strike Elite Rough Cut 2x4 Springs Replacement: étape 6, image 1 de 2 Nerf N-Strike Elite Rough Cut 2x4 Springs Replacement: étape 6, image 2 de 2
    • Now pull the springs out and add new ones.

    • There are a few pieces with springs that can misalign in reassembly. Keep in mind where they are.

Conclusion

To reassemble your device, follow these instructions in reverse order.

Une autre personne a terminé cette réparation.

Levi Rushing

Membre depuis le 09/08/21

148 Réputation

1 tutoriel rédigé

0 commentaires

Ajouter un commentaire

Nombre de vues :

Dernières 24 heures : 2

7 derniers jours : 12

30 derniers jours : 49

Total : 2,918