Aller au contenu principal

Nexus 7 2nd Generation Front Facing Camera Replacement

Ce dont vous avez besoin

  1. Nexus 7 2nd Generation Front Facing Camera Replacement, Rear Panel: étape 1, image 1 de 1
    • In the following steps you will release the clips (highlighted in red) along the perimeter of the Nexus 7's rear panel.

    • Do not use excessive force while prying the clips. They can be easily broken.

  2. Nexus 7 2nd Generation Front Facing Camera Replacement: étape 2, image 1 de 2 Nexus 7 2nd Generation Front Facing Camera Replacement: étape 2, image 2 de 2
    • Gently insert a plastic opening tool near the top of the Nexus 7 between the rear panel and the front panel assembly.

    • Carefully run the plastic opening tool along the top edge to pry the rear panel away from the front panel assembly of the Nexus 7.

  3. Nexus 7 2nd Generation Front Facing Camera Replacement: étape 3, image 1 de 3 Nexus 7 2nd Generation Front Facing Camera Replacement: étape 3, image 2 de 3 Nexus 7 2nd Generation Front Facing Camera Replacement: étape 3, image 3 de 3
    • Insert the plastic opening tool between the rear panel and the front panel assembly near the power button and pry up at several points along the right edge of the Nexus 7.

  4. Nexus 7 2nd Generation Front Facing Camera Replacement: étape 4, image 1 de 3 Nexus 7 2nd Generation Front Facing Camera Replacement: étape 4, image 2 de 3 Nexus 7 2nd Generation Front Facing Camera Replacement: étape 4, image 3 de 3
    • Pry up the rear panel along the left edge using the method described in previous steps.

  5. Nexus 7 2nd Generation Front Facing Camera Replacement: étape 5, image 1 de 2 Nexus 7 2nd Generation Front Facing Camera Replacement: étape 5, image 2 de 2
    • Gently lift and remove the rear panel up off the front panel assembly.

  6. Nexus 7 2nd Generation Front Facing Camera Replacement, Battery Cable: étape 6, image 1 de 2 Nexus 7 2nd Generation Front Facing Camera Replacement, Battery Cable: étape 6, image 2 de 2
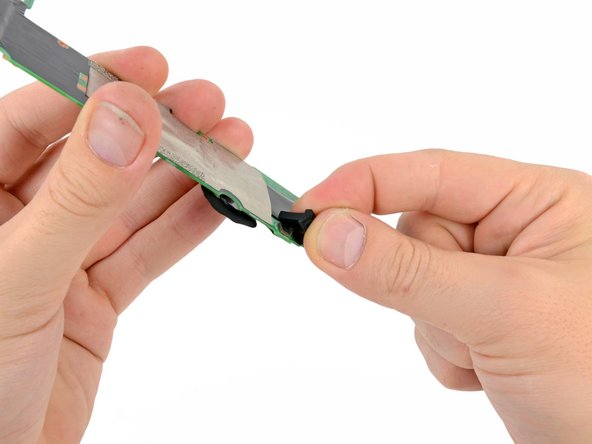
    • Using the tip of a spudger, push first on one side then the other to "walk" the battery cable straight out of its socket on the motherboard.

  7. Nexus 7 2nd Generation Front Facing Camera Replacement, Speaker Cable: étape 7, image 1 de 1
    • Peel back the copper ESD shielding covering the bottom of the motherboard.

    • Do not try to remove the copper shielding, as it is still attached underneath the battery.

    • If you're just replacing the micro usb charge port, there is no need to peel back the copper heatsink like in the photo, the speaker assembly can simply be moved out of the way once unscrewed. If the speakers are to be replaced simply peel back the bottom corner to expose the speaker connection. Leave the rest of the heatsink shield alone.

  8. Nexus 7 2nd Generation Front Facing Camera Replacement: étape 8, image 1 de 1
    • Using the tip of a spudger, push the speaker cable straight out of its socket on the motherboard.

  9. Nexus 7 2nd Generation Front Facing Camera Replacement, Power & Volume ZIF Connector: étape 9, image 1 de 1
    • Peel back the label covering the power and volume button ZIF connector.

  10. Nexus 7 2nd Generation Front Facing Camera Replacement: étape 10, image 1 de 2 Nexus 7 2nd Generation Front Facing Camera Replacement: étape 10, image 2 de 2
    • Use the tip of a spudger to carefully flip up the retaining flap on the power and volume button ribbon cable ZIF socket.

    • Make sure you are flipping up the retaining flap, not the socket itself.

    • Use the tip of a spudger to pull the power and volume button ribbon cable straight out of its socket.

  11. Nexus 7 2nd Generation Front Facing Camera Replacement, Motherboard Assembly: étape 11, image 1 de 2 Nexus 7 2nd Generation Front Facing Camera Replacement, Motherboard Assembly: étape 11, image 2 de 2
    • Carefully peel back the adhesive tape covering the I/O board ribbon cable socket on the motherboard.

  12. Nexus 7 2nd Generation Front Facing Camera Replacement: étape 12, image 1 de 2 Nexus 7 2nd Generation Front Facing Camera Replacement: étape 12, image 2 de 2
    • Use the tip of a spudger to carefully flip up the retaining flap on the I/O data ribbon cable ZIF socket.

    • Make sure you are flipping up the retaining flap, not the socket itself.

    • Use the tip of a spudger to pull the I/O data ribbon cable straight out of its socket.

  13. Nexus 7 2nd Generation Front Facing Camera Replacement: étape 13, image 1 de 1
    • Peel back the adhesive tape covering the display and digitizer cable sockets.

    • It is not necessary to completely remove the adhesive, but it is helpful to fold it back on itself to get it out of the way.

  14. Nexus 7 2nd Generation Front Facing Camera Replacement: étape 14, image 1 de 1
    • Use the flat end of a spudger to pry the display data cable straight up off its socket on the motherboard.

  15. Nexus 7 2nd Generation Front Facing Camera Replacement: étape 15, image 1 de 3 Nexus 7 2nd Generation Front Facing Camera Replacement: étape 15, image 2 de 3 Nexus 7 2nd Generation Front Facing Camera Replacement: étape 15, image 3 de 3
    • Use the flat end of a spudger to carefully flip up the retaining flaps on the digitizer ribbon cable ZIF sockets.

    • Make sure you are flipping up the retaining flaps, not the sockets themselves.

    • Use the tip of a spudger to pull the digitizer ribbon cable straight out of its socket.

  16. Nexus 7 2nd Generation Front Facing Camera Replacement: étape 16, image 1 de 2 Nexus 7 2nd Generation Front Facing Camera Replacement: étape 16, image 2 de 2
    • Use the tip of a spudger to remove the warranty seal stickers.

  17. Nexus 7 2nd Generation Front Facing Camera Replacement: étape 17, image 1 de 1
    • Remove the following screws securing the motherboard to the metal frame:

    • Six 3.25 mm silver Phillips screws

    • One 2.23 mm black Phillips screw

  18. Nexus 7 2nd Generation Front Facing Camera Replacement: étape 18, image 1 de 2 Nexus 7 2nd Generation Front Facing Camera Replacement: étape 18, image 2 de 2
    • Carefully lift the motherboard assembly out of the Nexus 7, minding any cables that may get caught.

  19. Nexus 7 2nd Generation Front Facing Camera Replacement, Motherboard: étape 19, image 1 de 1
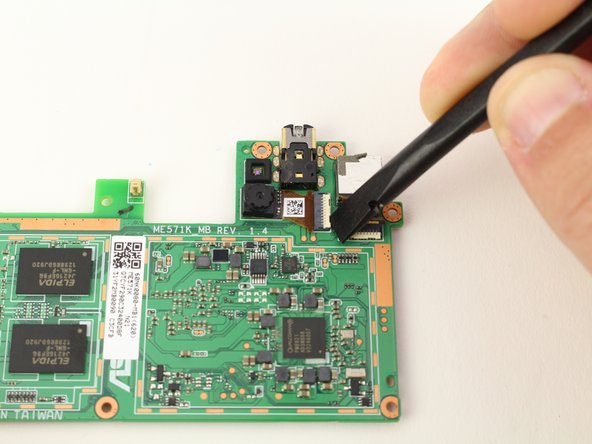
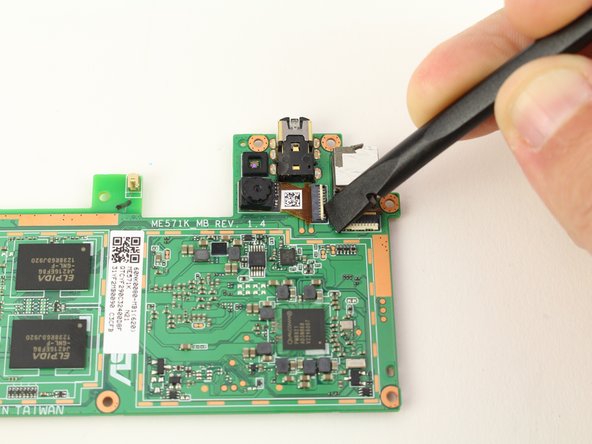
    • Use the flat end of a spudger to pry the front-facing camera straight off of its socket on the motherboard.

  20. Nexus 7 2nd Generation Front Facing Camera Replacement: étape 20, image 1 de 2 Nexus 7 2nd Generation Front Facing Camera Replacement: étape 20, image 2 de 2
    • Carefully pull the upper microphone straight up off its socket.

    • In a similar fashion, remove the rubber lower microphone gasket from the motherboard.

  21. Nexus 7 2nd Generation Front Facing Camera Replacement: étape 21, image 1 de 1
    • Motherboard remains.

  22. Nexus 7 2nd Generation Front Facing Camera Replacement, Front Facing Camera: étape 22, image 1 de 3 Nexus 7 2nd Generation Front Facing Camera Replacement, Front Facing Camera: étape 22, image 2 de 3 Nexus 7 2nd Generation Front Facing Camera Replacement, Front Facing Camera: étape 22, image 3 de 3
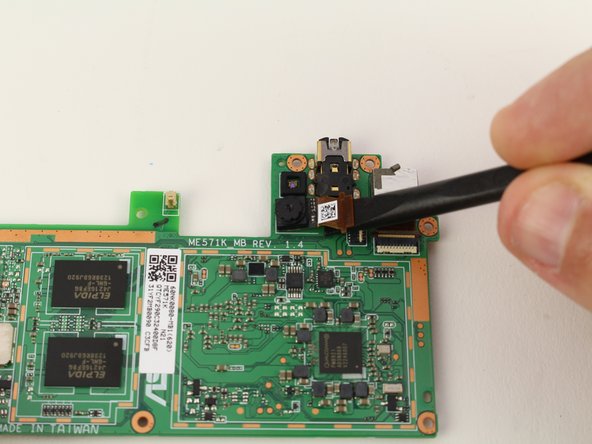
    • Flip the motherboard over to reveal the ZIF connectors for the two cameras.

    • The front facing camera will be the one on the left side. Start by prying the locking bar of the ZIF connector up with a spudger.

  23. Nexus 7 2nd Generation Front Facing Camera Replacement: étape 23, image 1 de 2 Nexus 7 2nd Generation Front Facing Camera Replacement: étape 23, image 2 de 2
    • Place the pointy end of the spudger underneath the cable ribbon to pull it from the connector.

    • Pry the camera off of the motherboard from the cable side and remove it from the motherboard.

    • You will likely damage the ribbon cable of the old camera when prying due to the strong adhesive used, but as long as you've got a replacement it shouldn't be a problem. You also may want to put a small drop of adhesive beneath the camera to affix it to the motherboard after installing it.

Conclusion

To reassemble your device, follow these instructions in reverse order.

Austin Blakely

Membre depuis le 03/11/19

19 389 Réputation

53 tutoriels rédigés

Équipe

iFixit Membre de l'équipe iFixit

Staff

136 membres

16 573 tutoriels rédigés

0 commentaires

Ajouter un commentaire

Nombre de vues :

Dernières 24 heures : 0

7 derniers jours : 0

30 derniers jours : 1

Total : 378