Cette version peut contenir des modifications incorrectes. Passez au dernier aperçu vérifié.
Ce dont vous avez besoin
-
Cette étape n’est pas traduite. Aidez à la traduire
-
Gently insert a plastic opening tool between the rear panel and the inner rear frame near the rear-facing camera.
-
Use your plastic opening tool to pry up the rear case around the perimeter of the Nexus S.
-
-
-
Cette étape n’est pas traduite. Aidez à la traduire
-
Using the edge of a plastic opening tool, lift the battery from the end closest to the headphone jack.
-
Remove the battery from the Nexus S.
-
-
Cette étape n’est pas traduite. Aidez à la traduire
-
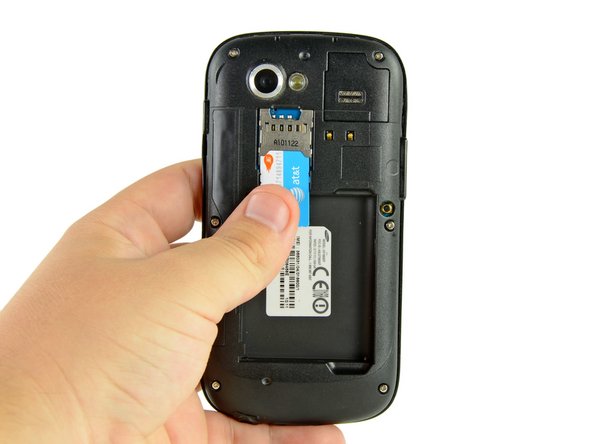
Use your thumb to slide the SIM card downwards from the SIM card slot.
-
Remove the SIM card.
-


Annulation : je n'ai pas terminé ce tutoriel.
5 autres ont terminé cette réparation.
