Aller au contenu principal

Nikon Coolpix S9050 LCD Screen Replacement

Tutoriel Archivé
Ce tutoriel est conservé uniquement à des fins de suivis historiques. Utilisez la version actuelle du tutoriel pour effectuer votre réparation.

Ce dont vous avez besoin

  1. Nikon Coolpix S9050 LCD Screen Replacement, LCD Screen Replacement: étape 1, image 1 de 3 Nikon Coolpix S9050 LCD Screen Replacement, LCD Screen Replacement: étape 1, image 2 de 3 Nikon Coolpix S9050 LCD Screen Replacement, LCD Screen Replacement: étape 1, image 3 de 3
    • Flip the camera upside down.

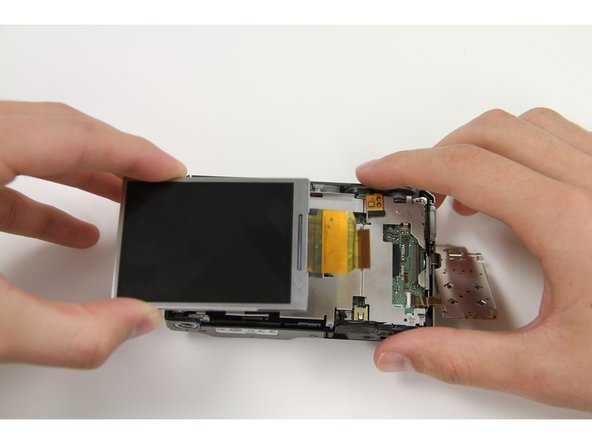
    • Slide the locking mechanism to the left.

    • Push yellow holding pin upward until battery pops up.

    • Pull out battery.

  2. Nikon Coolpix S9050 LCD Screen Replacement: étape 2, image 1 de 3 Nikon Coolpix S9050 LCD Screen Replacement: étape 2, image 2 de 3 Nikon Coolpix S9050 LCD Screen Replacement: étape 2, image 3 de 3
    • Tools Required: PH00 screwdriver

    • Remove the two screws on the left side of the camera.

    • Remove the two screws on the right side of the camera.

    • Remove the four screws from he bottom of the camera.

    • Remove the screw that is located on the inside of the battery chamber.

  3. Nikon Coolpix S9050 LCD Screen Replacement: étape 3, image 1 de 1
    • Use a blue pry tool and separate the black back plate from the camera.

    • Once the black plate is separated, carefully pull apart the back plate from the front half of the camera.

    • Make sure all four sides of the back casing are pried from the camera before completely pulling it apart. If not pulled off evenly plastic placement tabs may break.

  4. Nikon Coolpix S9050 LCD Screen Replacement: étape 4, image 1 de 2 Nikon Coolpix S9050 LCD Screen Replacement: étape 4, image 2 de 2
    • Take the blue pry tool and lift the brown latch on the ZIF connecter that holds the screen tab in place.

    • Once the brown latch on the ZIF connecter is lifted upward, carefully lift the screen and pull away from the camera.

    • The screen and screen tab will detach from the motherboard.

  5. Nikon Coolpix S9050 LCD Screen Replacement: étape 5, image 1 de 1
    • Take the new screen and slide the tab in to the ZIF connector that the previous screen was plugged in to.

    • Close the brown latch on the ZIF connector and fit the screen in the original slot.

    • Return the dial flap to its original position.

Conclusion

Follow the steps in reverse order to put the camera back together.

Paige Kloetzer

Membre depuis le 09/24/15

121 Réputation

1 tutoriel rédigé

Équipe

Texas Tech, Team 22-3, Rauch Fall 2015 Membre de l'équipe Texas Tech, Team 22-3, Rauch Fall 2015

TTU-RAUCH-F15S22G3

3 membres

1 tutoriel rédigé

0 commentaires

Ajouter un commentaire

Nombre de vues :

Dernières 24 heures : 1

7 derniers jours : 2

30 derniers jours : 3

Total : 330