Aller au contenu principal

Nikon D5100 LCD Replacement

Ce dont vous avez besoin

  1. Nikon D5100 LCD Replacement, LCD: étape 1, image 1 de 2 Nikon D5100 LCD Replacement, LCD: étape 1, image 2 de 2
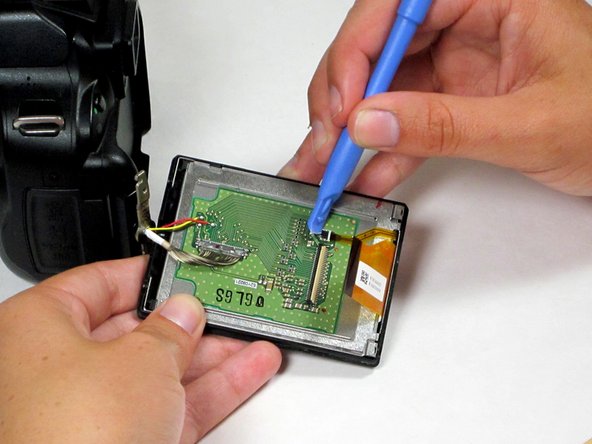
    • Use a Phillips #000 screwdriver to remove the four screws around the perimeter of the LCD panel.

  2. Nikon D5100 LCD Replacement: étape 2, image 1 de 1
    • Using a fingernail or the flat edge of a spudger inserted into the seam, separate the LCD bevel from the main panel body.

  3. Nikon D5100 LCD Replacement: étape 3, image 1 de 2 Nikon D5100 LCD Replacement: étape 3, image 2 de 2
    • Use a spudger to remove the ribbon cables on the LCD's circuit board by flipping up their plastic lock-bars and removing gently pulling them out of their ports.

  4. Nikon D5100 LCD Replacement: étape 4, image 1 de 1
    • Use a spudger to disconnect the 16-pin cable by gently pulling it upward, away from the circuit board, until it is removed from its port.

  5. Nikon D5100 LCD Replacement: étape 5, image 1 de 1
    • Desolder the 3 wires (red, yellow, and black) connecting the LCD board to the main camera body.

    • Soldering/desoldering presents potential for device damage and burns. Take all necessary precautions, and always solder/desolder in a well-ventilated workspace.

  6. Nikon D5100 LCD Replacement: étape 6, image 1 de 2 Nikon D5100 LCD Replacement: étape 6, image 2 de 2
    • The LCD assembly can now be fully separated from the main camera body.

    • Remove the plastic bezel and metal bracket from the LCD itself to complete the removal process.

Conclusion

To reassemble your device, follow these instructions in reverse order.

9 autres ont terminé cette réparation.

Liz

Membre depuis le 04/25/14

1 311 Réputation

5 tutoriels rédigés

Équipe

Cal Poly, Team 10-54, Amido Spring 2014 Membre de l'équipe Cal Poly, Team 10-54, Amido Spring 2014

CPSU-AMIDO-S14S10G54

4 membres

5 tutoriels rédigés

6 commentaires

Thank you so much! My camera was dropped . And yelow and black wires came off. Now i will try to fix it.

What is the functions of these wires?

Ilia - Réponse

Thanks for this Liz.

Removing the broken LCD from my Nikon D5100 seems like something I can do now!

I am unsure ?how to do the soldering bit to attach the new LCD, ?where to attach the wires...

Any help is welcome

Felipe Castro - Réponse

I was able to fix it, thanks to you guys. But the colors that came on the, LCD are weird. At least I can see the image.

Arline Osuna - Réponse

It’s very possible that applying the soldering iron to the board, while still attached to the back, caused the LCD to lose its color alignment and darken the display. I made the same mistake.

Franky -

I am having trouble reconnecting the 16-pin cable to the circuit board. Do you have any tips?

Lyle Ralston - Réponse

Ajouter un commentaire

Nombre de vues :

Dernières 24 heures : 3

7 derniers jours : 25

30 derniers jours : 85

Total : 11,782