Cette version peut contenir des modifications incorrectes. Passez au dernier aperçu vérifié.
Ce dont vous avez besoin
-
Cette étape n’est pas traduite. Aidez à la traduire
-
Use a 00 Phillips head screwdriver to remove the four screws from the lens mount.
-
-
Cette étape n’est pas traduite. Aidez à la traduire
-
Remove the three loose parts (spring, small rod, and metal ring) that were under the lens mount and put them aside.
-
-
-
Cette étape n’est pas traduite. Aidez à la traduire
-
Use 00 Phillips head screwdriver to remove the screw from the bottom of the front black case.
-
-
Cette étape n’est pas traduite. Aidez à la traduire
-
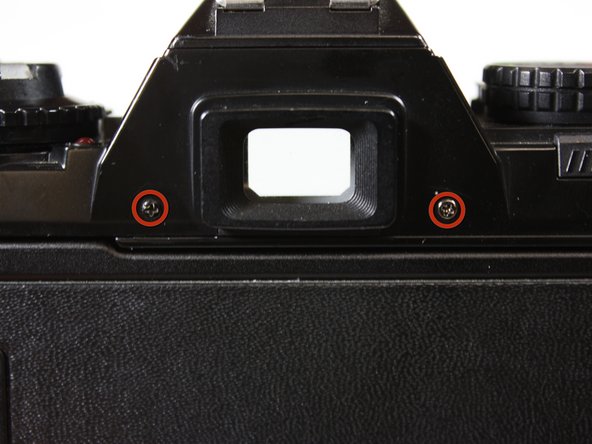
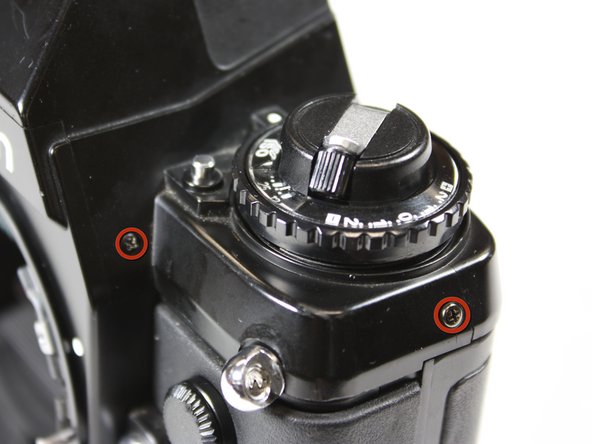
Use 00 Phillips head screwdriver to remove the screws from the top case (6 in all).
-
-
Cette étape n’est pas traduite. Aidez à la traduire
-
Use a 00 Phillips head screwdriver to remove the screws from either side of the communication board.
-
-
Cette étape n’est pas traduite. Aidez à la traduire
-
Desolder the wires and remove them from the communication board.
-


Annulation : je n'ai pas terminé ce tutoriel.
5 autres ont terminé cette réparation.
Équipe

Cal Poly, Team 25-26, Garner Spring 2011 Membre de l'équipe Cal Poly, Team 25-26, Garner Spring 2011
CPSU-GARNER-S11S25G26
3 membres
12 tutoriels rédigés
3 commentaires
Doesn't work for the 301, although it looks similar I can't find any way to remove the top or the front case
The F301 and N2000 are identical, so the guide should work. In this guide the top case isn't removed, as the film rewind knob is preventing it from coming off completely, and instead just lifted with the bit of leeway the popped up rewind knob provides.