Aller au contenu principal
Pour réparer ensemble - Je crée un compte
Nintendo 3DS 2015 Motherboard Replacement

Ce dont vous avez besoin

    1. Nintendo 3DS 2015 Motherboard Replacement, Battery: étape 1, image 1 de 1
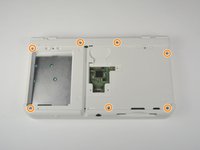
      • Unscrew the two 3mm Phillips #1 head screws along the top edge of the device.

      • The screws on the back panel strip easily. Go slowly and press down firmly.

      • The screws on the back panel are held in by locking washers, so they won't come out of the back panel.

      Demander à FixBot

      Ajouter un commentaire

    2. Nintendo 3DS 2015 Motherboard Replacement: étape 2, image 1 de 2 Nintendo 3DS 2015 Motherboard Replacement: étape 2, image 2 de 2
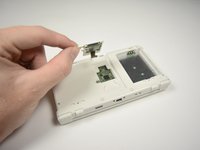
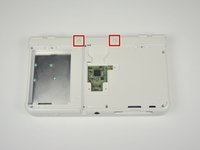
      • Pull the top corner tabs of the front face plate outward and towards you.

      • Pull the faceplate up and out of the slots at the bottom of the device.

      • Set aside the back faceplate.

      Demander à FixBot

      Ajouter un commentaire

    3. Nintendo 3DS 2015 Motherboard Replacement: étape 3, image 1 de 3 Nintendo 3DS 2015 Motherboard Replacement: étape 3, image 2 de 3 Nintendo 3DS 2015 Motherboard Replacement: étape 3, image 3 de 3
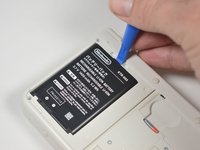
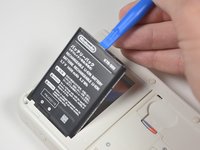
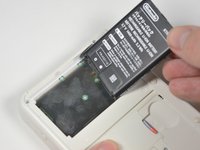
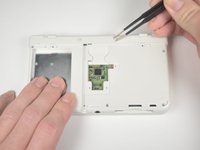
      • Insert a plastic opening tool into the notch at the top of the battery.

      • Pry the battery up with the plastic opening tool.

      Demander à FixBot

      Ajouter un commentaire

    1. Nintendo 3DS 2015 Motherboard Replacement, SD Card Reader: étape 4, image 1 de 1
      • Unscrew the three 3mm Y0 screws along the right and bottom of the SD card reader.

      • The bottom of the SD card reader should slightly pop out after removing the screws.

      Demander à FixBot

      Ajouter un commentaire

    2. Nintendo 3DS 2015 Motherboard Replacement: étape 5, image 1 de 1
      • Pull the SD card reader from the edge with two holes gently to free the tab at the top of the SD card reader.

      • Don't completely pull the SD card out of the device yet. There is a ribbon cable connected under the SD card reader.

      • Reorient the device so that the power jack faces you.

      Demander à FixBot

      Ajouter un commentaire

    3. Nintendo 3DS 2015 Motherboard Replacement: étape 6, image 1 de 2 Nintendo 3DS 2015 Motherboard Replacement: étape 6, image 2 de 2
      • Lift the SD card reader gently.

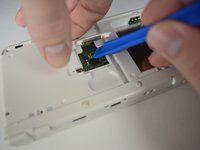
      • Use a plastic opening tool to pry the SD card ribbon cable off the socket on the motherboard.

      • Lift the SD card reader out off of the lower casing.

      Demander à FixBot

      Ajouter un commentaire

    1. Nintendo 3DS 2015 Motherboard Replacement, Lower Case: étape 7, image 1 de 3 Nintendo 3DS 2015 Motherboard Replacement, Lower Case: étape 7, image 2 de 3 Nintendo 3DS 2015 Motherboard Replacement, Lower Case: étape 7, image 3 de 3
      Outil utilisé dans cette étape :
      Tweezers
      $4.99
      • Reorient the device so that the game slot now faces you.

      • Remove the two rubber bumpers along the top of the device using tweezers.

      • Unscrew the seven 6mm Phillips #00 screws along the top and bottom of the 3DS.

      Demander à FixBot

      Ajouter un commentaire

    2. Nintendo 3DS 2015 Motherboard Replacement: étape 8, image 1 de 2 Nintendo 3DS 2015 Motherboard Replacement: étape 8, image 2 de 2
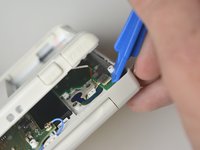
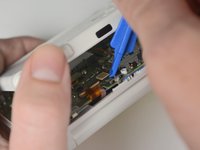
      • Lift the top edge of the lower case slightly off on the 3DS.

      • Don't pull the lower casing completely off, you may break those connections. There are ribbon cables that must be disconnected first.

      • Pry the ribbon cable socket under the right trigger using a plastic opening tool.

      • Pry the ribbon cable socket under the infrared receiver cover using a plastic opening tool.

      Demander à FixBot

      Ajouter un commentaire

    3. Nintendo 3DS 2015 Motherboard Replacement: étape 9, image 1 de 3 Nintendo 3DS 2015 Motherboard Replacement: étape 9, image 2 de 3 Nintendo 3DS 2015 Motherboard Replacement: étape 9, image 3 de 3
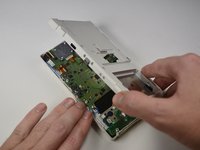
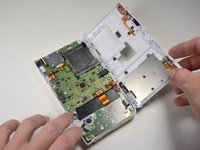
      • Open the device slowly from its top edge. Be careful not to tug the ribbon cable connected near the bottom edge of the device.

      • Pry the last ribbon cable attached to the lower case using a plastic opening tool.

      Demander à FixBot

      Ajouter un commentaire

    1. Nintendo 3DS 2015 Motherboard Replacement, Circle Pad: étape 10, image 1 de 3 Nintendo 3DS 2015 Motherboard Replacement, Circle Pad: étape 10, image 2 de 3 Nintendo 3DS 2015 Motherboard Replacement, Circle Pad: étape 10, image 3 de 3
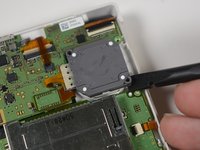
      • Locate the joystick assembly near the top right corner of the motherboard.

      • Remove the two 8mm Phillips #00 screws from the back of the joystick.

      • Use the flat end of the spudger to pry off the joystick pad from its plastic housing.

      Demander à FixBot

      Ajouter un commentaire

    2. Nintendo 3DS 2015 Motherboard Replacement: étape 11, image 1 de 2 Nintendo 3DS 2015 Motherboard Replacement: étape 11, image 2 de 2
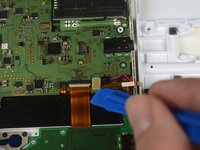
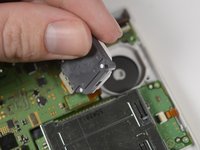
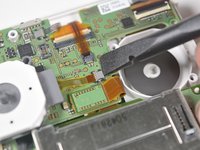
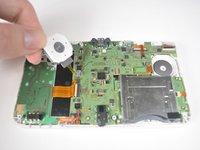
      • Lift the joystick pad and place it on its back. This will reveal the ribbon cable connected to the joystick pad.

      • Use the flat end of the spudger to pry up the retaining flap for the ribbon cable.

      • Lift the joystick out of the device.

      Demander à FixBot

      Ajouter un commentaire

    1. Nintendo 3DS 2015 Motherboard Replacement, Motherboard: étape 12, image 1 de 3 Nintendo 3DS 2015 Motherboard Replacement, Motherboard: étape 12, image 2 de 3 Nintendo 3DS 2015 Motherboard Replacement, Motherboard: étape 12, image 3 de 3
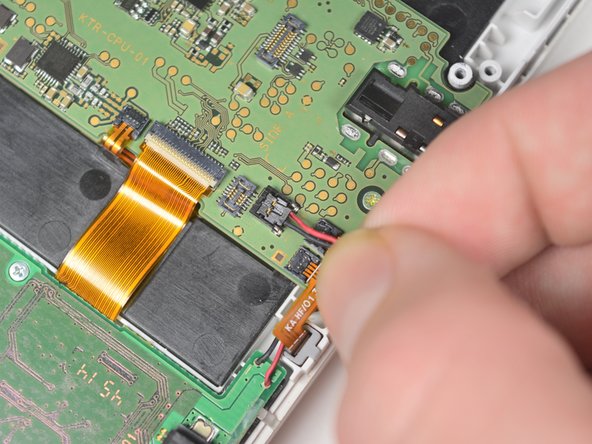
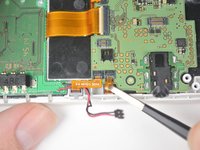
      • Remove the power cable, indicated by the black and red wires, by gently pulling it up and out of the connector.

      • Gently pull the ribbon cables out of the 4 ZIF connectors.

      • Do not lift up on the tabs on these ZIF connectors. Lifting these tabs will break the connectors.

      Demander à FixBot

      Ajouter un commentaire

    2. Nintendo 3DS 2015 Motherboard Replacement: étape 13, image 1 de 2 Nintendo 3DS 2015 Motherboard Replacement: étape 13, image 2 de 2
      Outil utilisé dans cette étape :
      Tweezers
      $4.99
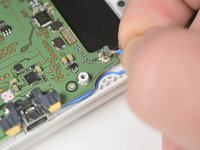
      • Pull up gently on the blue wifi antenna.

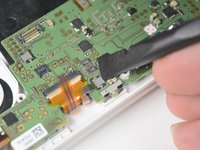
      • Pry the retaining tab on the connector behind the infrared receiver and gently pull the ribbon cable from the connector with tweezers.

      Demander à FixBot

      Ajouter un commentaire

    3. Nintendo 3DS 2015 Motherboard Replacement: étape 14, image 1 de 3 Nintendo 3DS 2015 Motherboard Replacement: étape 14, image 2 de 3 Nintendo 3DS 2015 Motherboard Replacement: étape 14, image 3 de 3
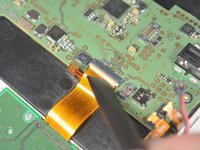
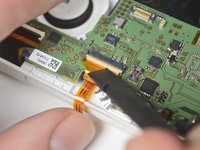
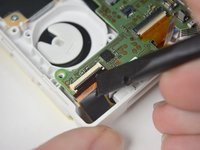
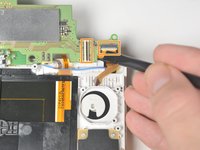
      • Lift the retaining tab and remove the large ribbon cable on the left side of the motherboard.

      • Lift the retaining tab and remove the large ribbon cable on the top of the motherboard behind the infrared receiver.

      • Lift the retaining tab and remove the large ribbon cable on the top of the motherboard just above the joysitck housing.

      Demander à FixBot

      Ajouter un commentaire

    4. Nintendo 3DS 2015 Motherboard Replacement: étape 15, image 1 de 3 Nintendo 3DS 2015 Motherboard Replacement: étape 15, image 2 de 3 Nintendo 3DS 2015 Motherboard Replacement: étape 15, image 3 de 3
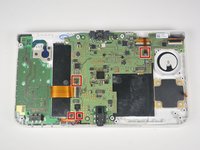
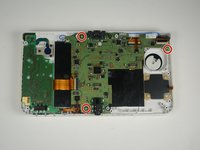
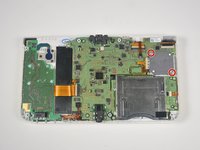
      • Double check that all motherboard connection on the top of the board have been disconnected.

      • Remove the three, 3mm Phillips #00 screws that secure the motherboard to the device housing.

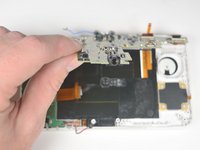
      • Lift the motherboard gently by the headphone jack.

      • Remove the two ribbons on the back of the device by lifting the retaining tabs on the ZIF connectors.

      Demander à FixBot

      Ajouter un commentaire

Conclusion

To reassemble your device, follow these instructions in reverse order.

Annulation : je n'ai pas terminé ce tutoriel.

6 autres ont terminé cette réparation.

Tyler Starr

Membre depuis le 10/06/16

1 779 Réputation

7 tutoriels rédigés

Équipe

Cal Poly, Team 4-6, Livingston Fall 2016 Membre de l'équipe Cal Poly, Team 4-6, Livingston Fall 2016

CPSU-LIVINGSTON-F16S4G6

4 membres

108 tutoriels rédigés

1 commentaire de tutoriel

Step #15 is incorrect. There are only two motherboard screws. The third screw circled, the right side of the console, is a passthrough for the rear housing screws.

Killy728 - Réponse Partager
Ajouter un commentaire

Nombre de vues :

Dernières 24 heures : 5

7 derniers jours : 81

30 derniers jours : 335

Total : 15,460