Introduction
This guide has been updated by iFixit staff! Read the new, official guide here.
This guide will show you how to replace the wireless antenna in your DS Lite.
Ce dont vous avez besoin
-
-
Place your device upside down and locate the battery compartment.
-
Find the Phillips head screw securing the battery cover in the bottom right hand corner of the device.
-
-
-
Remove the following seven screws that secure the lower case to the DS Lite:
-
Three silver tri-wing screws (5mm long)
-
One black tri-wing screw (4mm)
-
Two gold Phillips screws (4mm)
-
One silver Phillips screw (3mm)
-
Do not remove the silver PH screw (3mm) in the battery compartment yet. It holds the main PCB in place.
-
-
-
Flip the unit over so that it is facing right-side up.
-
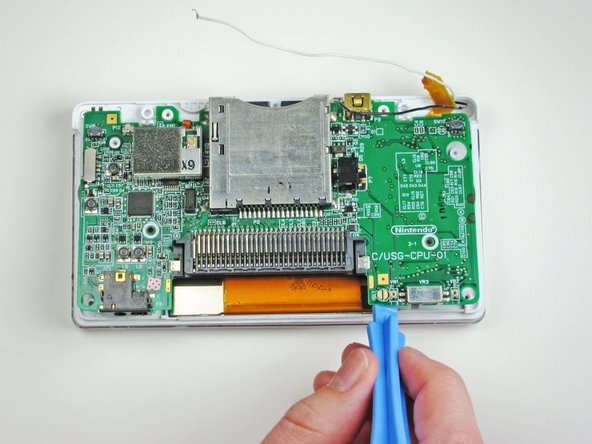
Use a spudger to pry open the gap between the bottom case and the front panel. Work all the way around the case until the panel is free.
-
Avoid touching the L and R shoulder buttons, because they easily detach and are difficult to reassemble. Keep the bottom case flat against your workbench to help hold the shoulder buttons in place.
-
-
-
Étape 8 Motherboard
Attention : les étapes 8 à 11 sont issues d'un tutoriel marqué comme étant en cours.
-
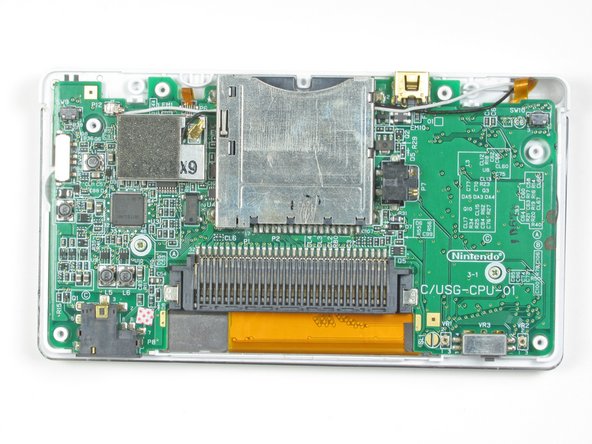
Locate the two screws that attach the logic board to the device.
-
Unscrew the two Phillips head screws.
-
-
-
Remove the two Phillips-head screws that hold the hinge in place.
-
Open the system up (just like if you were about to use it normally).
-
-
-
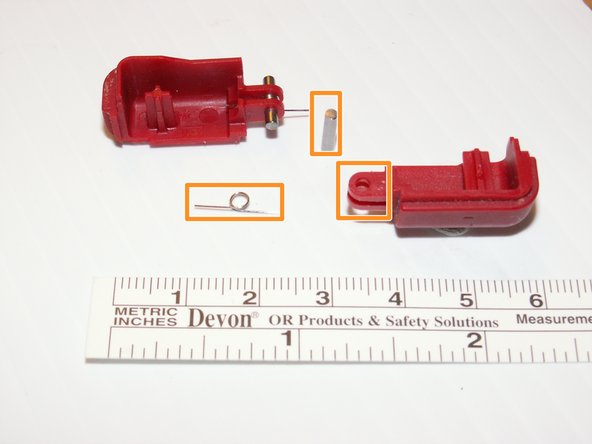
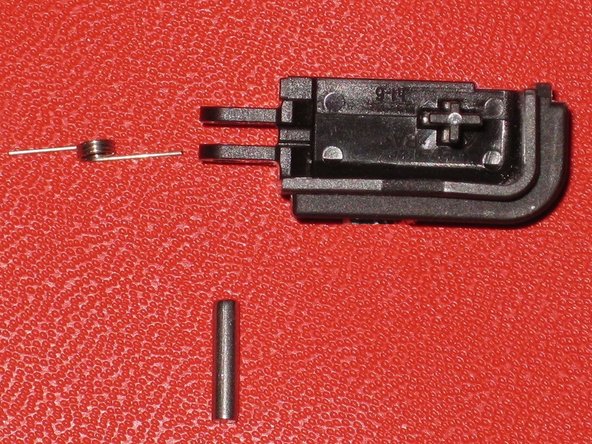
Carefully use a pair of tweezers to remove the wireless antenna.
-


To reassemble your device, follow these instructions in reverse order.
To reassemble your device, follow these instructions in reverse order.
Annulation : je n'ai pas terminé ce tutoriel.
Une autre personne a terminé cette réparation.
Équipe

Cal Poly, Team 16-30, Maness Winter 2010 Membre de l'équipe Cal Poly, Team 16-30, Maness Winter 2010
CPSU-MANESS-W10S16G30
4 membres
25 tutoriels rédigés