Aller au contenu principal

Nintendo DSi XL Lower Case Replacement

Ce dont vous avez besoin

  1. Nintendo DSi XL Lower Case Replacement, Battery: étape 1, image 1 de 2 Nintendo DSi XL Lower Case Replacement, Battery: étape 1, image 2 de 2
    • Remove the two Phillips screws securing the battery cover to the back of the handheld console.

    • Lift the battery cover off the back of the DSi XL.

  2. Nintendo DSi XL Lower Case Replacement: étape 2, image 1 de 1
    • Lift the battery from the DSi XL.

  3. Nintendo DSi XL Lower Case Replacement, Lower Case: étape 3, image 1 de 3 Nintendo DSi XL Lower Case Replacement, Lower Case: étape 3, image 2 de 3 Nintendo DSi XL Lower Case Replacement, Lower Case: étape 3, image 3 de 3
    • Remove the four rubber screw covers on the lower case by prying them up with a push pin.

  4. Nintendo DSi XL Lower Case Replacement: étape 4, image 1 de 1
    • Remove the following seven Phillips screws that secure the lower case to the rest of the DSi XL:

    • Four silver 5.3 mm screws

    • Two black 5.3 mm screws

    • One black 2.5 mm screw

  5. Nintendo DSi XL Lower Case Replacement: étape 5, image 1 de 3 Nintendo DSi XL Lower Case Replacement: étape 5, image 2 de 3 Nintendo DSi XL Lower Case Replacement: étape 5, image 3 de 3
    • Turn the DSi XL over, and open the display.

    • Insert a spudger between the upper and lower case at the bottom left corner of the DSi.

    • Slide the spudger along the bottom edge of the upper case to release the latches securing the upper case to the lower case.

  6. Nintendo DSi XL Lower Case Replacement: étape 6, image 1 de 2 Nintendo DSi XL Lower Case Replacement: étape 6, image 2 de 2
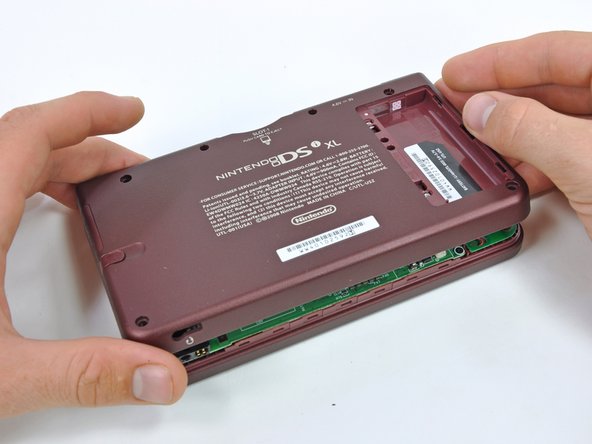
    • Close the display and turn the DSi XL over.

    • Lift the lower case from the front edge.

    • Rotate the lower case away from the DSi.

    • The lower case cannot be completely removed yet, since it is still connected to the motherboard.

  7. Nintendo DSi XL Lower Case Replacement: étape 7, image 1 de 2 Nintendo DSi XL Lower Case Replacement: étape 7, image 2 de 2
    • Using a spudger, pry the SD card/right shoulder button connector off its socket.

    • Pry the volume button/left shoulder button connector off its socket on the motherboard with a spudger.

Conclusion

To reassemble your device, follow these instructions in reverse order.

6 autres ont terminé cette réparation.

David Hodson

Membre depuis le 04/13/10

150 458 Réputation

127 tutoriels rédigés

0 commentaires

Ajouter un commentaire

Nombre de vues :

Dernières 24 heures : 4

7 derniers jours : 12

30 derniers jours : 64

Total : 8,545