Introduction
If your GameBoy Advance SP AGS-001 or AGS-101 has a deteriorating shell, or if you’re looking to customize it, use this guide to replace the shell.
Before using this guide, plug in your console and charge it for a few minutes. If the battery is too old, it may start expanding and could potentially explode. If it starts to swell, you’ll have to order a replacement battery - which you can find below:
https://www.amazon.com/Game-Boy-Advance-...
Before beginning the replacement process, power off your console and unplug it from the outlet if it is plugged in.
Ce dont vous avez besoin
-
-
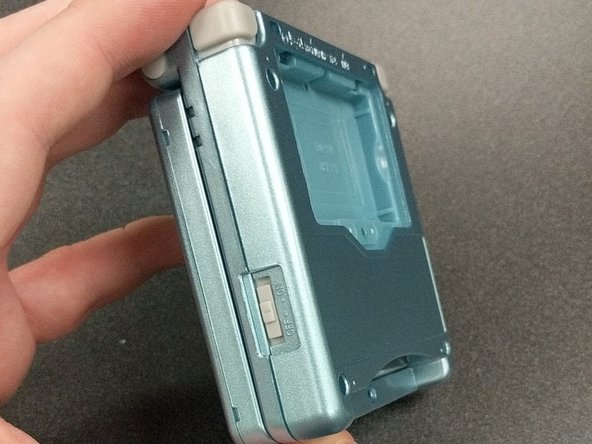
Unscrew the screw on the battery compartment with a Phillips #00 screwdriver.
-
Open the battery compartment and remove the battery.
-
Remove the four 6.45 mm Tri-point Y00 screws from the corners of the device.
-
Remove the two 4.6 mm Tri-point Y00 screws from inside the battery compartment and game cartridge comparments.
-
-
-
Lift off the bottom cover to expose the motherboard.
-
Remove the three 4mm Phillips #00 screws from the motherboard.
-
Gently lift up the motherboard and remove the ribbon cable by gently pulling the two clips on the side up and towards the cable.
-
Remove the small Phillips #00 screw hidden underneath the ribbon cable. It holds the hinge cover of the top screen together.
-
-
-
Open the GBA SP screen and use the pointed end of a spudger to remove the rubber pads around the screen bezel.
-
Remove the five Tri-point Y00 screws hidden beneath the rubber pads.
-
Remove the bezel from the screen with a spudger.
-
-
-
-
Remove the hinges from the original shell. This is the most difficult step, as it requires a lot of force to remove the hinges.
-
Apply pressure with the pointed end of a spudger from the inside, pushing out with plenty of force. The hinges will likely fly out of the shell a few feet; this is normal.
-
Once the hinges are removed, remove the caps on the end of each hinge.
Extremely careful here with the position of your hands as you’re pushing the hinges out. I managed to severely injure myself from the sudden jolt scraping my fingers on the case when the hinges gave in. Preferrably, position your hand and screwdriver around 30 degrees from the horizontal of the case to avoid this and press the case firmly against a table.
the easier way to do this is to stand the case on it’s side on the edge of something, I just used my desk mat at the edge of my desk, place your spudger on the inner metal part and tap with a small hammer or something, I used a pair of pliers. Way less likely to hurt your hand because you don’t have to grip the case as hard or push as hard. Work smarter
Interestingly enough, I found that, if you don't plan to use the old shell for anything else, it may be easier in some cases to cut the plastic around the hinges, which I did with a model kit cutting tool (the old shell was very brittle and broke apart into pieces too small for me to push the hinges out of). Eye protection is recommended.
-
-
-
Take out your replacement shell.
-
Push the hinges from the old case into the slot of the new case about halfway while the case is closed.
-
Then open the shell and push the hinges the rest of the way in.
The hinges will need to be slotted into your new end caps before being pushed in
-
-
-
Place your screen into the new shell and affix the bezel into position; the ribbon cable should slide through the gap like before.
-
Reinstall the five Tri-point Y00 screws around the screen.
-
Reinstall the speaker, buttons, and silicone pads into the bottom case.
I found it easier to reattach the screen ribbon cable before adding the buttons and speaker. Additionally, you’ll want to reattach the small half hinge part before the buttons too.
-
-
-
Reinsert the ribbon cable into the motherboard and lock it into place.
-
Guide the motherboard into the new case and screw it down with the three 4mm Phillips #00 screws.
-
Install the square, threaded washer on the back of the shell. This is where the battery compartment's screw gets held, so it is important!
There’s no mention of reinstalling the top hinge cover with that hidden little screw! It was important to do this before screwing the motherboard back down.
That’s exactly what I was going to comment. I had to go back and undo it all once I realised that I had left out the hinge cover. I might also suggest hooking in the ribbon before you put in the buttons. Mine fell out anyway. Also… make sure you put the speaker in the correct way. Trust me.
-
-
-
Reinstall the rubber pads around the screen bezel—they stop the shell from rubbing together on the inside.
-
Find the "Nintendo" logo replacement sticker and put it into place.
-
Test the console and make sure it works properly!
Removing the hinge doesn’t have to be as much of a struggle if you orient the screen correctly to remove it. The remove lock the screen into the open position, then push the hinge out. To push the hinge back in , push it in halfway while the screen is closed , then open the what would be the locked open position and the hinge should be able to more easily slide into final position.
-


Rehousing your GBA SP can be a fun project! It doesn’t take very long, and once you’re done you’ll have a fun new customized console! The ease of difficulty and ability to express yourself both make this project well worth attempting.
Rehousing your GBA SP can be a fun project! It doesn’t take very long, and once you’re done you’ll have a fun new customized console! The ease of difficulty and ability to express yourself both make this project well worth attempting.
Annulation : je n'ai pas terminé ce tutoriel.
18 autres ont terminé cette réparation.
Équipe

University of North Texas, Team S1-G1, Raign Fall 2020 Membre de l'équipe University of North Texas, Team S1-G1, Raign Fall 2020
UNT-RAIGN-F20S1G1
2 membres
5 tutoriels rédigés
6 commentaires
Excellent guide thank you! My GBA is looking great now :)
Hello this guide is great but it has some flaws (missing some steps) but I used an eXtremeRate GBA SP shell and they are the best ones to go with because they have It molded in a way to remove the Nintendo logo sticker and so you can put in a ips screen with out needing to trim and it is made out of a high quality plastic and it better than other third party shell and I used purple/blue color
Thanks for the helpful guide! A couple things of note that I noticed along the way:
If you're replacing the screen lens, make sure you line it up properly so the end result isn't crooked.
Make sure to organize your screws, a mismatched screw can poke a hole through the shell.
Be gentle but firm when tightening a screw. I definitely messed up a screw or two being too forceful.
(I might be stupid) keep an eye on the battery lid screw hole. Mine ended up warping so I had to duct tape the lid to the shell.
If you're doing a button replacement too, be careful with the triggers.
Der einzige Grund, warum ein schlechtes Spiel so viel Aufmerksamkeit erhält, ist sein Thema, obwohl es eine wirklich schöne Handlung hat. Das Abheben Ihres Geldes, nachdem Sie einen bedeutenden Jackpot oder einen saftigen Bonus geknackt haben, ist einer der schönsten Aspekte des Spielens in einem Online-Casino. Besuchen Sie https://casinotop.at/schnelle-auszahlung... um mehr über Online Casino Schnelle Auszahlung in Österreich zu erfahren. Aber zuerst müssen Sie den Auszahlungsprozess durchlaufen, um Ihr neu erworbenes Vermögen zu nutzen. Anfänger werden die Vielfalt der verfügbaren Auszahlungsoptionen für die schnellsten Auszahlungen zu schätzen wissen.
If you have a GameBoy Advance SP AGS-001 or AGS-101 with a deteriorating shell, or if you want to customize it, you can follow this guide to replace the shell. However, before you start, make sure to plug in your console and charge it for a few minutes. By choosing this 토토사이트추천, you can rest assur If the battery is too old, it may start to expand and could potentially explode. If you notice any swelling, it's important to order a replacement battery. You can find replacement batteries online or at electronics stores. It's important to take the time to properly align the screen lens to avoid it being crooked. Keeping track of screws and their placement is also crucial to avoid any mishaps, and being gentle when tightening them is a good practice to prevent damaging the shell or the device. It's also worth noting that the battery lid screw hole can warp over time, so it's important to keep an eye on it during the replacement process. In case of warping, a temporary solution such as duct tape may be necessary.