Aller au contenu principal

Nintendo Gameboy Pocket Shell-Side Battery Terminal Corrosion Removal

Ce dont vous avez besoin

  1. Nintendo Gameboy Pocket Shell-Side Battery Terminal Corrosion Removal, Nintendo Gameboy Pocket Shell-Side Battery Terminal Corrosion Removal: étape 1, image 1 de 1
    • Remove the battery cover and batteries.

  2. Nintendo Gameboy Pocket Shell-Side Battery Terminal Corrosion Removal: étape 2, image 1 de 1
    • Remove the six 8mm screws using a Y1 Tri-point screwdriver.

    • Place your screws in a small container to keep them safe.

  3. Nintendo Gameboy Pocket Shell-Side Battery Terminal Corrosion Removal: étape 3, image 1 de 1
    • Separate the front and back side of the Gameboy by gently pulling them apart.

  4. Nintendo Gameboy Pocket Shell-Side Battery Terminal Corrosion Removal: étape 4, image 1 de 1
    • Using a flathead screwdriver (or flat piece of plastic), nudge in the clip holding the shell-side battery terminal in place to release it from the shell.

  5. Nintendo Gameboy Pocket Shell-Side Battery Terminal Corrosion Removal: étape 5, image 1 de 2 Nintendo Gameboy Pocket Shell-Side Battery Terminal Corrosion Removal: étape 5, image 2 de 2
    • Using a pair of tweezers, remove the battery terminal from the shell.

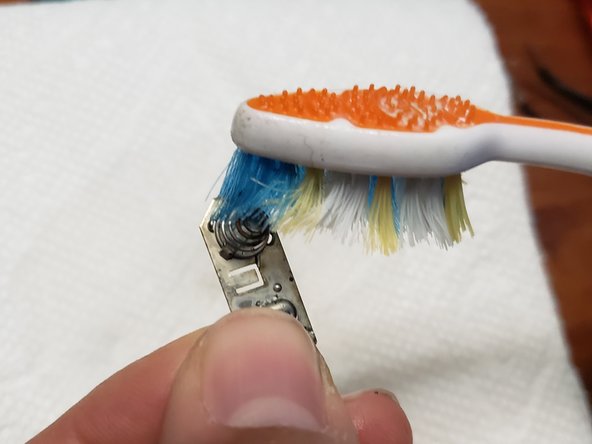
  6. Nintendo Gameboy Pocket Shell-Side Battery Terminal Corrosion Removal: étape 6, image 1 de 2 Nintendo Gameboy Pocket Shell-Side Battery Terminal Corrosion Removal: étape 6, image 2 de 2
    • Add isopropyl alcohol to a toothbrush.

    • Spread a paper towel down to keep your workspace clean.

    • Scrub the terminal where the corrosion is to remove as much as possible. If most of the corrosion is removed, skip to step 10.

  7. Nintendo Gameboy Pocket Shell-Side Battery Terminal Corrosion Removal: étape 7, image 1 de 1
    • Use the steel wool to remove as much corrosion as possible.

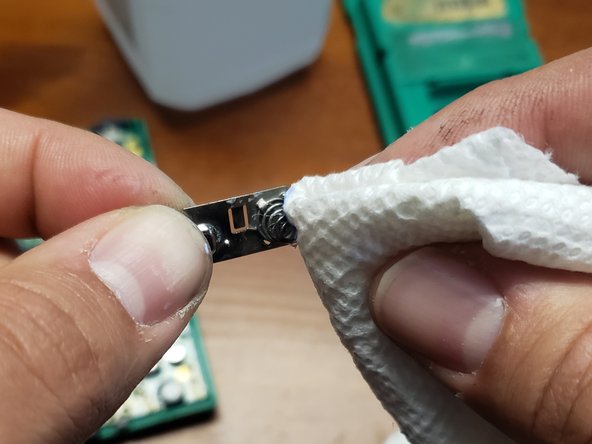
  8. Nintendo Gameboy Pocket Shell-Side Battery Terminal Corrosion Removal: étape 8, image 1 de 2 Nintendo Gameboy Pocket Shell-Side Battery Terminal Corrosion Removal: étape 8, image 2 de 2
    • Add metal polish to a paper towel.

    • Polish the battery terminal to remove the remainder of the corrosion.

Conclusion

To reassemble your device, follow these instructions in reverse order.

4 autres ont terminé cette réparation.

Sarah Travers

Membre depuis le 03/24/21

265 Réputation

1 tutoriel rédigé

Équipe

UMass Dartmouth, Team S1-G24, Riel Spring 2021 Membre de l'équipe UMass Dartmouth, Team S1-G24, Riel Spring 2021

UMASSD-RIEL-S21S1G24

1 membre

2 tutoriels rédigés

3 commentaires

Thank you for the guide! Resurrected a Gameboy Pocket today that has graphical glitches on the boot screen and sometimes crashed mid-game when a cartridge could load. This process seems to have completely remediated that.

I only needed to complete through step 6 to get clean shiny contacts in my case.

sacratoy - Réponse

Much better than the usual battery replacement guides! Most of those are practically useless as they do little more than say, “replace the batteries,” which is pretty much self-evident, and noting, “clean any corrosion,” without explaining how to do that!

Wolf Naegeli - Réponse

Is there a corresponding guide for cleaning the sections of the battery terminal which are fixed to the board, i.e. not shell-side?

Samuel Bradley - Réponse

Ajouter un commentaire

Nombre de vues :

Dernières 24 heures : 4

7 derniers jours : 43

30 derniers jours : 193

Total : 5,436