Aller au contenu principal

Nintendo Super Famicom SHVC-001 Controller Port Board Replacement

Ce dont vous avez besoin

  1. Nintendo Super Famicom SHVC-001 Controller Port Board Replacement, Upper Case: étape 1, image 1 de 1
    • Remove the six 13.5 mm screws on the lower case with a 4.5 mm Gamebit screwdriver.

  2. Nintendo Super Famicom SHVC-001 Controller Port Board Replacement: étape 2, image 1 de 2 Nintendo Super Famicom SHVC-001 Controller Port Board Replacement: étape 2, image 2 de 2
    • Flip the Famicom over and set it down.

    • Lift off the upper case.

  3. Nintendo Super Famicom SHVC-001 Controller Port Board Replacement, Controller Port Board: étape 3, image 1 de 2 Nintendo Super Famicom SHVC-001 Controller Port Board Replacement, Controller Port Board: étape 3, image 2 de 2
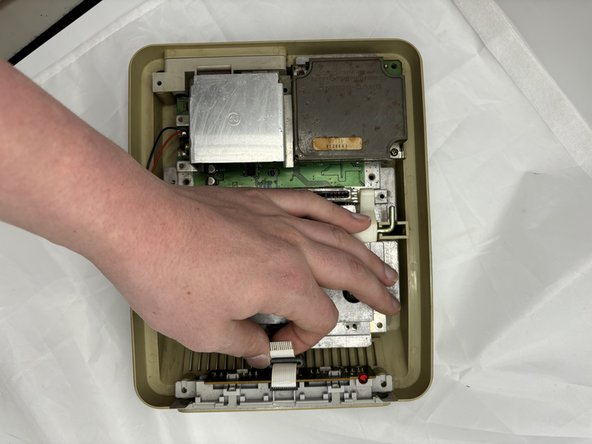
    • Carefully disconnect the ribbon cable that is attached to the controller board and the main board.

  4. Nintendo Super Famicom SHVC-001 Controller Port Board Replacement: étape 4, image 1 de 1
    • Lift the controller port board directly up and out of the chassis.

    • If your new controller port board does not come with a ribbon cable, you will also need to replace that.

  5. Nintendo Super Famicom SHVC-001 Controller Port Board Replacement: étape 5, image 1 de 3 Nintendo Super Famicom SHVC-001 Controller Port Board Replacement: étape 5, image 2 de 3 Nintendo Super Famicom SHVC-001 Controller Port Board Replacement: étape 5, image 3 de 3
    • The next bullet demonstrates how to replace your ribbon cable.

    • Disconnect and remove the old cable and replace it with a new 1.25 mm ribbon cable.

Conclusion

To reassemble your device, follow these instructions in reverse order.

Carter Eason

Membre depuis le 02/05/24

433 Réputation

4 tutoriels rédigés

Équipe

0 commentaires

Ajouter un commentaire

Nombre de vues :

Dernières 24 heures : 2

7 derniers jours : 6

30 derniers jours : 21

Total : 66