Introduction
If water drips from the stationary machine, the water connection seal ("inner manifold sleeve") may be defective.
Note: In the instructions it is shown that the upper part and both side parts are removed. If no repairs other than the water connection seal are necessary, the upper part and the side part with the service door do not need to be removed, then skip steps 4 to 6.
Ce dont vous avez besoin
-
-
Remove all attachments such as water reservoir, coffee compartment lid, trestle drawer. Remove all coffee beans in the storage container.
-
Unscrew the five Torx T10 screws on the back.
-
-
-
Unscrew the two Torx T10 screws on the front edge of the heat plate.
-
Lift the front edge of the heat plate and slide it forward a bit to clear the tabs on the back edge.
-
Put the heat plate back down, but in such a way that you can reach the screws underneath.
-
Unscrew the two Torx T10 screws located under the heat plate.
-
-
-
Gently lift the upper side a bit and put it back down.
-
Push the side panel on the water tank back about 2 cm.
-
Place the side panel next to the machine. Do not remove it completely yet, the cables of the switch are still connected.
-
Disconnect the flat plugs from the switch. Be sure to note the order of the cables for later reassembly.
-
Remove the side panel.
-
-
-
-
Lift the top side slightly.
-
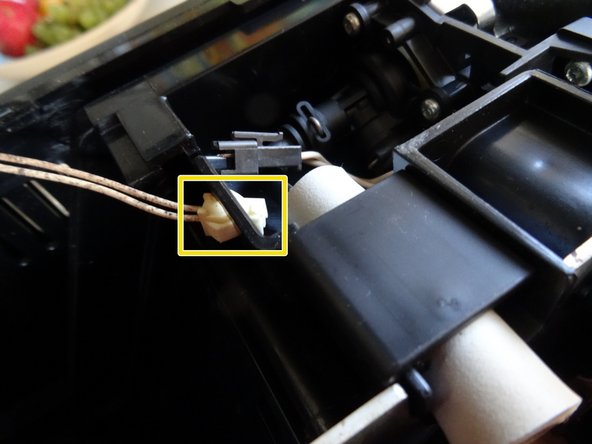
Press down the locking tab on the plug of the white sensor cable and pull off the black plug towards the front of the machine.
-
Press the two catches of the counterpart on the sides together and slide it out of the opening towards the back.
-
Now the top is free and you can remove it.
-
-
-
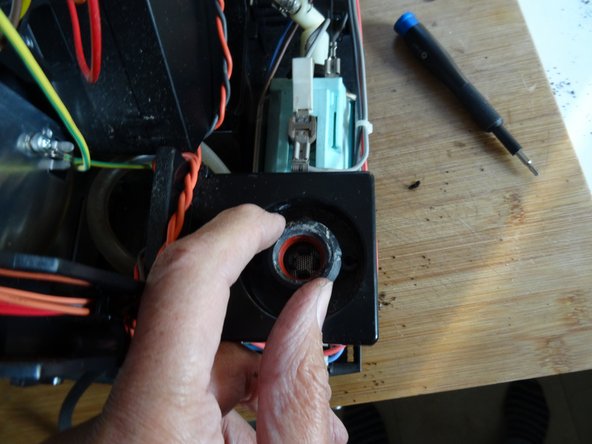
The water connection seal is covered with a plastic cap. This cap is fixed with two Torx T10 screws. Unscrew both screws.
-
Lift out the cap with your fingers.
-
Lift out the water connection seal with your fingers.
-


Work through the steps in reverse order to reassemble your device.
Work through the steps in reverse order to reassemble your device.
Merci à ces traducteurs :
100%

shingle nous aide à réparer le monde ! Vous voulez contribuer ?
Commencez à traduire ›
Équipe

Repair is War on Entropy Membre de l'équipe Repair is War on Entropy
Community
25 membres
1 126 tutoriels rédigés