Aller au contenu principal

Nokero N400 Solar Panel Replacement

Ce dont vous avez besoin

  1. Nokero N400 Solar Panel Replacement, Remove Battery Cover: étape 1, image 1 de 3 Nokero N400 Solar Panel Replacement, Remove Battery Cover: étape 1, image 2 de 3 Nokero N400 Solar Panel Replacement, Remove Battery Cover: étape 1, image 3 de 3
    • Press down firmly to remove the battery cover and display battery.

    • Then remove the battery.

  2. Nokero N400 Solar Panel Replacement, Unscrew Back Cover: étape 2, image 1 de 2 Nokero N400 Solar Panel Replacement, Unscrew Back Cover: étape 2, image 2 de 2
    • Remove the 7mm Phillips #1 screw.

  3. Nokero N400 Solar Panel Replacement, Pry Open Back Cover: étape 3, image 1 de 2 Nokero N400 Solar Panel Replacement, Pry Open Back Cover: étape 3, image 2 de 2
    • Place the plastic opening tool in between the two plastic panels and slowly work your way around the device.

    • Unlatch the clips on the inside and pull device apart.

    • Some clips will break when forced open.

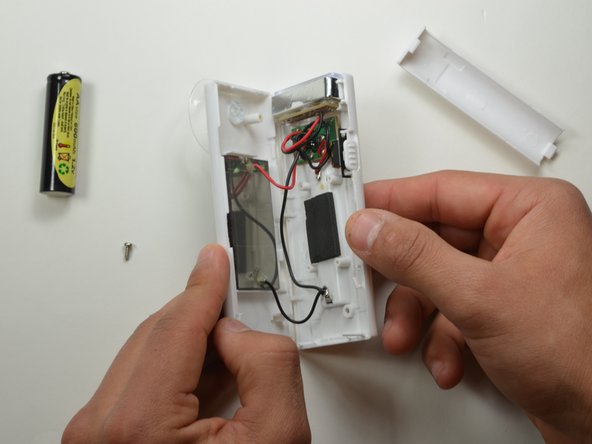
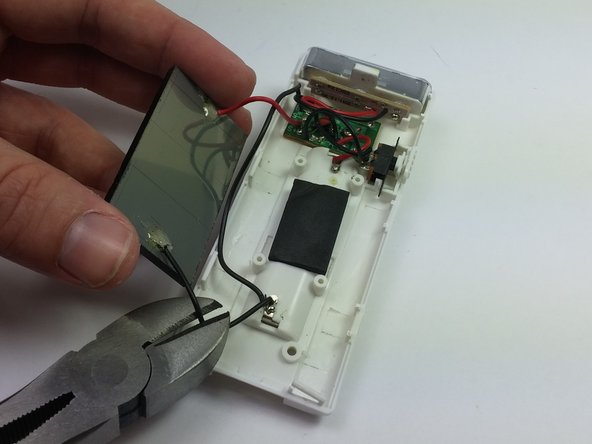
  4. Nokero N400 Solar Panel Replacement, Solar Panel: étape 4, image 1 de 2 Nokero N400 Solar Panel Replacement, Solar Panel: étape 4, image 2 de 2
    • Pull the panel away from the rest of the assembly and cut the red and black wires coming from the panel

    • Be careful not to cut the ground-wire for the motherboard, it is the same color and goes to the exact same place as the solar panel wire.

    • For reassembly you will need to either splice, or solder the wires onto the replacement.

Conclusion

To reassemble your device, follow these instructions in reverse order.

Daniel Bumiller

Membre depuis le 01/20/15

201 Réputation

2 tutoriels rédigés

Équipe

USF Tampa, Team 19-2, Blackwell Winter 2015 Membre de l'équipe USF Tampa, Team 19-2, Blackwell Winter 2015

USFT-BLACKWELL-W15S19G2

4 membres

5 tutoriels rédigés

0 commentaires

Ajouter un commentaire

Nombre de vues :

Dernières 24 heures : 0

7 derniers jours : 0

30 derniers jours : 1

Total : 133