Aller au contenu principal

Nokia 3300B Screen Replacement

Ce dont vous avez besoin

  1. Nokia 3300B Screen Replacement, Battery: étape 1, image 1 de 2 Nokia 3300B Screen Replacement, Battery: étape 1, image 2 de 2
    • Flip the Nokia 3300B over with the back-side facing towards you.

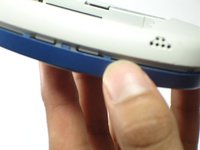
    • Gently press the button on the back of the battery cover to release the cover and slide up.

  2. Nokia 3300B Screen Replacement: étape 2, image 1 de 2 Nokia 3300B Screen Replacement: étape 2, image 2 de 2
    • Lift the battery out of the back of the phone.

    • It is easiest to lift the battery out of the phone from the right-hand side, as seen in the picture.

  3. Nokia 3300B Screen Replacement, Screen: étape 3, image 1 de 3 Nokia 3300B Screen Replacement, Screen: étape 3, image 2 de 3 Nokia 3300B Screen Replacement, Screen: étape 3, image 3 de 3
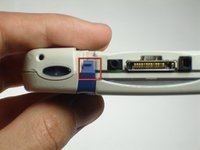
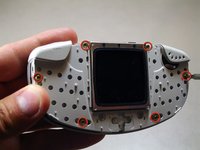
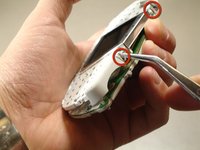
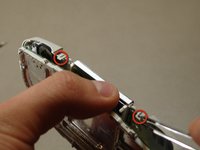
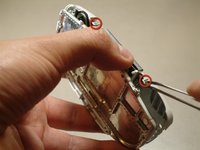
    • Gently push the blue tabs on the top of the phone out of their slots.

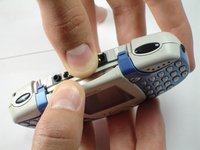
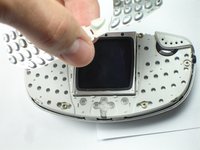
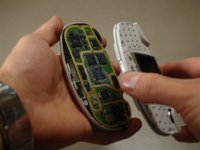
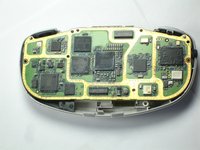
    • With the phone facing up, pop the blue faceplate off by using your fingernail (or some tweezers) and working your way around the phone.

    • Note: If the blue cover does not detach easily use your finger nails to try and split it open, as seen in the picture.

  4. Nokia 3300B Screen Replacement: étape 4, image 1 de 1
    • With the screen still facing you, remove the blue faceplate.

  5. Nokia 3300B Screen Replacement: étape 5, image 1 de 2 Nokia 3300B Screen Replacement: étape 5, image 2 de 2
    • Grab the sides of the keypad and lift it up vertically.

    • If you encounter resistance while removing the keypad, be sure to lift up evenly on both sides, so the button's pin don't snap.

  6. Nokia 3300B Screen Replacement: étape 6, image 1 de 3 Nokia 3300B Screen Replacement: étape 6, image 2 de 3 Nokia 3300B Screen Replacement: étape 6, image 3 de 3
    • Using the Torx T6 bit of a Phillips precision screwdriver, remove the six screws on the phone's inner protective case, as seen in the picture.

    • NOTE: Be sure to save these screws so the phone can be reassembled later.

  7. Nokia 3300B Screen Replacement: étape 7, image 1 de 2 Nokia 3300B Screen Replacement: étape 7, image 2 de 2
    • Holding the phone with the screen facing you, remove the top half of the phone from the circuit board.

  8. Nokia 3300B Screen Replacement: étape 8, image 1 de 3 Nokia 3300B Screen Replacement: étape 8, image 2 de 3 Nokia 3300B Screen Replacement: étape 8, image 3 de 3
    • Hold the top half of the phone with the screen facing you.

    • Using a pair of tweezers, release the tabs holding the two distinct cases together.

    • The tabs are very fragile. Be gentle when releasing the tabs.

  9. Nokia 3300B Screen Replacement: étape 9, image 1 de 1
    • Be sure to remove both casings so that the screen is facing down. This will ensure that the screen does not fall out of its case.

    • NOTE: The screen's part identification sticker is on the top back side of the screen. The screen will need to be replaced with the same orientation.

  10. Nokia 3300B Screen Replacement: étape 10, image 1 de 1
    • Tilt the casing back and the screen should fall out smoothly.

    • Replace the old screen with the new screen.

Conclusion

To reassemble your device, follow these instructions in reverse order.

2 autres ont terminé cette réparation.

Chris Colwell

Membre depuis le 04/13/10

107 Réputation

2 tutoriels rédigés

Équipe

Cal Poly, Team 18-65, Johann Spring 2010 Membre de l'équipe Cal Poly, Team 18-65, Johann Spring 2010

CPSU-JOHANN-S10S18G65

4 membres

9 tutoriels rédigés

0 commentaires

Ajouter un commentaire

Nombre de vues :

Dernières 24 heures : 1

7 derniers jours : 2

30 derniers jours : 3

Total : 3,098