Introduction
Nokia 6 batteries can degrade with use. As the more you use your phone, amount of energy the battery can hold will slowly decrease. Couple that with the phone’s already quick energy consumption, your phone’s battery might be running out a lot faster than you would expect. If so, use this guide to replace your batter back to factory condition.
If the battery is swollen, take appropriate precautions. Be very careful when heating the phone when removing the screen. As the battery is in the center of the phone, avoid heating the center, focusing only on the edges to heat up the adhesive.
Ce dont vous avez besoin
-
-
Insert the SIM card ejection tool into the hole on the left side of the phone.
-
Remove the SIM card and microSD card.
 Demander à FixBot
-
-
-
Lay overlapping strips of clear packing tape over the Nokia 6's display until the whole screen is covered.
-
-
-
To soften the adhesive, use a heat gun and heat one edge of the phone for five minutes.
-
To use the heat gun, plug it into an outlet.
-
-
-
Take a Jimmy and slide it under the glass after the adhesive has been softened.
-
Place a pick under the glass after lifting with the pry tool so that the screen won't re-adhere to the frame again.
-
-
-
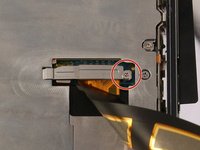
Use a Phillips #000 screwdriver to remove the 1 mm x 1.4 mm screw holding down the metal bracket over the screen ribbon connector.
-
-
-
-
Use a spudger to disconnect the screen ribbon connector and free the display assembly.
-
Carefully remove the screen from the device.
-
-
-
Disconnect the battery connector with a spudger.
-
-
Outil utilisé dans cette étape :Tweezers$4.99
-
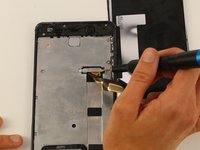
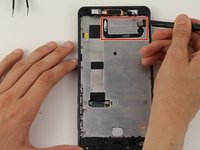
Use a Phillips #00 screwdriver to remove the 1.2 mm x 2.2 mm screw in the upper hand corner of the phone.
-
Use tweezers to remove the bracket.
-
-
-
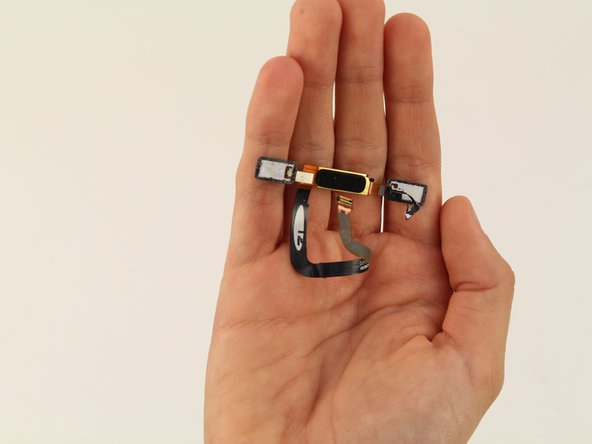
Detach the cable with the black nylon spudger.
-
Detach the home button and remove it from the device.
-
-
-
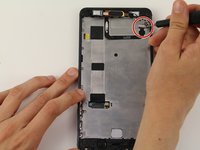
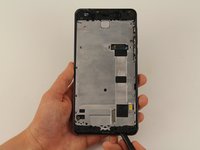
Remove 18 screws.
-
There is one 1 mm x 1.4 mm screw that needs to be removed by a Phillips #000 screwdriver.
-
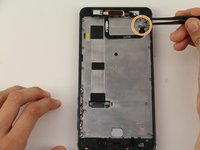
One of the screws is 1.2 mm x 4.2 mm and will be removed by a Phillips #00.
-
The remaining 16 screws can be removed by the Phillips #00 screwdriver and are 1.2 mm x 2.2 mm.
-
-
-
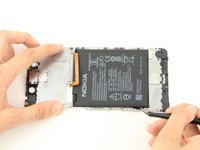
Decouple the midframe with the spudger and remove the midframe from the device.
-
-
-
Turn the midframe around to see the now exposed battery.
-
-
-
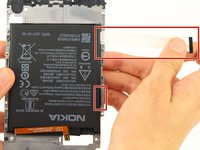
Pull the two adhesive tabs underneath the battery with a tweezer and then your fingers to remove it.
-


To reassemble your device, follow these instructions in reverse order.
Annulation : je n'ai pas terminé ce tutoriel.
16 autres ont terminé cette réparation.

Équipe

Cal Poly, Team S9-G15, Maness Spring 2019 Membre de l'équipe Cal Poly, Team S9-G15, Maness Spring 2019
CPSU-MANESS-S19S9G15
4 membres
14 tutoriels rédigés
7 commentaires de tutoriel
Thanks for the instructions. Looks like I could do a lot of things wrong and my screen is cracked. I think I will go buy a new phone as my Nokia is 3 years old now.
I am very grateful for your help,now I got it all figured out..I can do it own my own without necessary taking it to the Nokia center right here in Kenya.
Battery kaha hothe hai back per yya front mein
Make sure that neither the soundcloud downloader tool nor the cards touch the LCD edge under the glass. This can cause damage to the ribbon cables underneath and make the phone less stable.