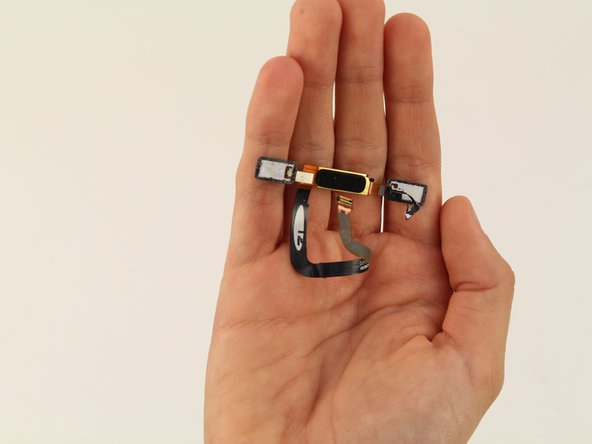
Aller au contenu principal

Nokia 6 Home Button Assembly Replacement

Ce dont vous avez besoin

  1. Nokia 6 Home Button Assembly Replacement, Display Assembly: étape 1, image 1 de 3 Nokia 6 Home Button Assembly Replacement, Display Assembly: étape 1, image 2 de 3 Nokia 6 Home Button Assembly Replacement, Display Assembly: étape 1, image 3 de 3
    • Power off your Nokia 6 before beginning disassembly.

    • Insert the SIM card ejection tool into the hole on the left side of the phone.

    • Remove the SIM card and microSD card.

  2. Nokia 6 Home Button Assembly Replacement: étape 2, image 1 de 1
    • If your display glass is cracked, take precaution by taping over the display to prevent further breakage and harm.

    • Lay overlapping strips of clear packing tape over the Nokia 6's display until the whole screen is covered.

  3. Nokia 6 Home Button Assembly Replacement: étape 3, image 1 de 1
    • To soften the adhesive, use a heat gun and heat one edge of the phone for five minutes.

    • To use the heat gun, plug it into an outlet.

    • When the heat gun is plugged in, the heat gun automatically turns on and will start blowing hot air.

  4. Nokia 6 Home Button Assembly Replacement: étape 4, image 1 de 1
    • Take a Jimmy and slide it under the glass after the adhesive has been softened.

    • Place a pick under the glass after lifting with the pry tool so that the screen won't re-adhere to the frame again.

    • Make sure to not touch the LCD edge underneath the glass layer with the metal pry tool or the cards. This can damage the ribbon cables underneath and compromise the structural integrity of the phone itself.

    • The corners of the screen are the most fragile part of the screen. Make sure that the entire edge of the screen is dislodged from the frame before prying at the corners.

  5. Nokia 6 Home Button Assembly Replacement: étape 5, image 1 de 1
    • Lift the screen off of the phone.

  6. Nokia 6 Home Button Assembly Replacement: étape 6, image 1 de 2 Nokia 6 Home Button Assembly Replacement: étape 6, image 2 de 2
    • Use a Phillips #000 screwdriver to remove the 1 mm x 1.4 mm screw holding down the metal bracket over the screen ribbon connector.

  7. Nokia 6 Home Button Assembly Replacement: étape 7, image 1 de 1
    • Remove the metal bracket with a tweezer.

  8. Nokia 6 Home Button Assembly Replacement: étape 8, image 1 de 1
    • Use a spudger to disconnect the screen ribbon connector and free the display assembly.

    • The corners and edge of the LCD are fragile. Be careful attaching it to the back of the phone.

    • Carefully remove the screen from the device.

  9. Nokia 6 Home Button Assembly Replacement, Home Button Assembly: étape 9, image 1 de 1
    • Disconnect the battery connector with a spudger.

  10. Nokia 6 Home Button Assembly Replacement: étape 10, image 1 de 2 Nokia 6 Home Button Assembly Replacement: étape 10, image 2 de 2
    • Use a Phillips #00 screwdriver to remove the 1.2 mm x 2.2 mm screw in the upper hand corner of the phone.

    • Use tweezers to remove the bracket.

  11. Nokia 6 Home Button Assembly Replacement: étape 11, image 1 de 2 Nokia 6 Home Button Assembly Replacement: étape 11, image 2 de 2
    • Detach the cable with the black nylon spudger.

    • Detach the home button and remove it from the device.

Conclusion

To reassemble your device, follow these instructions in reverse order.

Une autre personne a terminé cette réparation.

Chrissy Robins

Membre depuis le 04/15/19

1 510 Réputation

10 tutoriels rédigés

Équipe

Cal Poly, Team S9-G15, Maness Spring 2019 Membre de l'équipe Cal Poly, Team S9-G15, Maness Spring 2019

CPSU-MANESS-S19S9G15

4 membres

14 tutoriels rédigés

Un commentaire

I am very grateful for your help,now I got it all figured out..I can do it own my own without necessary taking it to the Nokia center right here in Kenya. friday night funkin mods online

Britt Isaacs - Réponse

Ajouter un commentaire

Nombre de vues :

Dernières 24 heures : 0

7 derniers jours : 4

30 derniers jours : 14

Total : 2,742